Overview
In this article, we’ll walk you through the next steps for creating your monthly Support at Home statement. This guide follows on from completing your claim. If you haven’t yet finalised your claim, please refer to our Reconciling Your Support at Home Claim article first.
Please note: You do not need to produce a statement after every claim. Members should receive a statement monthly, inclusive of services delivered during the period.
Statements
The Support at Home program has been designed to support the Member’s ability to make informed choices on how to best use their Support at Home quarterly budget, so they can receive the services and items needed to remain and live well at home.
Support at Home providers are required to provide Members with a monthly statement that shows how the quarterly budget is being used.
The statement needs to list the details and cost of each service and item, so Members can see if the quarterly budget is being used in the best way possible and in accordance with the program rules.
Statements should be issued each month detailing all services and charges occurred in the previous month. Here is an example of a PDF statement.

Decoupling Support at Home statements and claims
Under Support at Home, claims and statements are no longer tied together. This means:
- You claim for the services you’ve delivered, when you’re ready, as you go.
- You issue statements separately, based on the care the person has actually received and been charged for.
- These two processes don’t have to happen at the same time anymore:
- You could submit 10 claims per month
- The claims do not need to be tied to a specific month
Once you’ve completed all claims for services delivered in that month, you can generate your monthly statement.
Generating a statement
Navigate to the Claiming section in the main side menu and click Support at Home.

This will load a new screen where you can view previous claims, check their Lookout status, and see amounts submitted for claiming.

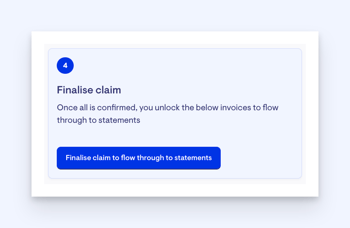
As a reminder of our final steps in our reconciliation article, we clicked Step 4’s blue ‘Finalise claim’ button to proceed to the statements.
The claim was then finalised, and from our list here, we can see its status is now updated to completed.

You’ll see above the claim list, some tabs – Claims, Statements and Client Contributions. Let’s go ahead and click the Statements tab.

The Statements tab will appear blank the first time you open, as no statements have been created yet. Eventually, there will be a list of previous statements, allowing you to preview each one individually through the eye icon button and view its status. As pictured below:

You’ll see a blue button labelled ‘New statement period' in the top-right corner. Click this to create a new statement.

A pop-up window will appear asking you to input the statement period.

You can adjust the month and year to match the desired monthly date range. As Support at Home went live in November, this is the first month you will want statements created. When you are happy with the date selected, click the blue Save button.

A green banner will appear letting you know your statement period has been created.

If you try to make a monthly statement for a period you’ve already completed, you’ll see an error message reminding you it’s already been created.

An error message will also display if you try to generate a statement for a future date.

Now that we have created a statement period, it will appear on the main statement tab. To view, click on the date period or eye icon.

A new screen will load, listing all your Members.
Please note: The statements for this period are a preview until the statement period has been locked and statements finalised. Once the period is locked and statements are finalised, no further changes can be made to the statements. They are then released for downloading and emailing.

You can search by name to find a particular Member’s statement, then click the preview statement link on the right-hand side of their name to view.

This will open a new screen, displaying their statement as a PDF preview. Here is an example of a PDF statement.
We have created a “How to read your new Support at Home statement” guide to help you understand each section of your statement. This guide breaks down the information presented, providing a clear explanation of what each part means and how to read your statement. The guide will be made available online and can also be shared with Members and staff as an email attachment or printed for easy reference. It serves as a handy resource to refer to whenever needed.
After you have previewed the statements and are satisfied that all information is correct, you can proceed to lock the period and finalise the statements. Click the blue Lock period and finalise statements button in the top-right corner.

A pop-up window will appear. You should have completed all of your relevant claims that cover the statement period before locking. If you have not completed your claims or need help with this step, please review our claiming support article.

Reminder: Once the period is locked, no further changes can be made to statements for that month.
You will need to input today’s date to confirm you are ready to proceed. When you have added this information, press the blue Save button.

A green banner will appear confirming your statements have been locked. You will also notice that the status next to the statement period name has been updated to ‘locked’. There will also be new buttons in the top-right corner, now available – Download statement PDFs and Email statements.

As a reminder, a statement is provided to the Member, billing recipient, or authorised representative within the app once it has been finalised. If a statement needs to be sent by paper mail or email, the recipient must be set up as a billing recipient with their preferred mailing option selected. A separate article is available that explains how to set up these mailing preferences.
Clicking the Download statement PDF button will trigger an email that will be sent to you containing all the PDF statements for this claim period. A green banner will appear, confirming this when you click the button.

Clicking the blue Email statements button will bring up a pop-up window asking you to confirm your action.

Confirming will trigger the statements being sent to each Member’s billing recipients. When the blue “Confirm” button is pressed, a green banner will appear, confirming the action.
