
This guide explains how to onboard a Member in Lookout. Onboarding happens in two stages: first creating the person's profile, then creating their membership. This article focuses on creating the membership - the step that turns a profile into a Member.
Before you begin: Onboarding a Member starts with creating their profile. If you haven't done this yet, head to our Creating a Profile article first, then return here to create their membership.
Onboarding a Member
A Member is an individual receiving care or services. Onboarding a Member brings them fully into Lookout so you can plan their care, manage their funding, and schedule their support.
There are two steps to onboarding:
- Create a profile - the basic record for the person.
- Create a membership - the step that gives the profile the Member role, along with their funding, plan, communities, and care details.
This article covers step two. If you haven't created the person's profile yet, start with our Creating a Profile guide, then come back here.
Before you start
To onboard a Member, make sure:
- The person's profile already exists. If not, create it first.
- If you're adding an Authorised Representative, their profile must also already exist.
- You have access to the community the Member will belong to.
- You have any key details to hand - funding, plan, communities, and important dates, though most can be added later if unknown.
Step-by-Step Instructions
Step 1: Open the Members list
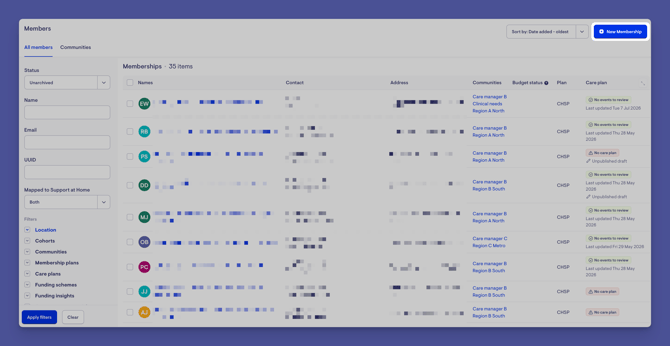
- From the main navigation menu, click Members to open the full list of Members.
- Click the blue +New Membership button in the top-right corner.
- A new screen will load where you can create a new profile for the Member.
- As we have already created a profile, we will click use an existing profile.
Step 2: Select the Member's profile
- Use the available search bar to find the profile you created for this Member and select it.
- Set the options for this person:
- Send an app invitation (an email address is required)
- Make them the Primary Contact for the membership, if applicable
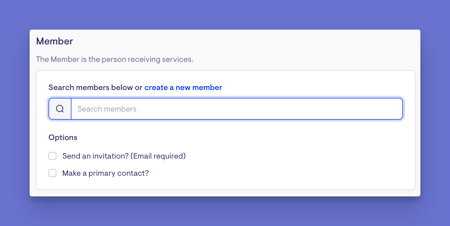
Top tip: The Primary Contact is the main person to speak with about the Member's care - there can only be one.
Step 3: Add an Authorised Representative (optional)
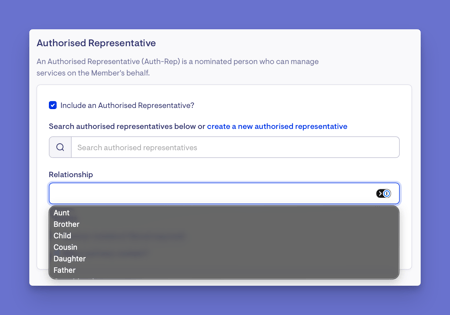
An Authorised Representative is the nominated person who can manage services on the Member's behalf.
- Tick the Authorised Representative checkbox.
- Search for their profile (it must already exist).
- Select their relationship to the Member.
- Optionally, send an app invitation or make them the Primary Contact.
Step 4: Set the funding details
- Choose who will fund the membership and service fees.
- Select from the available options, or choose another funder (such as a government funding body).
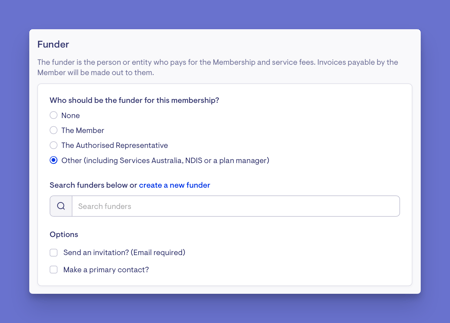
Top tip: There's no need to send email invitations when selecting an external funder.
Step 5: Complete the membership details
Work through the remaining sections - most can be updated later if you don't have the information yet:
-
- Custom attributes: Any extra fields your organisation has set up (such as dropdowns or radio buttons) to capture the details you need.
- Important dates: When the Member signed up, their commencement date, and their next review date.
- Communities: Select the community (or communities) this Member will belong to.
- Membership plan: Choose the applicable plan.
- Care plan template: Choose a template to start their care plan.
- Cohort: Tag or label the Member if needed.
- Tickets: You can open tickets straight from the membership creation.
- Matching requirements: Set any requirements to ensure Helpers have the right qualifications and clearances for this Member.
- Notes: A free-text field for anything else relevant to the membership.
-
When you are ready, press the blue Save membership button.
-
A green banner will display confirming your membership was created successfully.
-
Some suggested next steps will appear - submit forms, create a care plan and view tickets.
-
When you close the next steps window, you'll see your Members Dashboard.
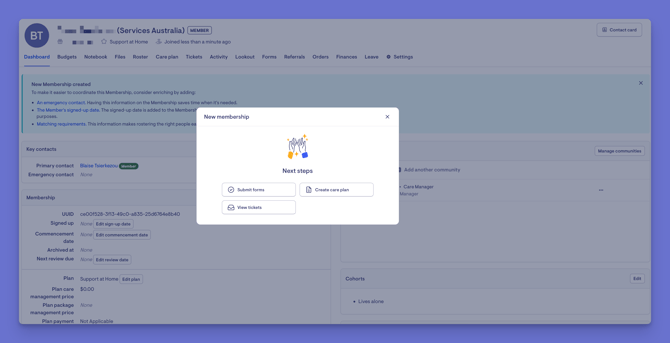
Want to learn more about the Member dashboard? Please take a look at our dedicated article.
What Happens Next?
After onboarding:
- The person is now a Member with a full profile and dashboard.
- If you sent an invitation, they'll be invited to the Lookout app.
- Any tickets you opened during setup are ready in the ticket inbox.
- You can begin care planning, scheduling, and managing their funding.
What different Users/ Staff will see
For staff with access to the community
- Can view and manage the new Member, their care plan, funding, and schedule.
For the Member and their Authorised Representative
- If invited, they can access the Lookout app to view relevant information such as their schedule and statements.
For Helpers
- Once connected through their care work, Helpers can see the Members they support in their own app.
- For those Members, they can view the essentials needed to deliver care: basic details, the care plan, and the visits they're scheduled for.
- Helpers do not see the Member's funding, budgets, or financial details.
For Sharers
- If added later, they can see the Member's schedule only - not contact or financial details.
Troubleshooting
I can't find the profile when creating the membership
Make sure the profile has been created first. If not, see our Creating a profile article.
Try searching by preferred name or email.
I can't add an Authorised Representative
Their profile must already exist. Create it first, then add them.
I can't send an app invitation
An email address is required. Add one to the person's profile and try again.
I don't have all the dates or details
That's fine - sign-up, commencement, and review dates (and most other fields) can be entered later by editing the membership.
A warning appears about Helper requirements
This means a matched Helper is missing a qualification or clearance the Member requires. Review the Member's matching requirements and the Helper's verifications.
Still Need Help?
If you're still experiencing issues, please contact our Support Team and include:
- Screenshots (if possible)
- The user's name/email
- The exact steps taken
- Any error messages received