
Before you start
- You have permission to create and edit profiles and third party providers.
- You have the supplier’s full name or business contact details, email address, business name and valid ABN.
- You know which services the supplier can provide.
- You know whether the supplier is registered for GST.
Step-by-step instructions
Step 1: Creating the supplier profile
- Navigate to Profile search
- Create a new profile for the supplier contact if one does not already exist
- Enter the required basic details, such as full name, email address, address and time zone
- Save the profile

Step 2: Create the supplier record
- Go to Third party providers and open the Supplier tab
- Click New Supplier
- Search for and select the profile you created
- Select Contractor
- Enter the supplier's ABN and business name
- Confirm whether the supplier is registered for GST
- Add the products, communities and services the supplier can provide
- Select Supplier role, Clinician role, or both if applicable
- Click Save

Step 3: Add supplier rates
- Open the supplier record
- In the supplier price list tile, click New rate
- Enter the rate name, description and external ID if required
- Select the relevant support/service claiming code
- Enter the rate, unit type, applicable service and tax treatment
- Click Save

Step 4: Invite them to the supplier portal
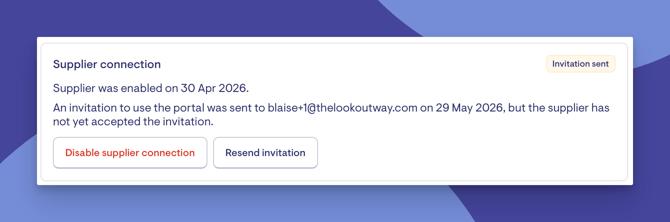
- On the supplier record, locate the Supplier connection tile.
- Click Enable and send invitation.
- Confirm the invitation is being sent to the correct email address.
- The supplier will receive an email invitation to activate their Supplier Portal account.
- If the invitation expires, resend it from the supplier record.
For more information, please review our supplier portal articles:
How to set up the supplier portal in Lookout
For Supplier: The Lookout supplier portal
What happens next?
- Once a supplier activates their portal account, this is reflected in Lookout
- The supplier can then add team members and choose their access level
- All checkout activity is recorded and auditable
- Delivery confirmations flow through to your finance and claiming workflows automatically
- You can view delivery details, must-do responses, and checkout notes directly from the purchase order and/or the Member notebook in Lookout
Troubleshooting
The Supplier connection tile is not visible
- Refresh the supplier record after saving
- Check that the supplier has been saved correctly
- Confirm your permissions allow supplier connection management
The supplier did not receive the invitation
- Confirm the email address on the supplier profile
- Ask the supplier to check junk/spam folders
- Resend the invitation if the previous link has expired
The supplier's organisation details are wrong
- The supplier's admin or owner can update organisation details from within the portal
- Tax numbers must be valid and unique across all supplier organisations
The supplier’s rate is not available when creating a purchase order
- Check that the rate has been created on the correct supplier
- Confirm the applicable service is selected on the rate
- Check whether the rate has been archived