Managing Travel and Transport rates in Lookout
A guide to adding, enabling, editing and archiving provider travel and client transport rates in Lookout.
Being able to manage all costs and expenses associated with client care is paramount for many care organisations. These costs include travel expenses incurred by support workers travelling to visits (provider travel) and providing transport during visits (client transport). This article covers how to add, enable, edit and archive provider travel and client transport rates in Lookout.
An access role with Finance permissions is required to update rates.
Provider Travel rates
Provider travel refers to the compensations for worker travel expenses and the time spent travelling to a participant's location to provide direct support.
How to add Provider travel rates
-
Click the three dots next to your name in the side navigation and select Settings.

-
In the Settings menu, navigate to the Rates section and click Provider travel rates.

-
Click New Provider travel rate.

-
Enter the relevant Rate Details, External identifiers (if applicable), and Pricing

-
Under Finance & invoice settings, ensure that you select the appropriate options for how the rate will be taxed. The rate tax fields are mandatory.

-
Click Save.

How to edit provider travel rates
-
Open the Provider Travel settings page
-
Click the three dots in the right-most column of the rate you need to update
-
Click Edit
-
Make the necessary changes and save them

-
If only the effective date needs to be changed, tick the Force rate propagation box under the Suggested Price section before saving

Force rate propagation will trigger the rate change review window that allows for start date selection if there are no real rate changes required
-
Select the start date for the rate and save the changes

How to archive provider travel rates
-
Open the Provider Travel settings page
-
Click the three dots in the right-most column of the rate you need to archive
-
Click Archive

-
Confirm the action

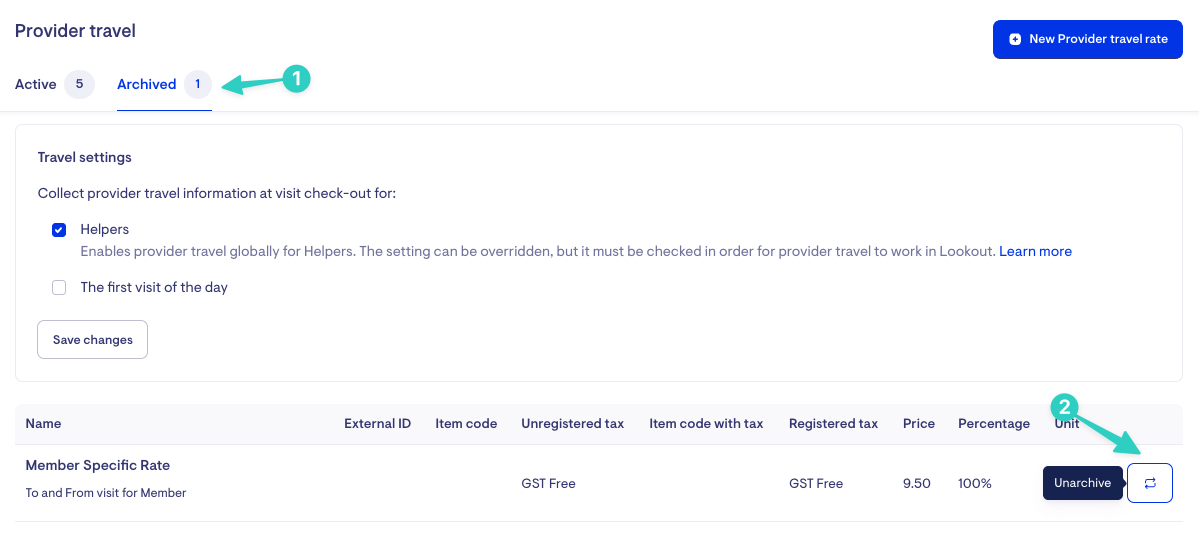
To unarchive a provider travel rate, click the Archived tab > Unarchive

How to enable or disable Provider travel rate collection
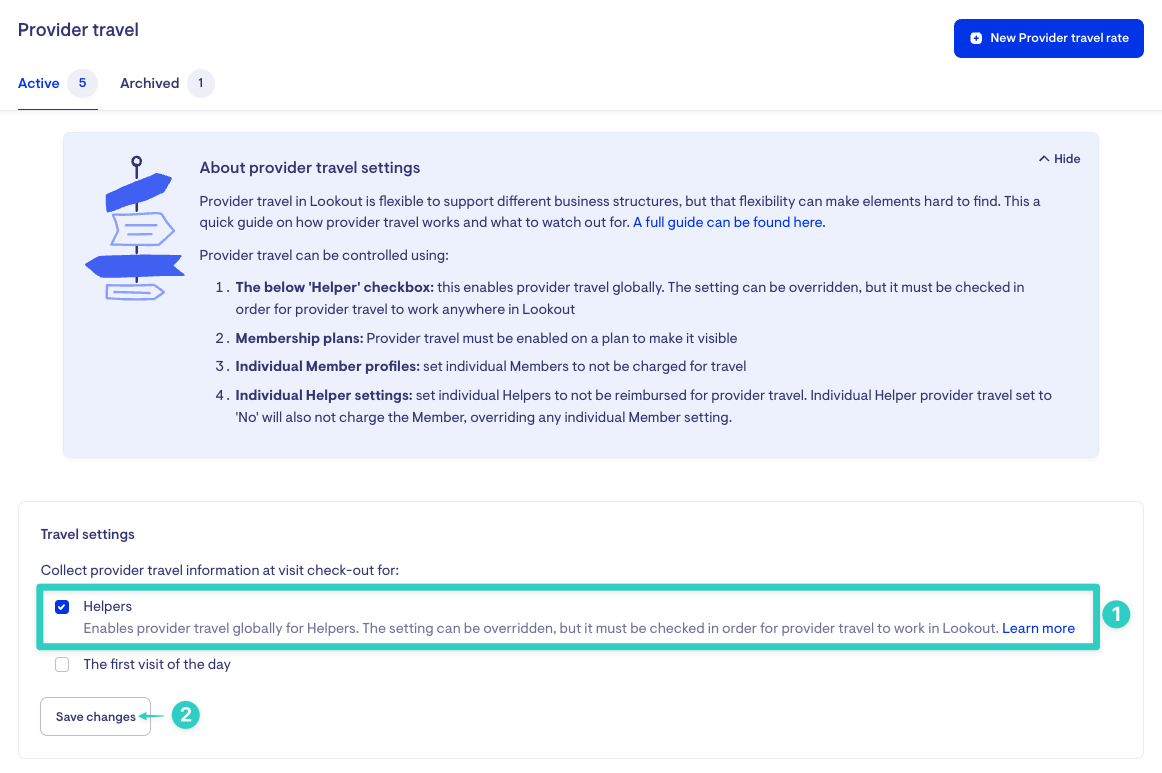
Select the 'Collect provider travel information' checkbox from the Provider travel rates screen and Save changes.

This option toggles provider travel on or off for your organization. When the checkbox is not selected, helpers will not be required to enter the time and/or distance traveled to a visit during check-out.
The individual helper travel setting must be enabled if you collect provider travel information. Otherwise, the actual provider travel collected for a helper's visit will default to 0 at check-out.
Client Transport rates
Client Transport is the service of providing transportation for clients during visits to ensure they can access necessary locations and services.
How to add Client Transport rates
-
Click the three dots next to your name in the side navigation and select Settings.

-
In the Settings menu, navigate to the Rates section and click Client transport rates.

-
Click New client transport rate.

-
Enter the relevant Rate Details, External identifiers (if applicable), and Pricing

-
Under Finance & invoice settings, ensure that you select the appropriate options for how the rate will be taxed. The rate tax fields are mandatory.

-
Click Save.

How to edit Client Transport rates
-
Open the Client Transport settings page
-
Click the three dots in the right-most column of the rate you need to update
-
Click Edit

-
Make the necessary changes and save them

-
If only the effective date needs to be changed, tick the Force rate propagation box under the Suggested Price section before saving

Force rate propagation will trigger the rate change review window that allows for start date selection if there are no real rate changes required
-
Select the start date for the rate and save the changes

How to archive client travel rates
-
Open the Client Transport settings page
-
Click the three dots in the right-most column of the rate you need to archive
-
Click Archive

-
Confirm the action

To unarchive a client transport rate, click the Archived tab > Unarchive

FAQs
How do these rates link to visits?
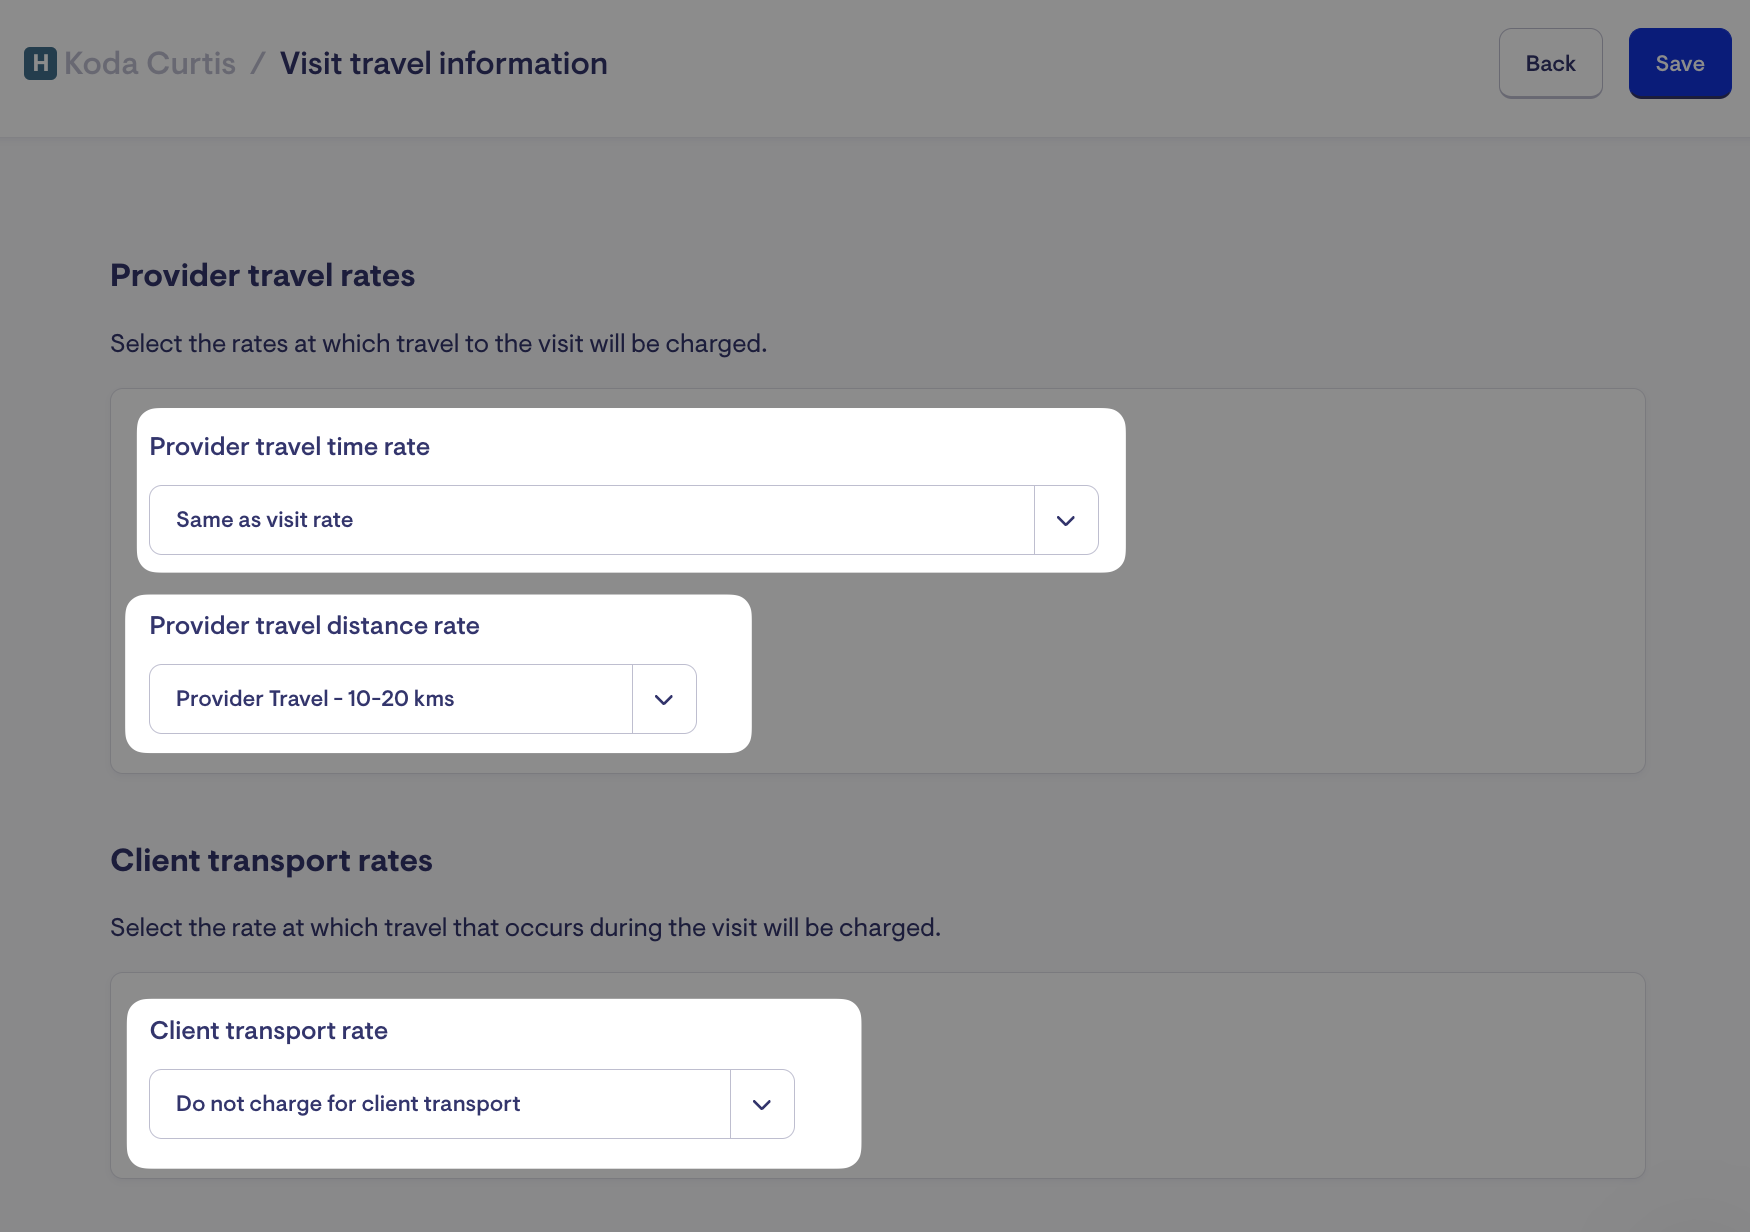
When creating a visit and if applicable, you can select the rate at which the client will be charged for travel within the visit or schedule rule travel information page.

How do I attach client transport rates to services?
To see client transport rate options on the visit or schedule rule travel information page, the services provided during the visit must be linked to a client transport rate. This tells the system that client transport can be included for the visit.
Why are travel rates separate from visit rates?
Travel rates operate differently from visit rates and have different units of measurement.
