
Custom attributes let you add your own fields to the platform, so you can record information that matters to your business but isn't part of the standard setup. While built-in fields cover the essentials, custom attributes let you capture the extra details your organisation needs - and ensure they flow through to reporting and exports.
For a definition of the terms used within this article, see the Custom attributes: Glossary of terms.
Before you start
Custom attributes involve two separate permissions, because there are two different jobs:
- Setting up the fields - creating, editing, ordering and deleting custom attributes needs the Configure custom attributes permission. You'll need this to follow along with any step-by-step instructions in this article.
- Filling in the values - entering or changing the information in a custom attribute on an actual record needs the Create and edit custom attribute values permission.
Both of these permissions will be needed. If the custom attribute settings aren't available to you, or you can see a field on a record but can't edit its value, whoever manages roles and permissions in your organisation can review and adjust your access.
What is a custom attribute?
Think of a custom attribute as a blank field you design yourself. You decide what it's called, what kind of information it holds, and what kind of record it appears on. Once created, it shows up on those records for your team to fill in, just like the built-in fields do.
For example, you might add:
- An internal reference number on Members, to match your own systems
- A preferred contact method on Members
- A parking notes field on Helpers
- A classification on communities
Utilising custom attributes
Custom attributes aren't limited to a single type of record. They can be added to many different parts of the platform, including Members, Helpers, Staffers, communities, products, visits and more. Each type keeps its own set - a custom attribute you create for Members appears only on Members, not on Helpers.
Field types
When you create a custom attribute, you choose its field type - the kind of information it holds. This decides how the field appears and what can be entered. The available types include:
| Field type | Best for |
|---|---|
| Text | Short single-line entries, like a reference or a name |
| Text area | Longer free text, like notes |
| Number | Numeric values |
| Date | A calendar date |
| Dropdown | Picking one option from a set list you define |
| Radios | Picking one option from a small set, all shown at once |
| Checkboxes | Picking one or more options from a set list |
| Tag | Choosing from a set of labelled tags |
| File | Uploading a document or image |
| External identifier | A reference or ID from one of your own systems |
| HTML | Formatted, rich text |
Choose the type before you create the attribute. It shapes everything about how the field behaves, and can't sensibly be changed to an unrelated type later.
Please note: Dropdown, radio, checkbox and tag fields need options - the set of choices people pick from. You define these when creating the attribute and can give some of them a colour or icon so they stand out.
The custom attributes page
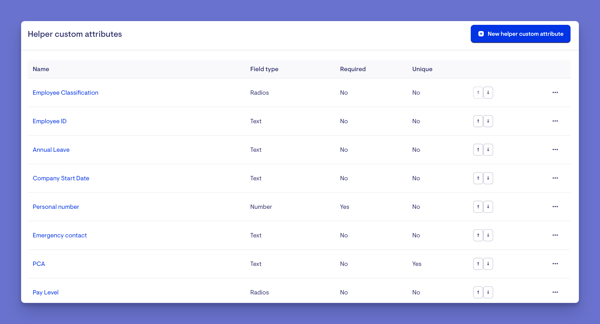
Custom attributes are managed from a single page in your settings. Rather than one long list, the page is divided into sections - one for each part of the platform that can have custom attributes: Members, Helpers, Staffers, communities, products, visits and so on.
Each section has:- A heading naming the part of the platform it covers (for example, Membership custom attributes or Community custom attributes).
- A +New button for adding a custom attribute to that specific part of the platform. This is how to ensure a new field lands in the right place within your Lookout instance.
- A list of the fields already set up for that section, showing each one's name, its field type, and whether it's required or unique.
So, if you want to add a new custom attribute to Members, you find the Members section and use its New button; to add one to communities, you use the New button in the communities section. A field always belongs to the section you create it in - that's what decides where it appears within your Lookout instance.
Please note: Which sections you see depends on what your organisation uses - parts of the platform you don't have switched on won't appear.
Making a field required or unique
Two settings change how a field behaves:
- Required: The field must be filled in before the record can be saved. Use this for information you can't do without.
- Unique: No two records can share the same value. Use this as identifiers, so the same reference number can't be entered twice by mistake. Unique applies only to certain field types, such as text, number, date, and external identifier.
Create a custom attribute
Step 1: Create the field
- From your home dashboard, navigate to the overflow menu by clicking the ellipsis (...) next to your name in the bottom left-hand corner.
- The overflow menu will open - click Settings.
- In the main settings, navigate to the Care section, then click Custom attributes.
- A new screen will load. Find the section you want your custom attribute to apply to and click its corresponding blue +New button. For example, +New Helper custom attribute.
- Enter a Name - for example, communication preference. This is what your team will see on every Member.
- Choose a Field type. This is where you decide what kind of field it is: a text box, a dropdown, radio buttons and so on. If you want people to pick one option from a fixed list, choose Dropdown.
- Enter a Key. This is a reference used in your data exports, and it has to be unique. It's how this field is identified behind the scenes when you export your data.
- (Optional) Enter a Hint - a short line of text that appears alongside the field to guide people as they fill it in, such as "How this Member prefers to be contacted."
- Decide whether it's a Required field. Tick this only if a value must be filled in before the record can be saved.
- Decide whether to display the attribute when the value is empty. Tick this if you want the field to show on a Member's record even before anyone has entered a value. This is best practice if making a custom attribute applicable to Members, Helpers or Staffers. It will ensure it displays on their profile/dashboard, ready for you to update.
- When happy, click the blue Save button.
- A green banner will display to confirm that your new custom attribute has been created. This custom attribute will now appear in the area of the platform you created it in, ready to be filled in.

Step 1a: Adding options
If you've chosen a dropdown, an Options section appears where you list the choices. Add one row per option using the Add option button.
Using the same example as above, communication preference, here we'd add some options like:
- SMS
- Phone call
- Post
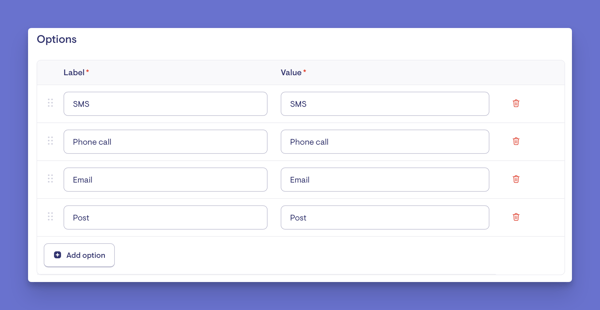
Each option has a Label and a Value. The label is what appears in the dropdown; the value is what's saved and reported on. For a simple list like the above, you can make them the same.
Edit a custom attribute
You can edit a custom attribute at any time - its name, its hint, whether it's required, and (for option-based fields) the choices people pick from.
- In the main settings, navigate to the Care section, then click Custom attributes.
- Find the custom attribute you wish to edit in its corresponding section (for example, Membership custom attributes).
- Find the custom attribute and click its name or its ellipsis (...) icon to right-hand side.
- Clicking its name will load straight into the Edit screen. Clicking the ellipsis will display a short options menu, Edit or Delete. Click Edit to load the same edit screen.
- Update the details as needed - for example rename it, adjust the hint, or change whether it's required.
- If it's a dropdown, radio, checkbox or tag field, you can also add, rename or reorder its options here. Add a choice with Add option, or remove one using the control on its row.
- When ready, click Save.
Your changes take effect straight away and apply everywhere the field appears. A green confirmation banner will display, confirming your updates have been applied.
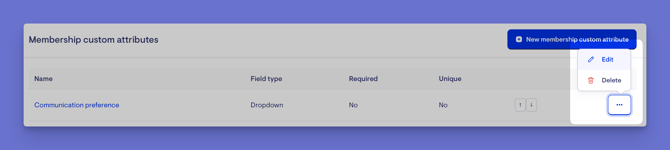
Two things to keep in mind when editing. Changing an option's stored value (not just its label) affects how existing entries and filters line up - so if you only want to change the wording people see, edit the label and leave the value alone. And avoid changing the field type to something unrelated once people have entered data, since the existing values may no longer fit.
Deleting a custom attribute
You can delete a custom attribute you no longer need.
Important: Deleting a custom attribute deletes all its data. Removing an attribute doesn't just hide the field - it permanently deletes every value entered into it across all records, and removes it from data exports. This can't be undone. If you only want to stop using a field, consider leaving it in place rather than deleting it.
- In the main settings, navigate to the Care section, then click Custom attributes.
- Find the custom attribute you wish to edit in its corresponding section (for example, Membership custom attributes).
- Find the custom attribute and click its name or its ellipsis (...) icon to right-hand side.
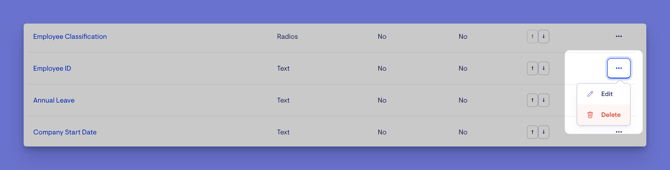
- Clicking its name will load straight into the Edit screen. Clicking the ellipsis will display a short options menu, Edit or Delete.
- Click Delete and confirm your actions.
- A green banner will display confirming you have successfully removed the custom attribute.
Reordering custom attributes
Custom attributes appear in a set order, and you can move them up or down. This controls the order they show in forms, records and in exports. Group related fields together and have them appear in the order that makes sense to you.
Filling in a custom attribute
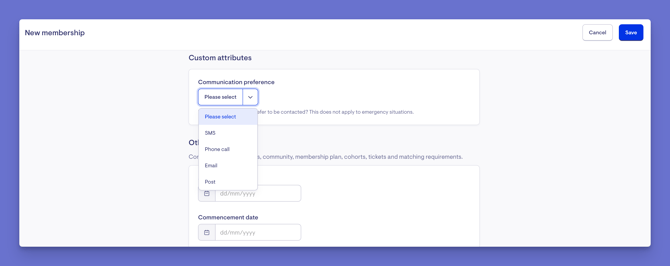
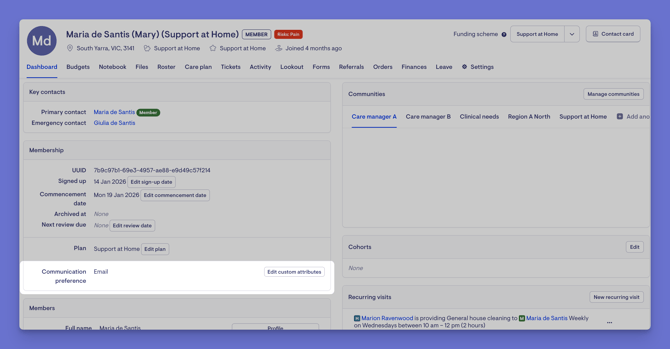
Once a custom attribute exists, it appears on the relevant records alongside the built-in fields. Open a record, enter or choose the value, and save - the same way you'd fill in any other field. Below are two examples of our Member custom attribute we created - communications preference.
Here, our custom attribute now appears to be filled in when creating a new Membership. As we didn't mark this field as required, there is no red asterisk, and the Membership can be saved and created without the communication preference recorded.
In this example, we are on an existing Member. On their Member dashboard, our communications preference now displays. We can click Edit custom attribute to record their communication preference, and click Save to apply any changes we've made.
Filtering Members by custom attributes
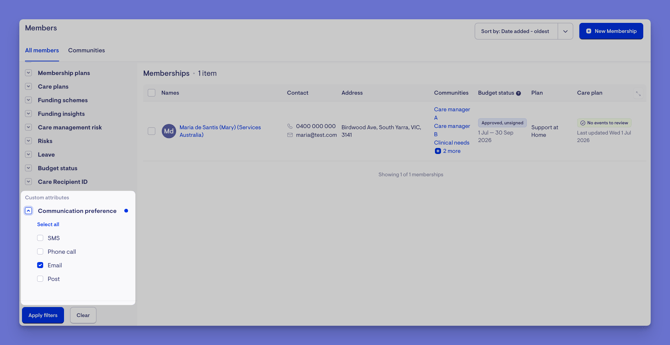
Once your team has recorded preferences, you can use the field to find Members — for example, everyone who prefers post, so you know whom to include in a mail-out.
- From the main navigation menu, click Members to open the full list of Members.
- Using the Filters, scroll until you find your custom attribute and apply its options to your search.
- When ready, click the blue Apply filters button.
- The list narrows to the Members whose preferences match.
Troubleshooting
I can't see the option to create or edit custom attributes.
Creating and editing custom attributes needs a specific permission on your access role. If the settings aren't available to you, ask the person who manages roles and permissions in your organisation.
A custom attribute I created isn't showing on a record.
Custom attributes only appear on the type of record they were created for — a Member attribute won't appear on Helpers. Check you created it for the right type. Also confirm you're looking at a record that shows custom attributes.
I can't save a record because of a custom attribute.
The field is probably marked as required, so it must be filled in before saving. Either enter a value, or have someone with the right permission make the field optional.
It won't let me enter a value — it says it's already taken.
The field is marked as unique, so that exact value already exists on another record. Enter a different value, or check which record is already using it.
An empty custom attribute isn't displaying at all.
By default, some attributes are hidden when they have no value. There's a setting to display an attribute even when empty — an administrator can turn that on.