This guide explains what happens in Lookout after a supplier completes a job, including checkout notes, files, observations, care plan updates and supplier invoice matching.
Before you start
- You have purchase order read & write access permissions
- The Connected Care - Confirmation of delivery feature has been enabled for your organisation
- You have a purchase order already created for a relevant Member and supplier
Step-by-step instructions
When a supplier completes a job checkout in Connected Care, several things happen automatically behind the scenes. If check-in is enabled, the supplier may first check in (starting the clock) before completing checkout (ending the clock), giving visibility into the actual visit duration. Let's take a look at the full process:
Step 1: The supplier submits the checkout
The supplier completes their job checkout by:
- Optionally recording a checkout note (a message to the care team about how the visit went)
- Providing the delivery date (the date the service was actually delivered)
- Optionally sharing their location (if enabled)
- Responding to any "Must Do" tasks — these are required questions or acknowledgements set up by the care team (for example, confirming medication was administered)
- Responding to any automatic tasks tied to the services linked to the job
Please note: If the organisation requires checkout notes, the supplier must write one before they can complete the checkout.
Once they confirm, the supplier sees a "Job Complete - Thank you for your care!" confirmation screen.
The system immediately updates the job item's status to Completed and records the exact time of delivery. If the supplier was previously "checked in" (in progress), it also records the full duration of the visit.
The checkout link that was sent to the supplier is then closed so it can't be used again.
Remember: Suppliers can only complete a checkout within a set time window around the scheduled delivery date. If they try outside this window, they'll see a "Checkout not open" message.
Step 2: A provisional claim item is automatically created (if enabled)
If the organisation has the "Automatically generate provisional claim items (third-party invoices) " setting turned on:
- The system automatically creates a provisional claim item linked to this job item
- The item is dated based on the day the service was delivered
- The item is held back from billing until the real supplier invoice arrives and is matched

Step 4: The Checkout Note is Scanned for Observations
The system automatically analyses the supplier's checkout note. It uses keyword matching and a smart detection system to check if the note contains anything concerning, such as mentions of illness, risk, or important communications.
If something noteworthy is detected, the system:
- Creates an Observation (a flagged item for the care team)
- Categorises it (e.g., risk, illness, medication concern)
- Notifies the relevant care managers so they can review and take action
Step 5: "Must Do" Task Responses Are Processed
If the supplier responded to any tasks (must-do items) that have been assigned to specific team members, a follow-up ticket is automatically generated and assigned to the correct staff member.
This ensures that important feedback from the supplier (like "medication was refused" or a custom form response) reaches the right person to act on.
Step 6: Automatic Task Responses Are Checked for Observations
Each automatic task response is also analysed. If the supplier answered "No" to a key question (such as "Was medication administered?"), the system may automatically flag this as an Observation for the care team. Any comments the supplier added to their task responses are also scanned for risk or concerns.
Step 7: The Job Appears in the Client's Notebook
The completed job, along with the supplier's checkout note, task responses, and any observations, all become visible in the client's Notebook (the care journal for that person). Care managers can:
- Review checkout notes from this and past visits
- See flagged observations
- Filter by date range, type of visit, or search for specific content
Step 8: Status Updates Are Broadcast in Real Time
Once the job is completed, the updated status is immediately reflected across the system:
- The purchase order view on the client's ticket updates in real-time
- Any integrations connected via webhooks are notified of the status change
- The job item now shows as "Completed" across all relevant screens (roster, weekly view, finance sections)
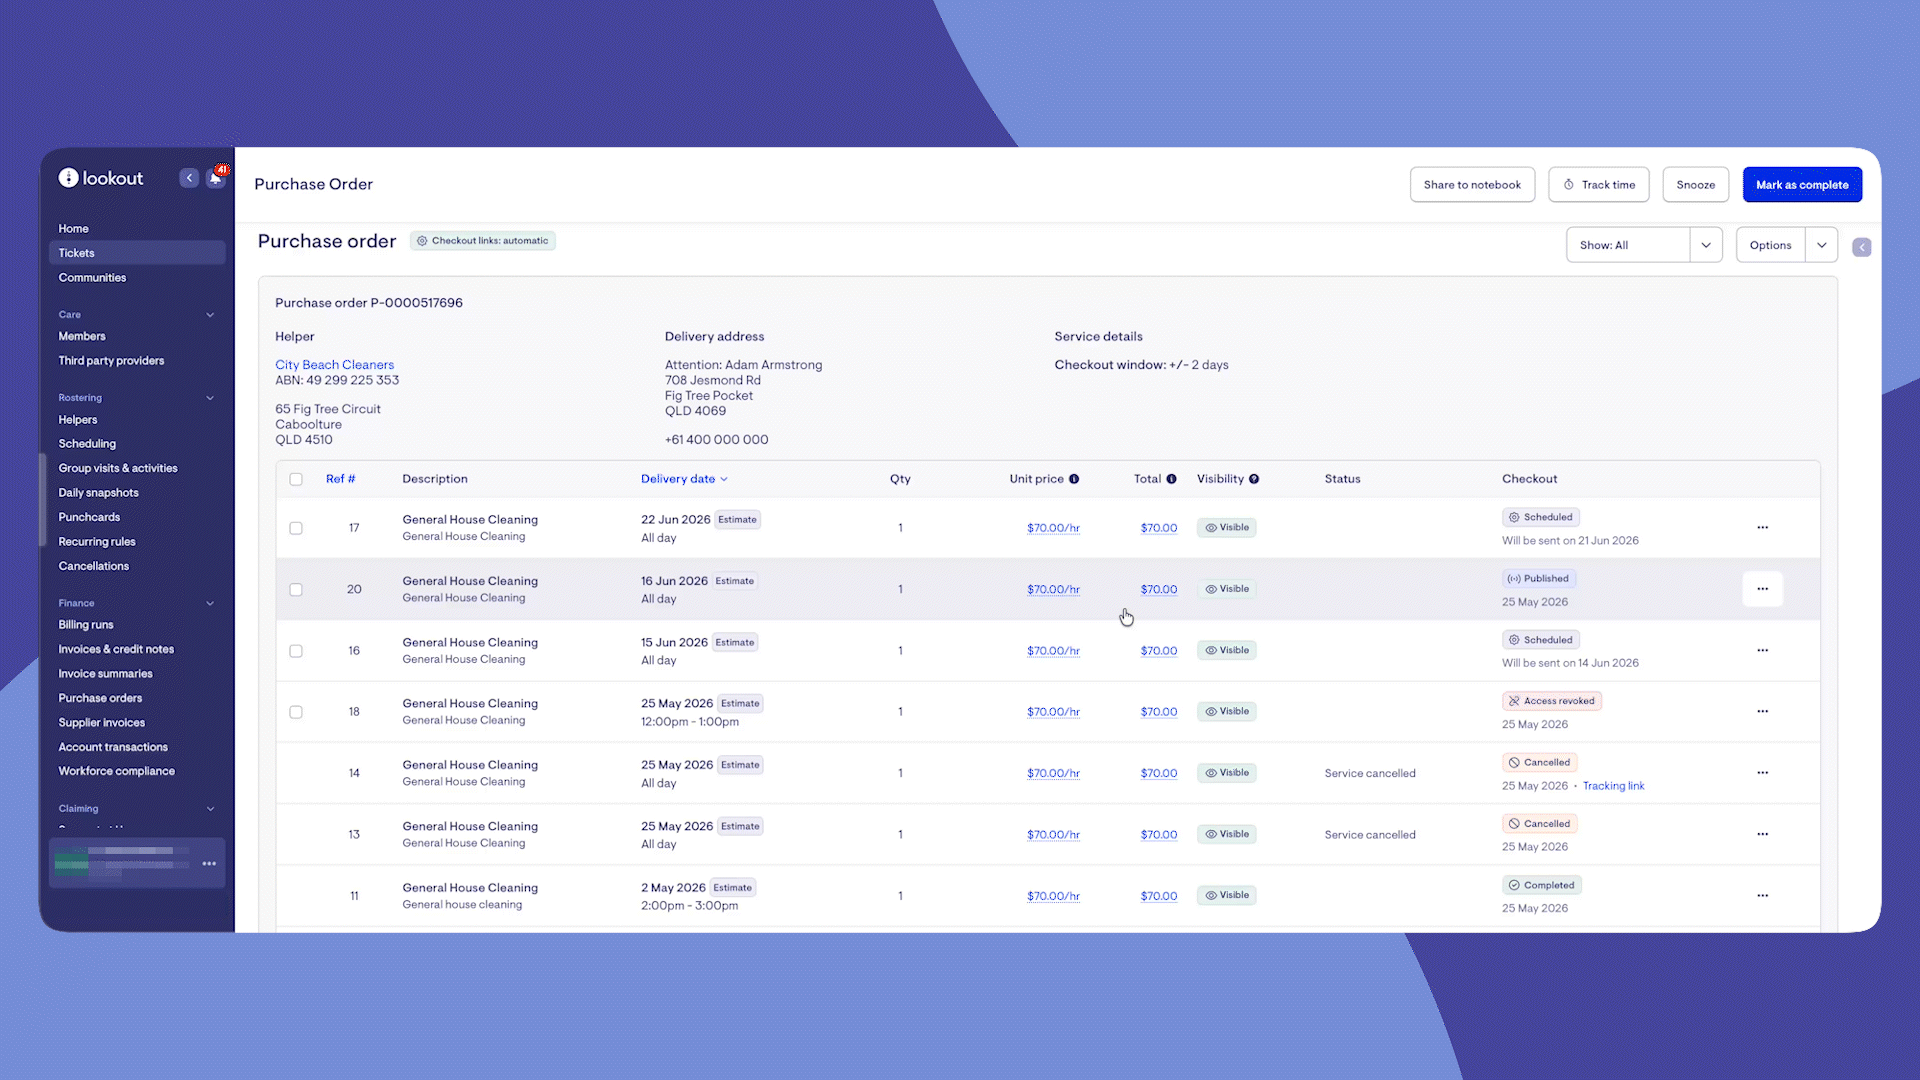
Each purchase order line item now shows a clear delivery status:
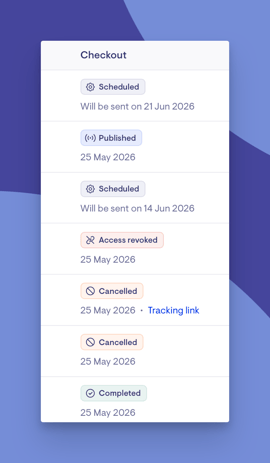
| Status | Meaning |
| Scheduled | The line item has been created and has been scheduled to be sent on the date displayed |
| Published | The link has been sent to the supplier email and published to the supplier portal |
| Access revoked | The link was revoked before checkout |
| Checked in | The supplier has checked in (if check-in is enabled) |
| Tracking link | A courier tracking link has been added |
| Completed | The supplier has confirmed delivery (checked out) |
| Cancelled | The service was cancelled |
Step 9: Upload or match the supplier invoice
- When the supplier invoice is received, upload or match it according to your finance workflow.
- Confirm the invoice relates to the correct purchase order and line item.
- Check the invoice reference and supporting document where required.
Step 10: Use supplier invoices to monitor unmatched invoices
- From the main navigation menu, open Supplier invoices.
- Review completed jobs and invoices that still need to be matched.
- Use this list to follow up with suppliers before billing and claiming deadlines.
In summary
|
What Happens |
When |
|
Job status changes to Completed |
Immediately |
|
Checkout link is closed |
Immediately |
|
Supplier invoice is created |
Immediately (if auto-generate setting is on) |
|
Checkout note is scanned for concerns |
Within minutes |
|
Care managers are notified of observations |
Within minutes |
|
Follow-up tickets created for must-do tasks |
Within minutes |
|
Automatic task responses scanned for issues |
Within minutes |
|
Notebook updated with visit details |
Immediately |
|
Webhook notifications sent to integrations |
Immediately |
What happens next?
-
Matched supplier invoices can proceed through your billing and claiming workflow.
-
Unmatched invoices remain visible for follow-up.
-
OCR functionality can still apply to invoice processing, where configured.
-
The delivery information flows through to data exports, giving you full reporting capability
-
Budget tracking is updated to reflect actual delivery dates and amounts.
Troubleshooting
The supplier didn't receive their checkout link email
- Verify the supplier's email address is correct on the purchase order line
- Check whether the supplier contact has opted out of receiving checkout links by asking the supplier
- Try resending the checkout link from the purchase order line item
The supplier says they can't access the checkout link
- The link has a checkout window. It can only be used within the configured number of days before and after the scheduled delivery date.
- An initial fix may be updating the estimated delivery date, as this updates the checkout window
- Secondly, check whether the link was revoked
- Try resending the link
I need to cancel a delivery after the checkout link was sent
- You can cancel a purchase order line item at any point before it's completed
- You'll need to provide a cancellation note and a cancellation reason. These are the same reasons and custom reasons used for visits.
A provisional claim item was not created
- Check that third party invoicing is enabled in Finance settings.
- Confirm the purchase order line item is marked completed.
- Check whether the line item is excluded from claiming.
I need to edit the claim item
- Open the line item options and select Edit where available.
- Some fields are restricted after completion, such as unit price and delivery date.
- You may be able to update limited fields such as claiming code, service or specific time.
Want to learn more about Connect Care and its new features? Read our article.