New features
Adding purchase orders to the roster 🗓️
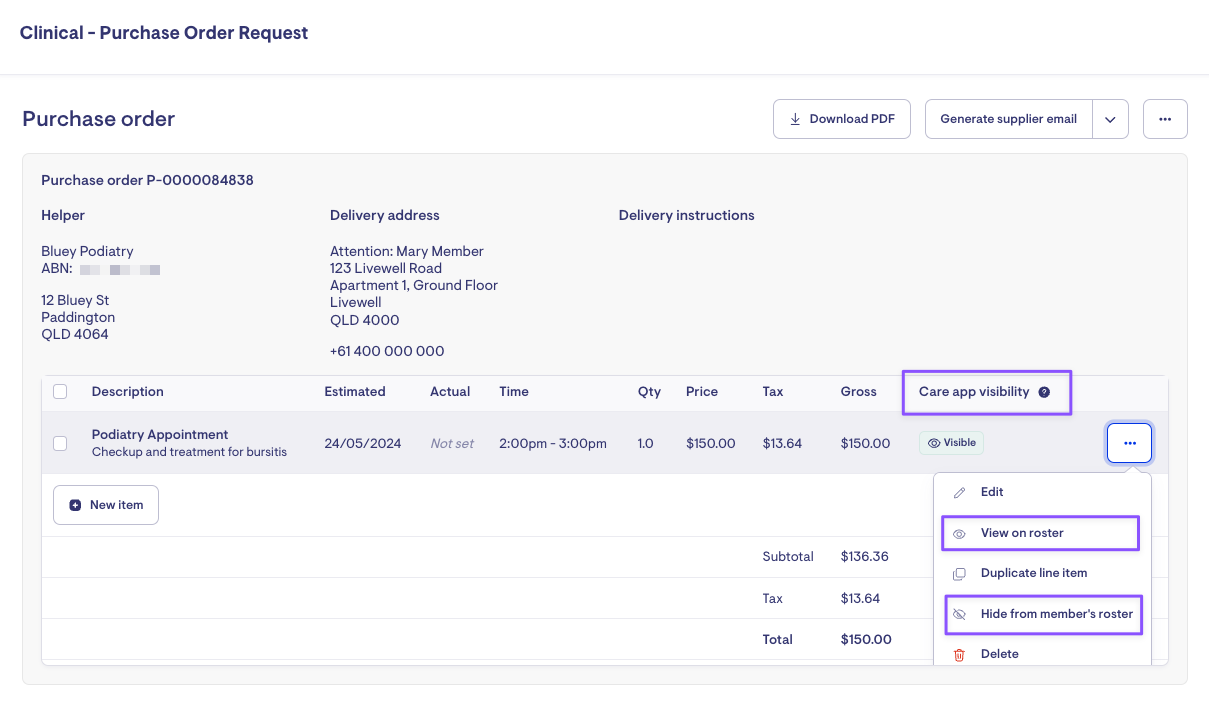
We have implemented a new feature that allows purchase order line items to be included in a member's roster and displayed within the Member's Care app for improved visibility.
To add purchase order (PO) items to the roster:
-
Add a delivery date - the estimated delivery date will trigger a banner warning the member about potential changes to the visit date and time. Adding the actual delivery date will remove this warning message.
-
Add a time - without an indication of time, the PO visit will not appear on the roster. Select 'All day' or set a start and end time.
-
Once the date and time are added, the Care app visibility status will change from
 to
to  automatically.
 -
To hide it from the member's roster, click
 and select 'Hide from member's roster', or you can remove the visit time by selecting 'Edit.'
Where will it be visible?
-
Admin App: appointments will remain visible to administrative staff regardless of the Care app visibility setting. However, they can only see it when they go to a member's Roster tab under Calendar view.

Purchase order appointments on the Calendar View of a Member's Roster
-
Member Care App: similar to standard visits, appointments will be visible on the member app Schedule page. Clicking on the appointment will display details and third-party contact details.

Purchase order appointments can be found under the Schedule page of the Care app
Check out the video below for a quick demo of this new feature:
Currently, Purchase Order visits are not displayed in the Member's List View, Punchcards, Daily Snapshots, or the Supplier's roster.
Limit what services a Member should receive 📋
We've introduced the ability to restrict the selection of services when scheduling visits for members, making it easier to manage rosters efficiently without second-guessing your choices.
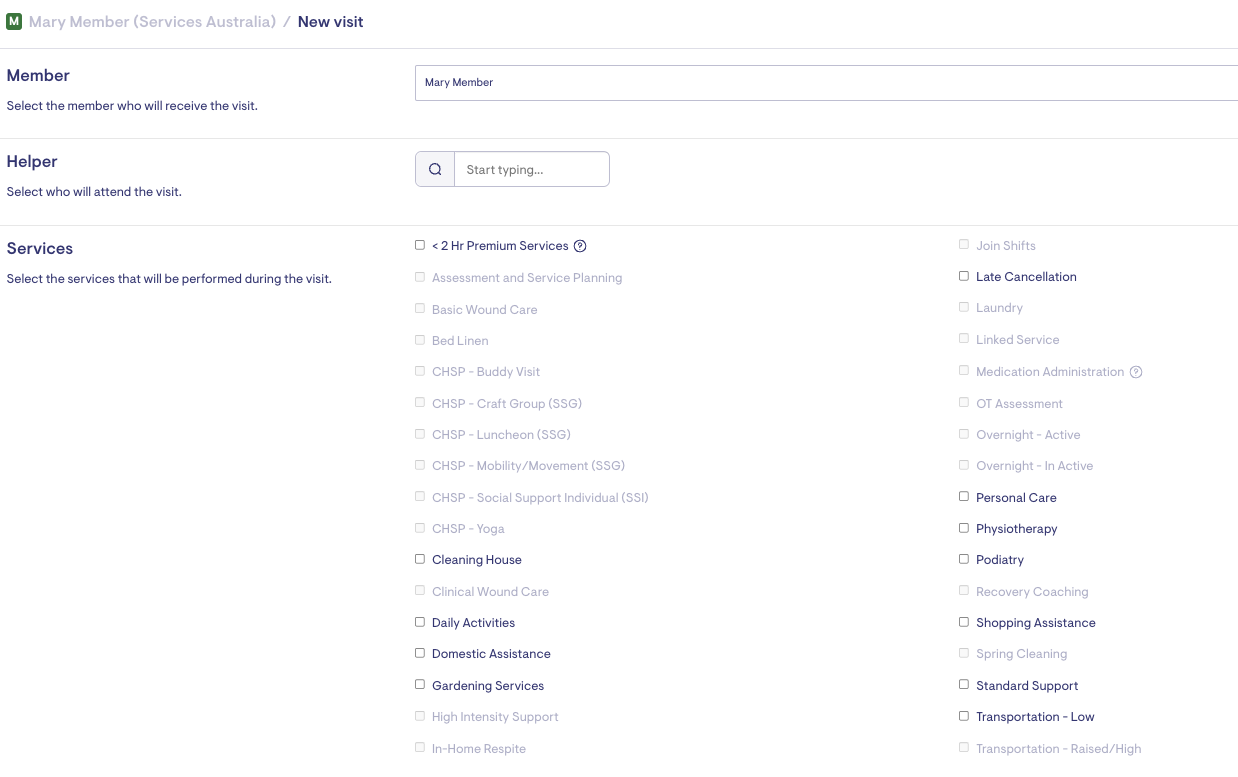
Select from a list of approved services for the Member
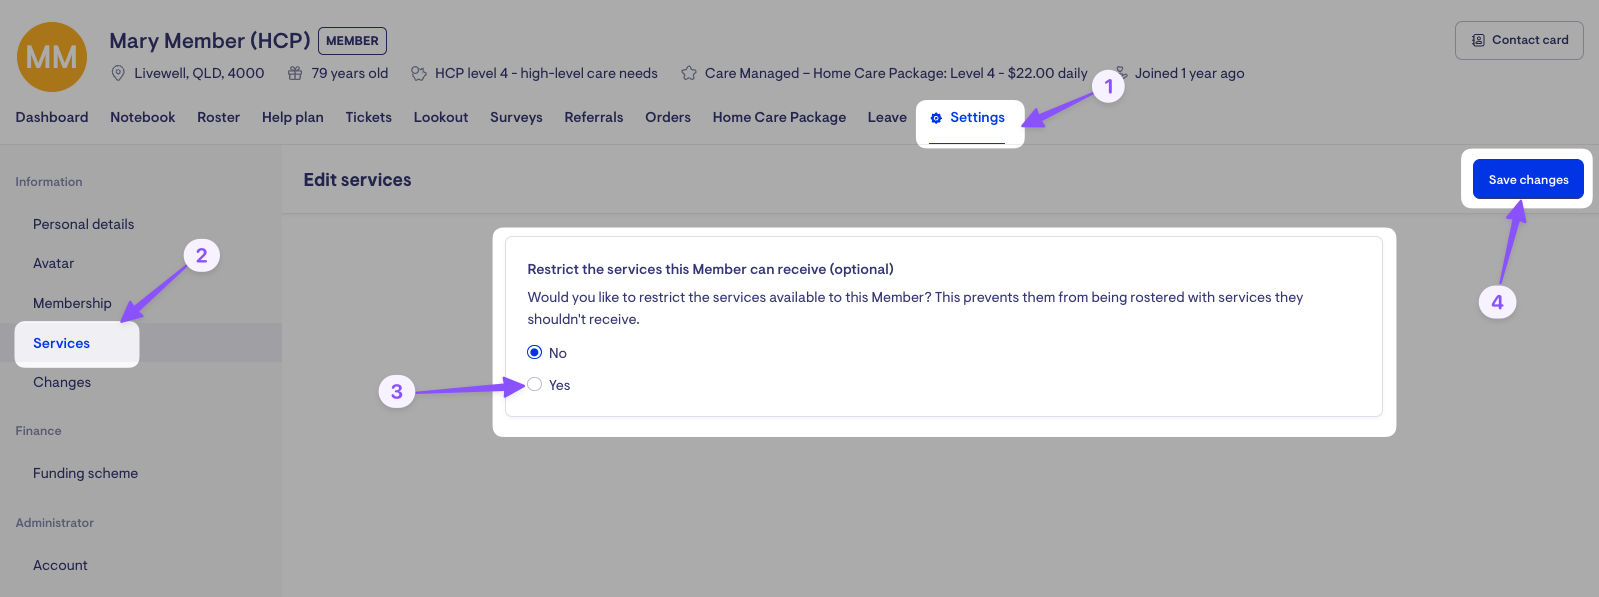
To restrict services that a Member can receive:
-
Navigate to the Member's page and go to the Settings tab.
-
Choose Services and select the 'Yes' radio button.
-
Select the services the member can receive by checking the corresponding tick boxes.
-
Save your changes.
The restricted services settings will also be applied to the Referral and Purchase Order services that can be selected for the member.
Automatic must-dos based on services during a visit ✅
We've enhanced our must-do feature by allowing multiple automatic must-dos with customisable titles and descriptions to be added directly to services. Previously, this capability was limited to a single medication compliance must-do.
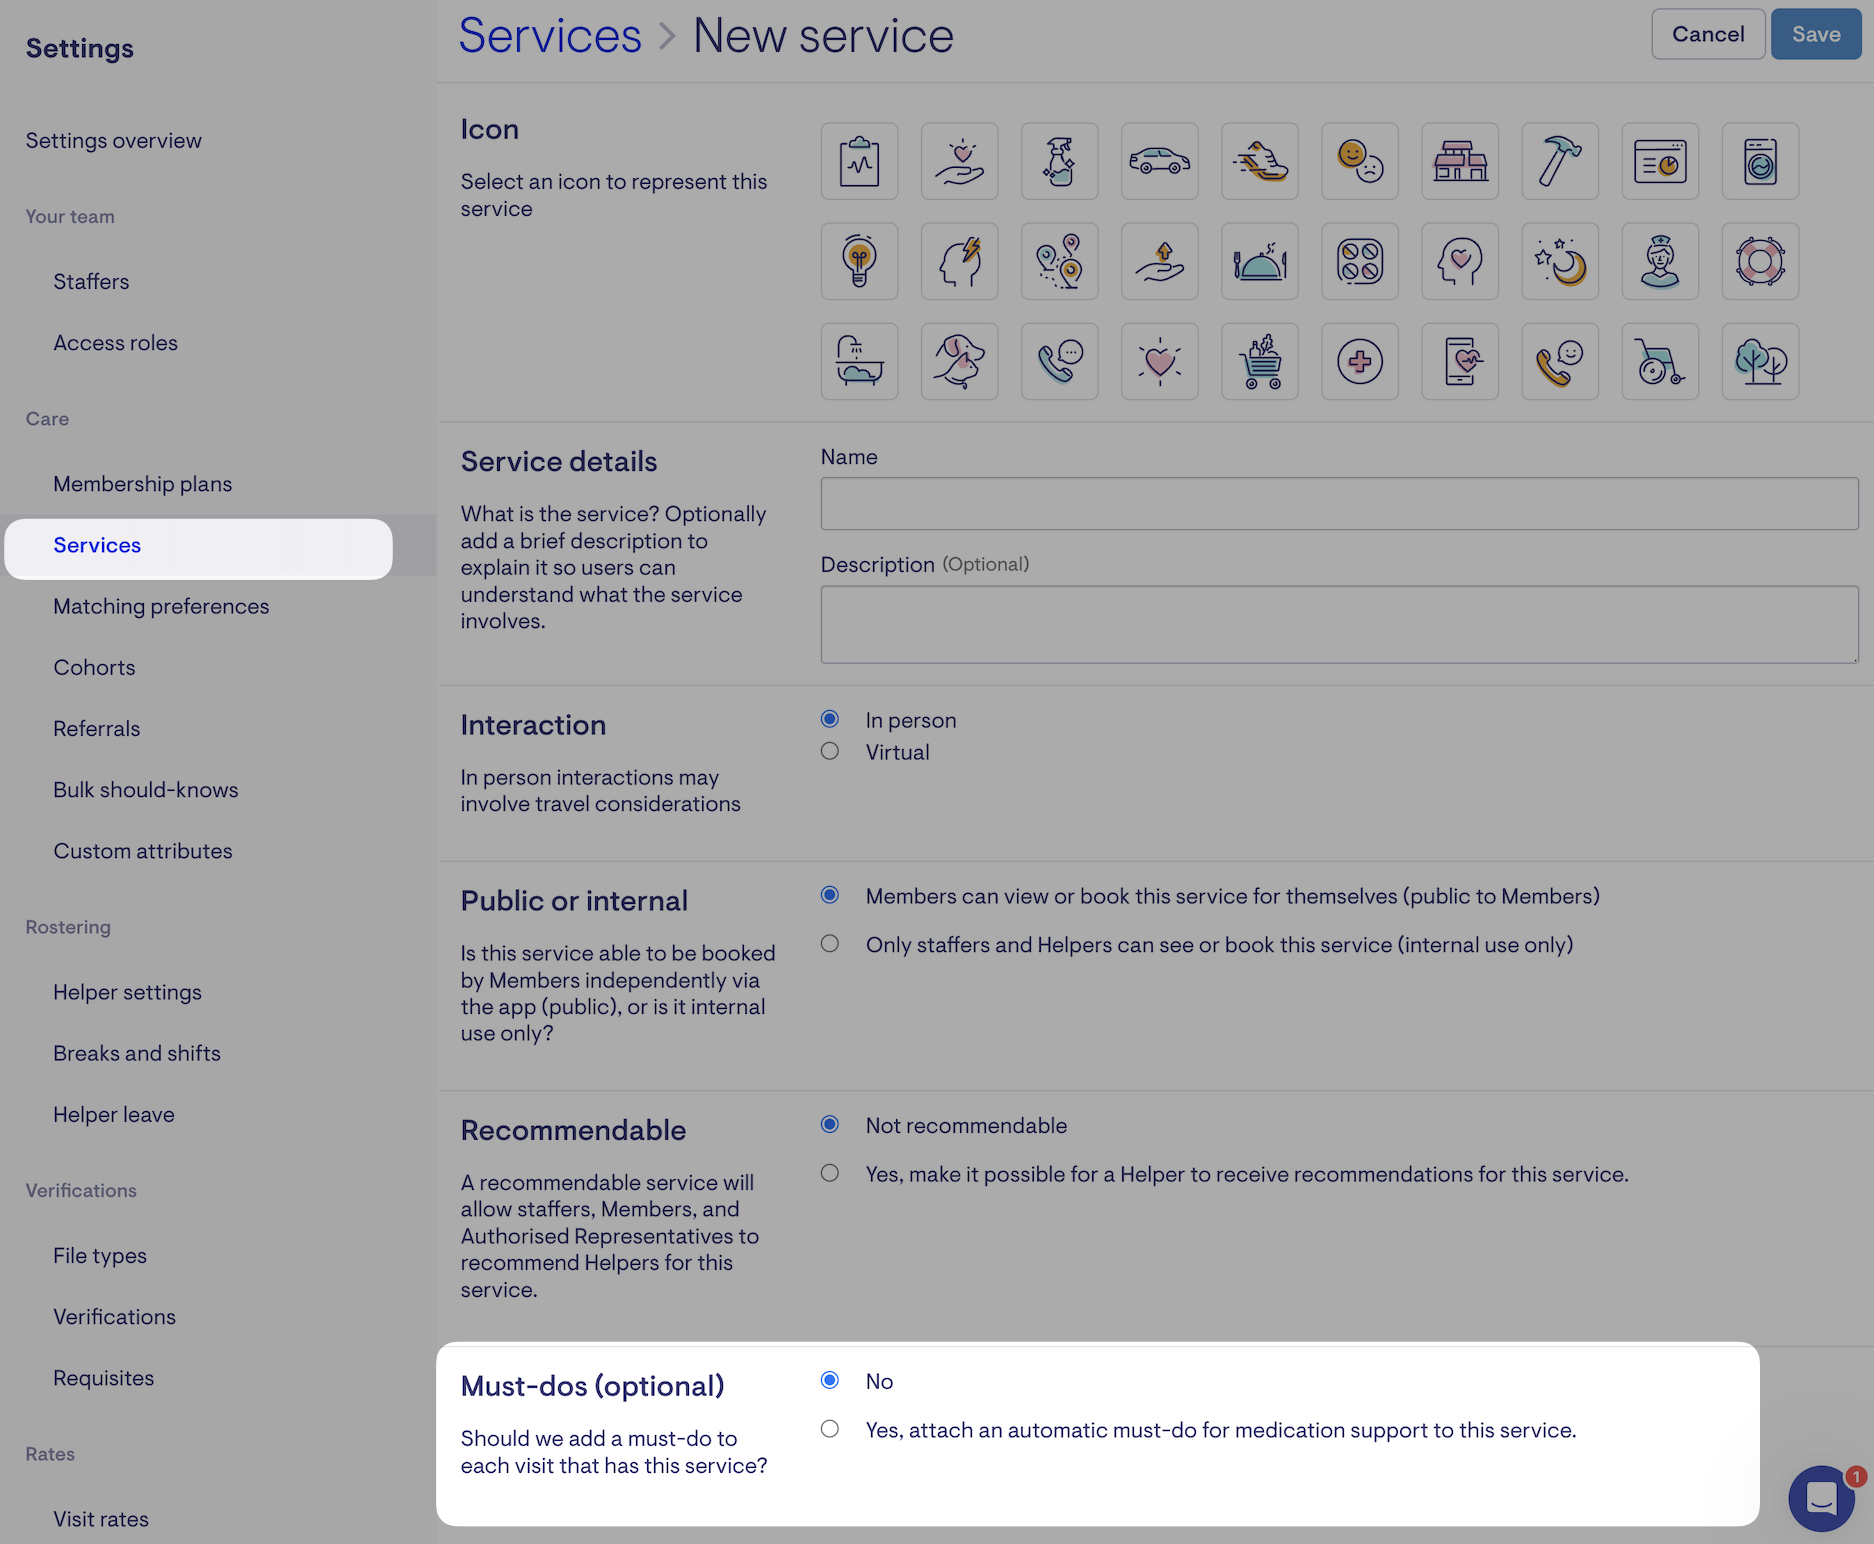
Before: Services Must-dos were limited to medication support

After: Multiple Must-dos attached to Services can now be added with improved formatting options
How does it work?
-
After adding automatic must-dos to a service, the Services list will show which ones have must-dos and how many.

-
Automatic Must-dos will apply to all scheduled visits with the corresponding service that have not been completed or checked in and have not been previously restored (unacquitted).
-
When adding a new visit or creating a new schedule rule, a question mark icon will appear next to services with automatic must-dos. Hovering over the icon will display details of the associated must-dos.

Multiple must-dos will be numbered in the order they were added
-
Once visits are created, automatic must-dos will appear in the Care app and must be completed just like manually added or regular must-dos. They can also be used together.

A preview of our upcoming UI update on the Care Worker app, showing how a helper is prompted to complete multiple must-dos on a visit.
Please remember:
-
Must-Dos at the Visit Level: When a must-do is included as part of a specific visit, a ticket will automatically be created to log the free-text note entered during the helper’s check-out process.
-
Must-Dos at the Service Level: Must-dos added at the service level are treated as automatic must-dos. They do not generate must-do tickets; instead, they appear as part of the helper’s check-out note, where the helper is prompted to confirm whether each task was completed. If the helper selects “Not done,” an uninvestigated Observation is created.
If the helper selects “Done,” an Observation may be generated automatically based on the response content and the remote care monitoring algorithm (otherwise, no further action is taken).
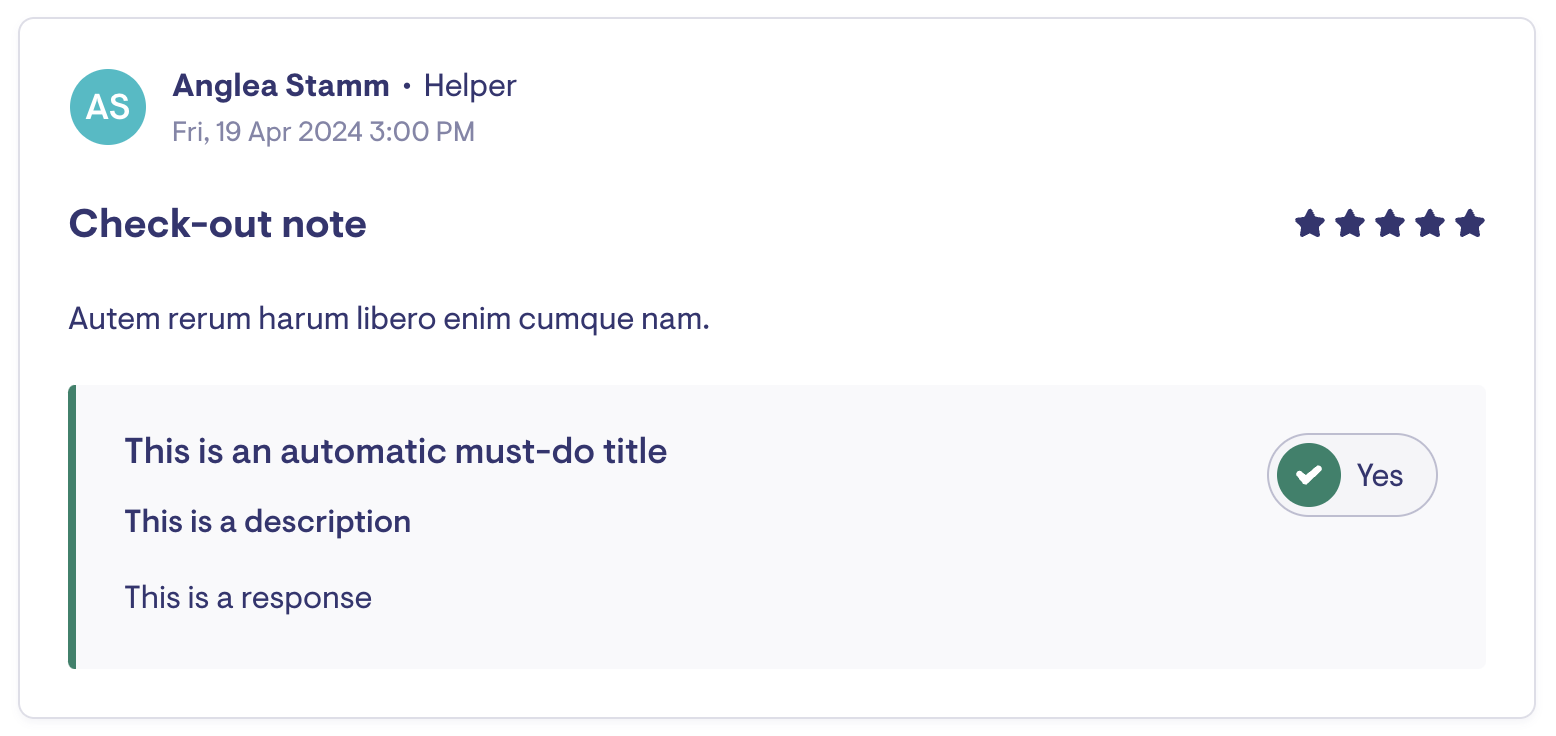
A check-out note with an automatic must-do in a Member's notebook
Data export period filter for Member invoices 📊
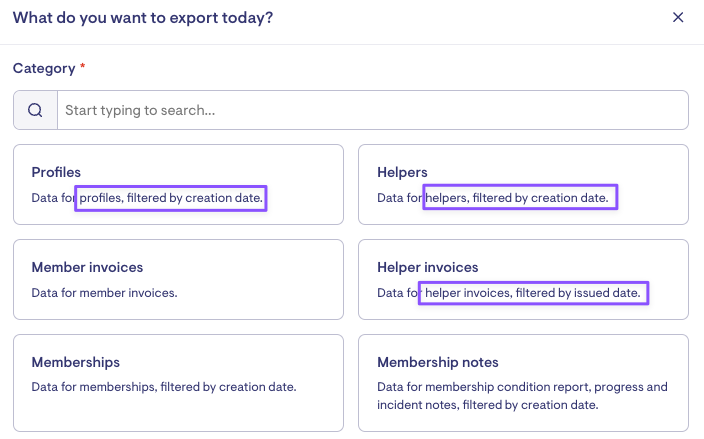
Our Data Export templates allow you to view exported results within a specified start and end date or a chosen date range. The specific date used within this period depends on the selected data category.
For instance, in the 'Memberships' category, data is filtered or fetched based on the 'creation date.' When you enter a date range, the Data Exporter will generate a report for memberships created during that period.

Each Data Category description details how the data is fetched and what specific 'date criteria' are used to filter or export it.
We are enhancing our date criteria functionality by allowing users to select the key date that determines the exported window, starting with the 'Member invoices' category. Other data category export periods remain fixed at this stage.
Previously, Member Invoices could only be filtered by the 'Invoice issue date.' Now, users can export invoices based on the 'Invoice published date' instead.
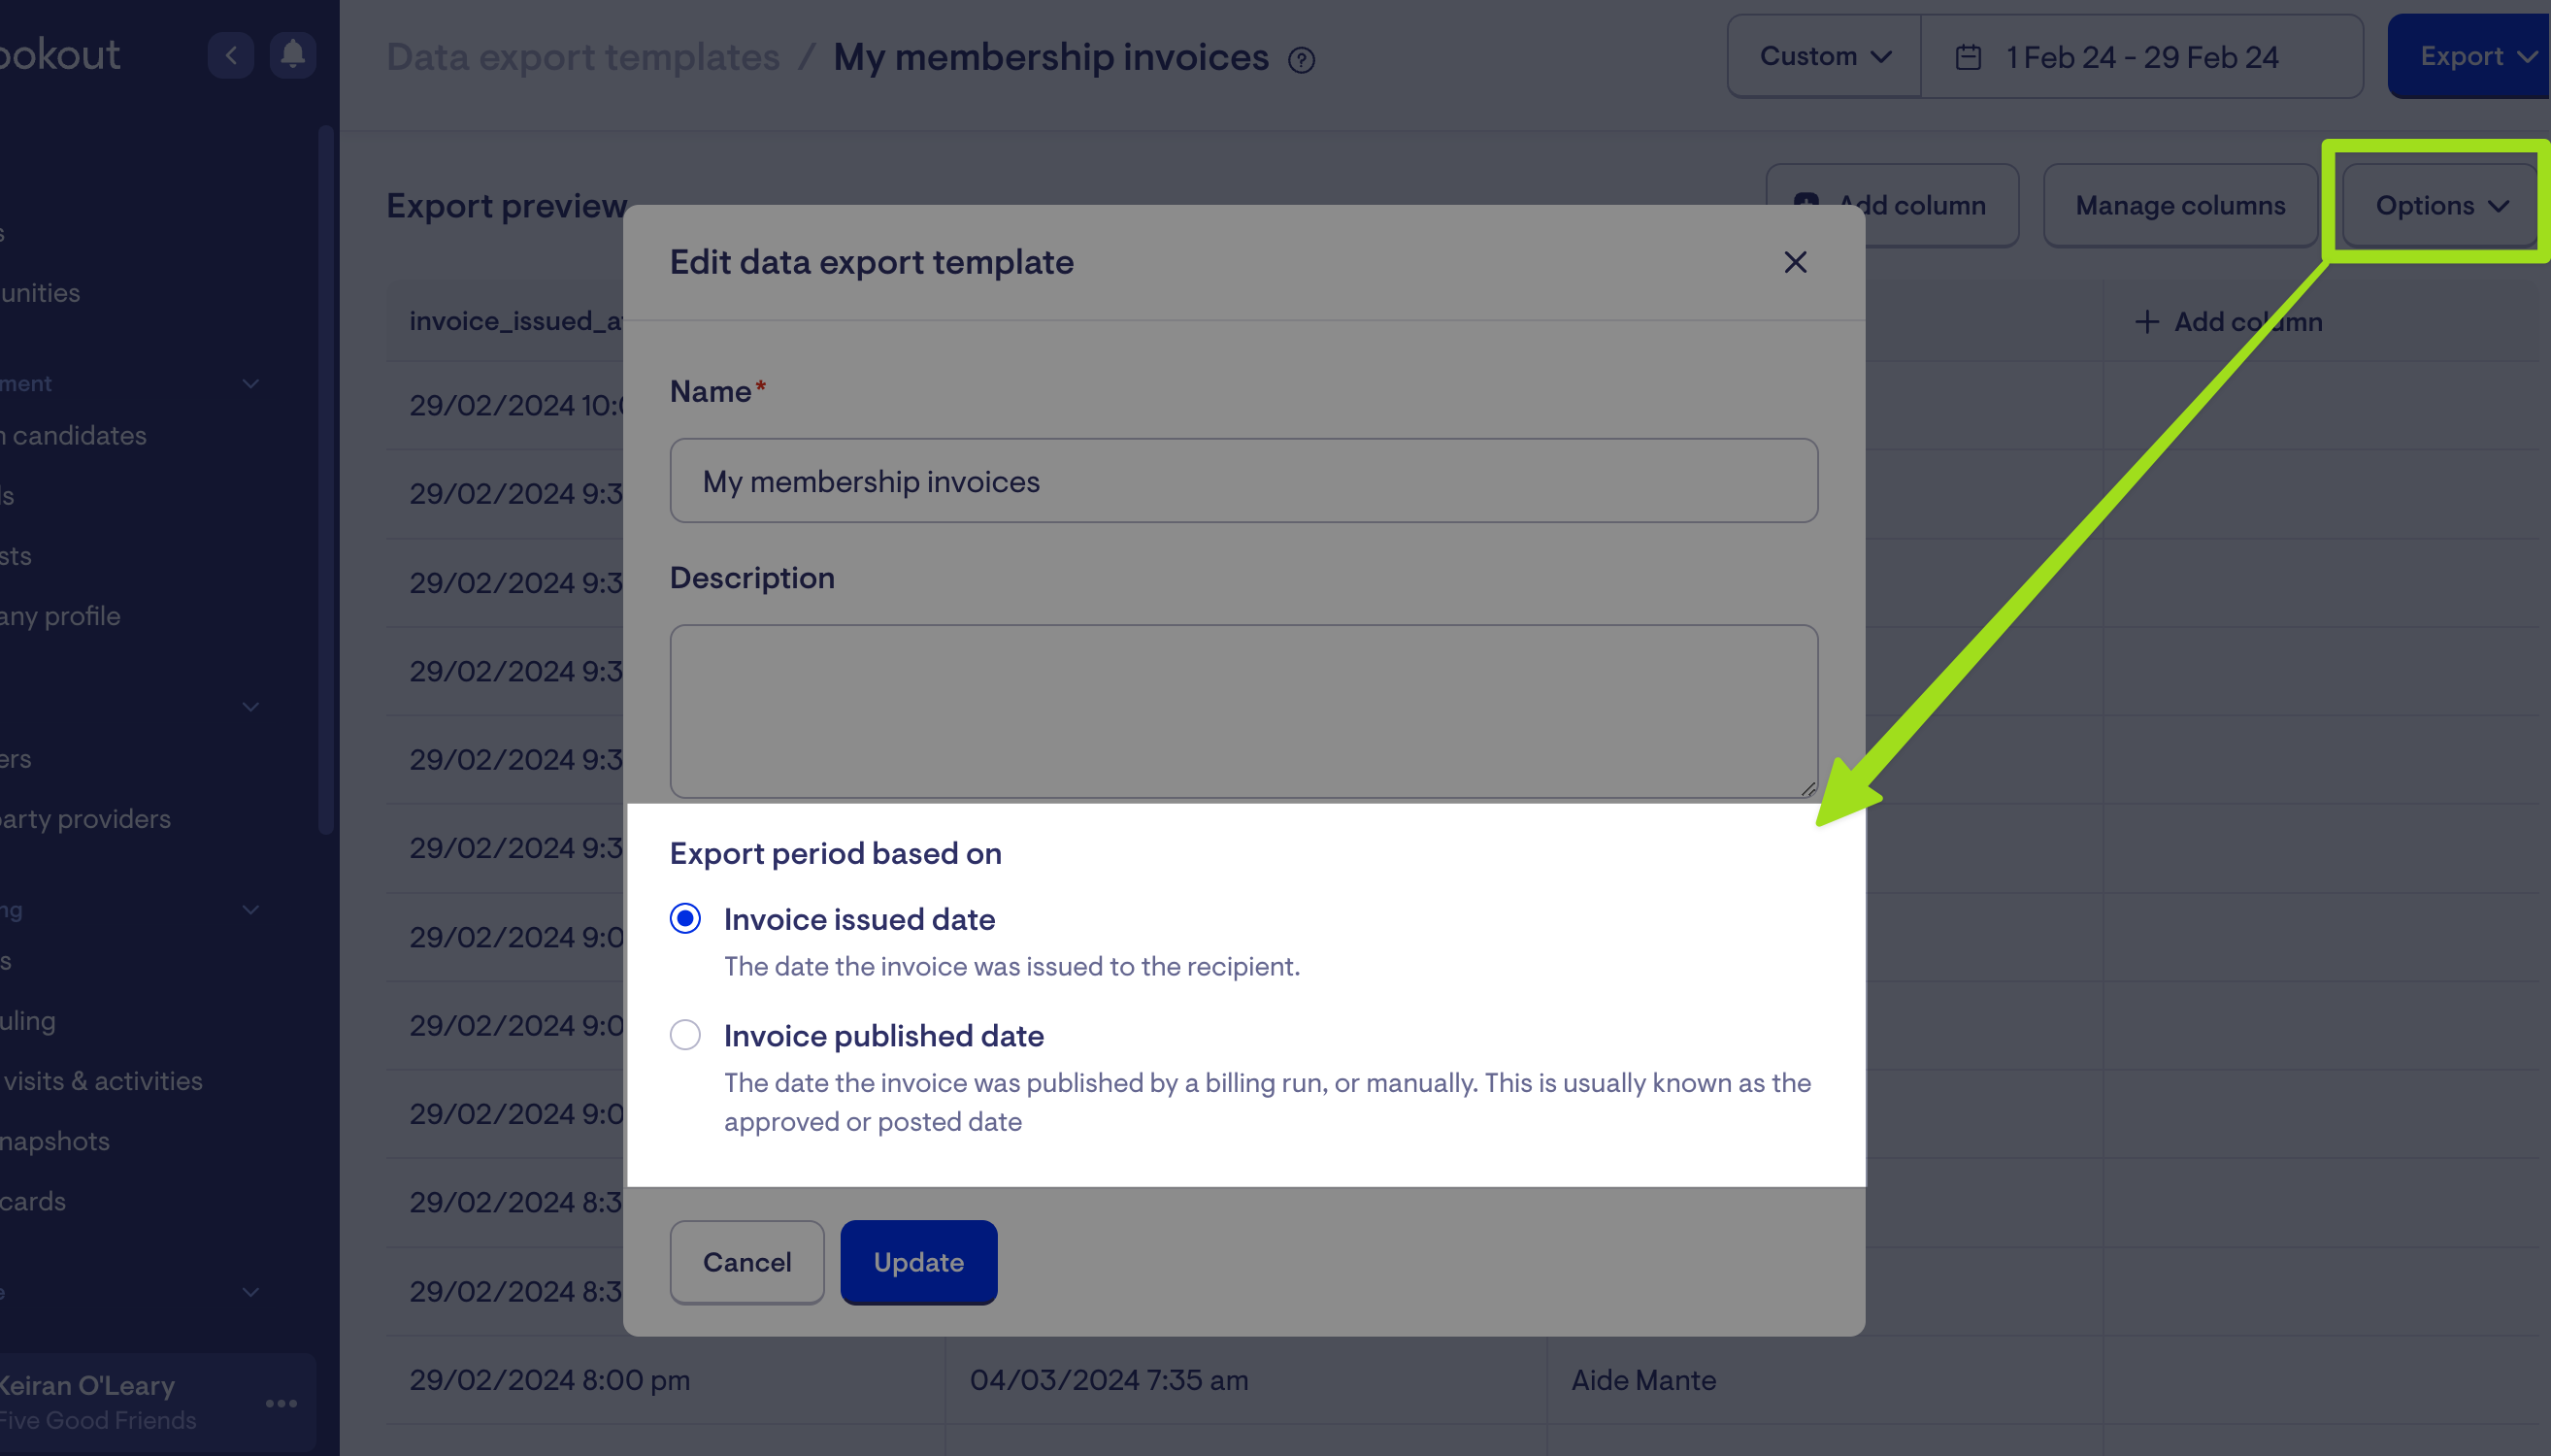
To make the changes, click Options > Edit Details and select the export period required.
New change logs 📓
HCP claim summary history
We've introduced a History auditing feature to enhance transparency in the Home Care Package claim summary. A log message will be displayed by default indicating who and when the claim period was last locked.
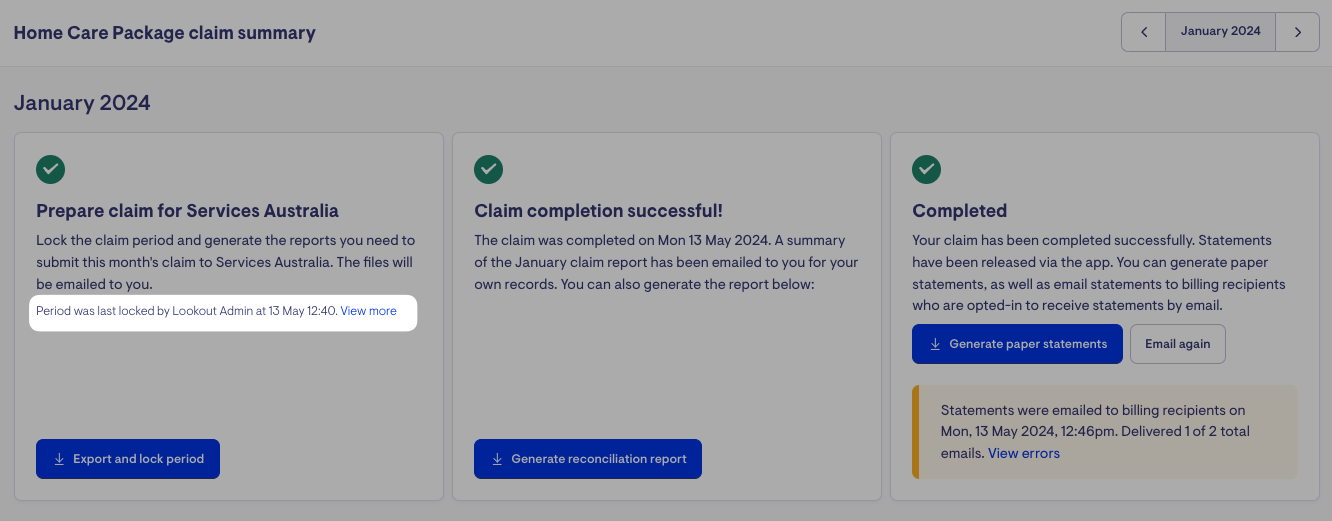
Clicking on the 'View more' link will take you to the History page, which provides detailed information on who updated the HCP claim and when. This history also captures when it was adjusted and finalised and when statements were delivered.
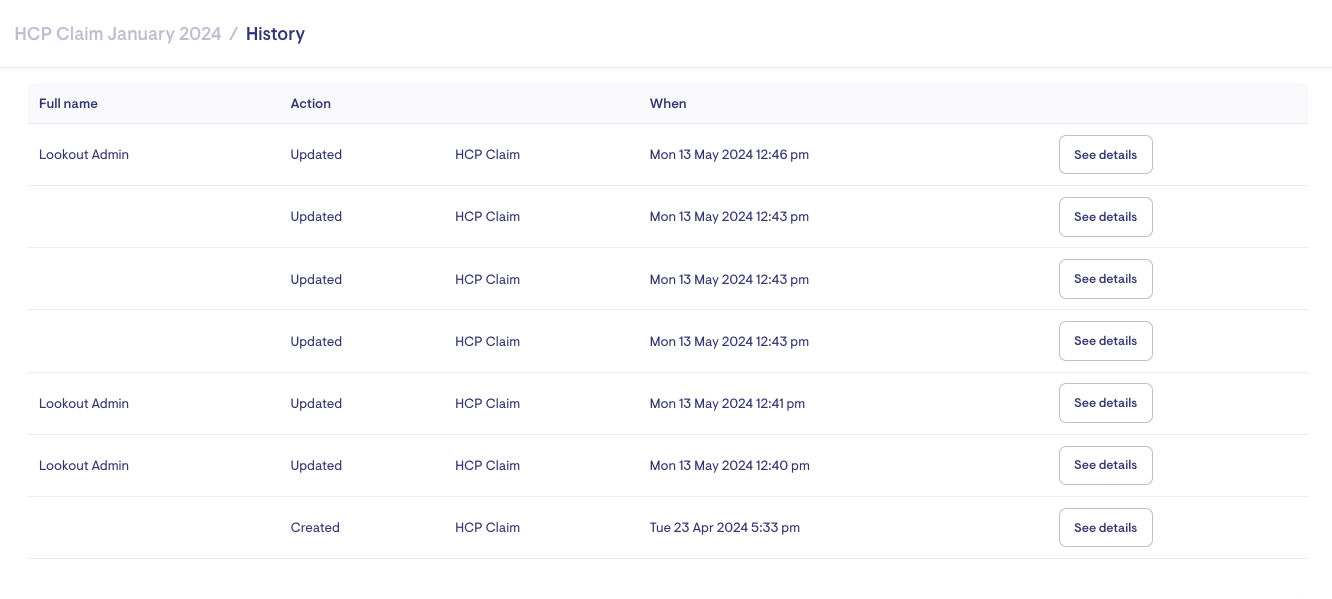
Logs will not be available for claims completed before the feature's release on 23 April, 2024.
Membership change log
You can now review the history of changes made to a membership, including its initial setup and subsequent modifications. This will give you insights into who made the update, what was altered, and precisely when each adjustment was implemented.
To access the revision history of a membership:
-
Open the Membership page
-
Navigate to the Settings tab
-
Click on 'Changes' to view the timeline of changes
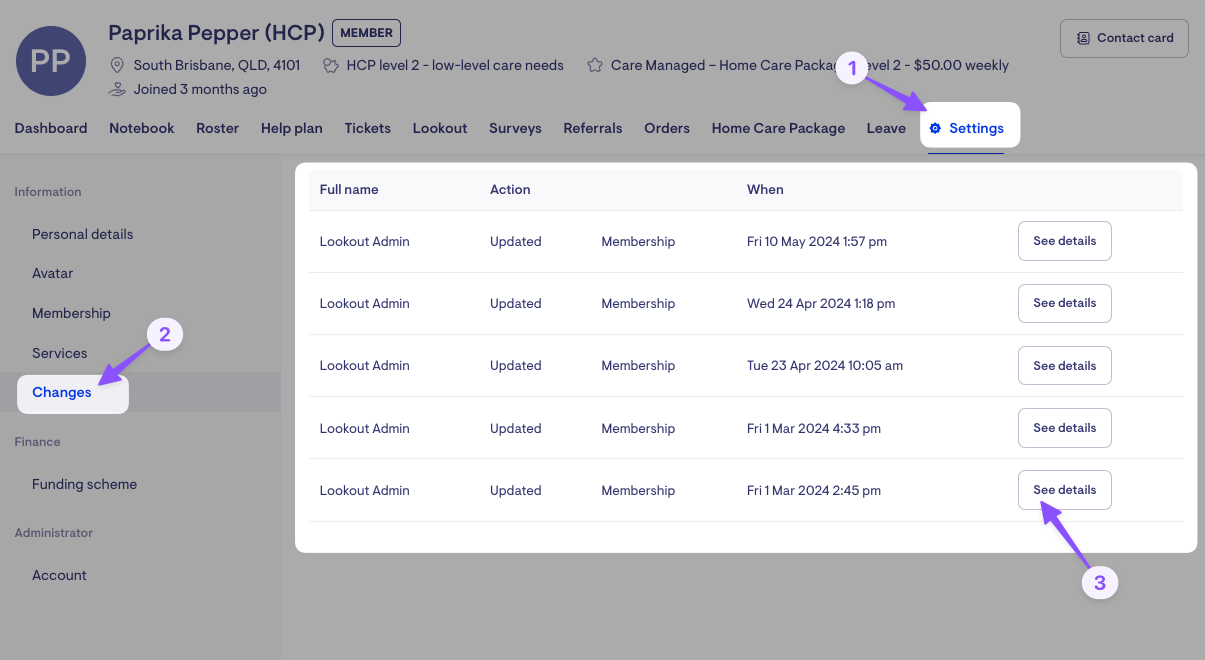
Click See details to learn about the changes made
Improvements
Group activity enhancements
Bulk archive time slots
Group activities can now be archived in bulk with the 'Archive timeslot and all after' option. Archiving a group visit will also cancel the visit on the helper and member rosters.
Archive a group activity by clicking the ellipses button > Archive next to the time slot you want to cancel
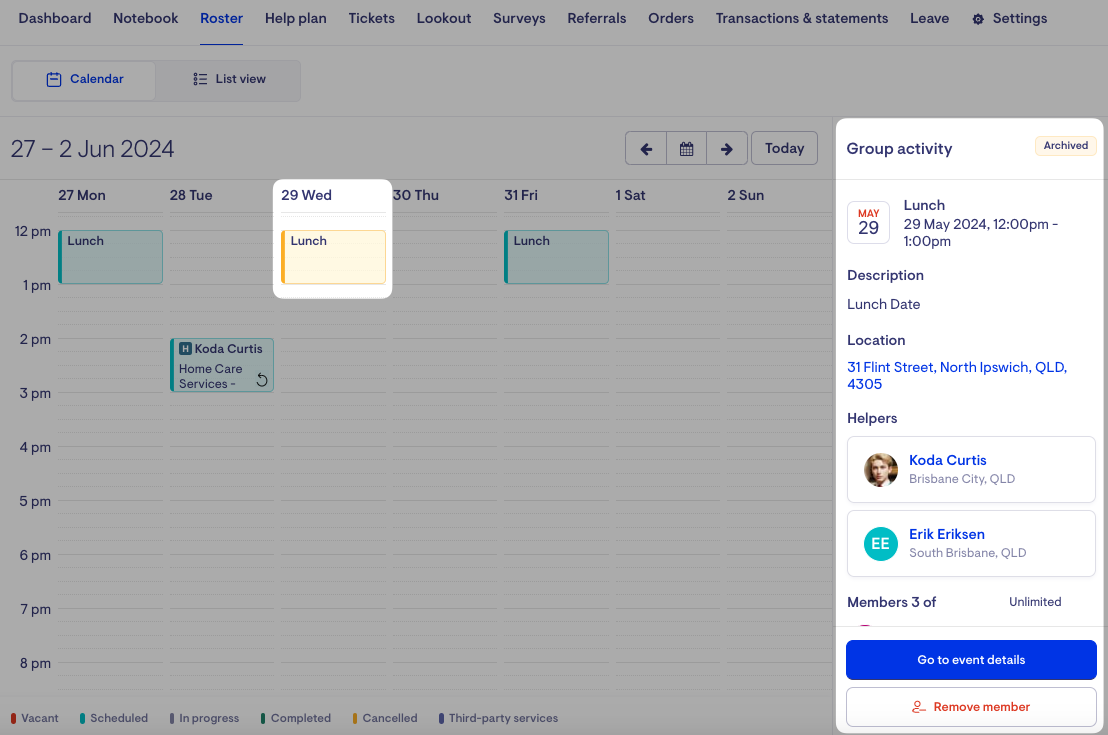
A cancelled group activity on the Calendar view of a Member's roster
It will also appear on the member's care app as a cancelled event. However, cancelled group activities will be removed from the helper's schedule page in the Care app, similar to cancelling a standard visit. Removing the member from the group activity will delete the visit from their roster and the Care app.
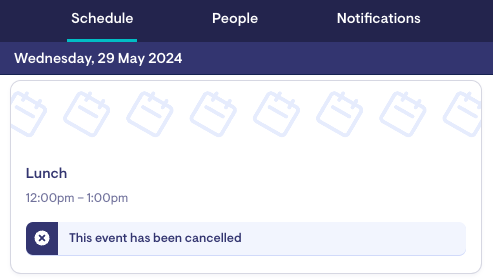
A cancelled group visit on the Member's Care app
In addition to bulk archiving, group visits on a Member's roster will now also change colour based on its status:

-
Green - indicates that an invoice has been generated for the member, even if it is still unpublished.
-
Orange - indicates that the event has been cancelled or archived.
-
Blue - indicates that the status is not one of the above and is the default colour once scheduled.
Add contractors to group visits
We have also added the ability to create contractor group visits. To support this, a new Member section has been included in the group visit Add Helper form. This section is distinct from the Members added as attendees to the group visit.
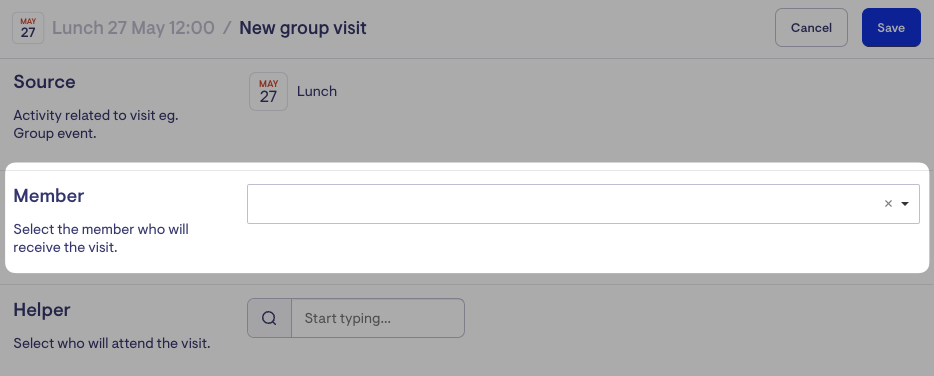
This new Member section determines who will fund the visit, ensuring contractors get paid through reports exported from Lookout (e.g., Helper invoices).
To add contractors to group visits:
-
Click 'Add Helper' within a group activity's time slot.
-
Add a "Corporate Member" as the recipient of the visit and select the contractor who will attend the visit.
-
Select the services performed during the visit and add the product (rate) that will determine how the visit will be charged.

-
Save the visit. The corporate member will not be included in the list of attendees but will instead be used to charge the company for the services provided by the contractor.
Note:
-
If you add a contractor but do not assign a Corporate Member, a warning will appear. This warning does not prevent you from saving the visit.

If contractor payments are handled outside of Lookout without relying from our reports, you can leave the Member section blank
-
If you are adding a helper with an employee engagement type, leave the Member section empty to avoid double-charging the member.

New Data Export Category and Columns
We have introduced a new HCP Daily Rates category to facilitate the creation of reports identifying member Income-Tested Fee (ITF) daily rates to support invoicing.
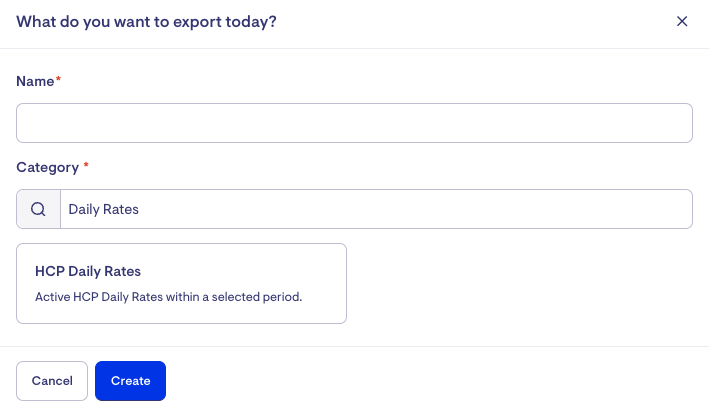
Check out the video below for a demo of how to create an ITF Daily Rates export:
Additional data columns can also now be used for the following Data Export categories:
Transactions
-
invoice_external_id - the Transaction invoice external ID (if applicable)
-
invoice_line_rate_names - the Transaction invoice line rate names (if applicable)
Visits
-
provider_travel_time_rostered—the rostered estimated travel time in seconds. Visits with the Provider travel setting set to 'No' will appear blank on the report.
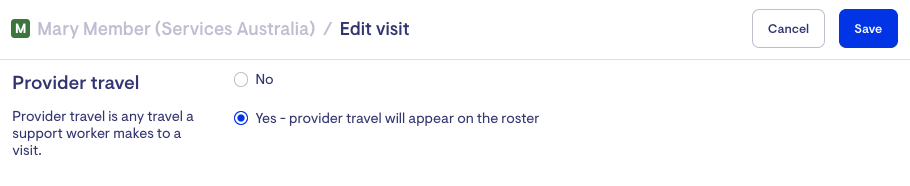
Provider travel settings when creating or editing a visit
Watch webinars
We recently hosted two educational webinars. If you missed them, you can watch the recordings below.
⚙️ How to unlock efficiency in home care with Lookout automations
Learn about Lookout's new automation feature to help your organisation automate a multitude of manual tasks and integrate with other applications.
📊How to use Lookout to support each phase of your data strategy
Understand how Lookout can help your organisation extract, display and leverage data to help optimise processes, drive efficiencies and support intelligent business decisions.
If you are interested in activating any of the solutions mentioned in these webinars, please reach out to a customer success representative.
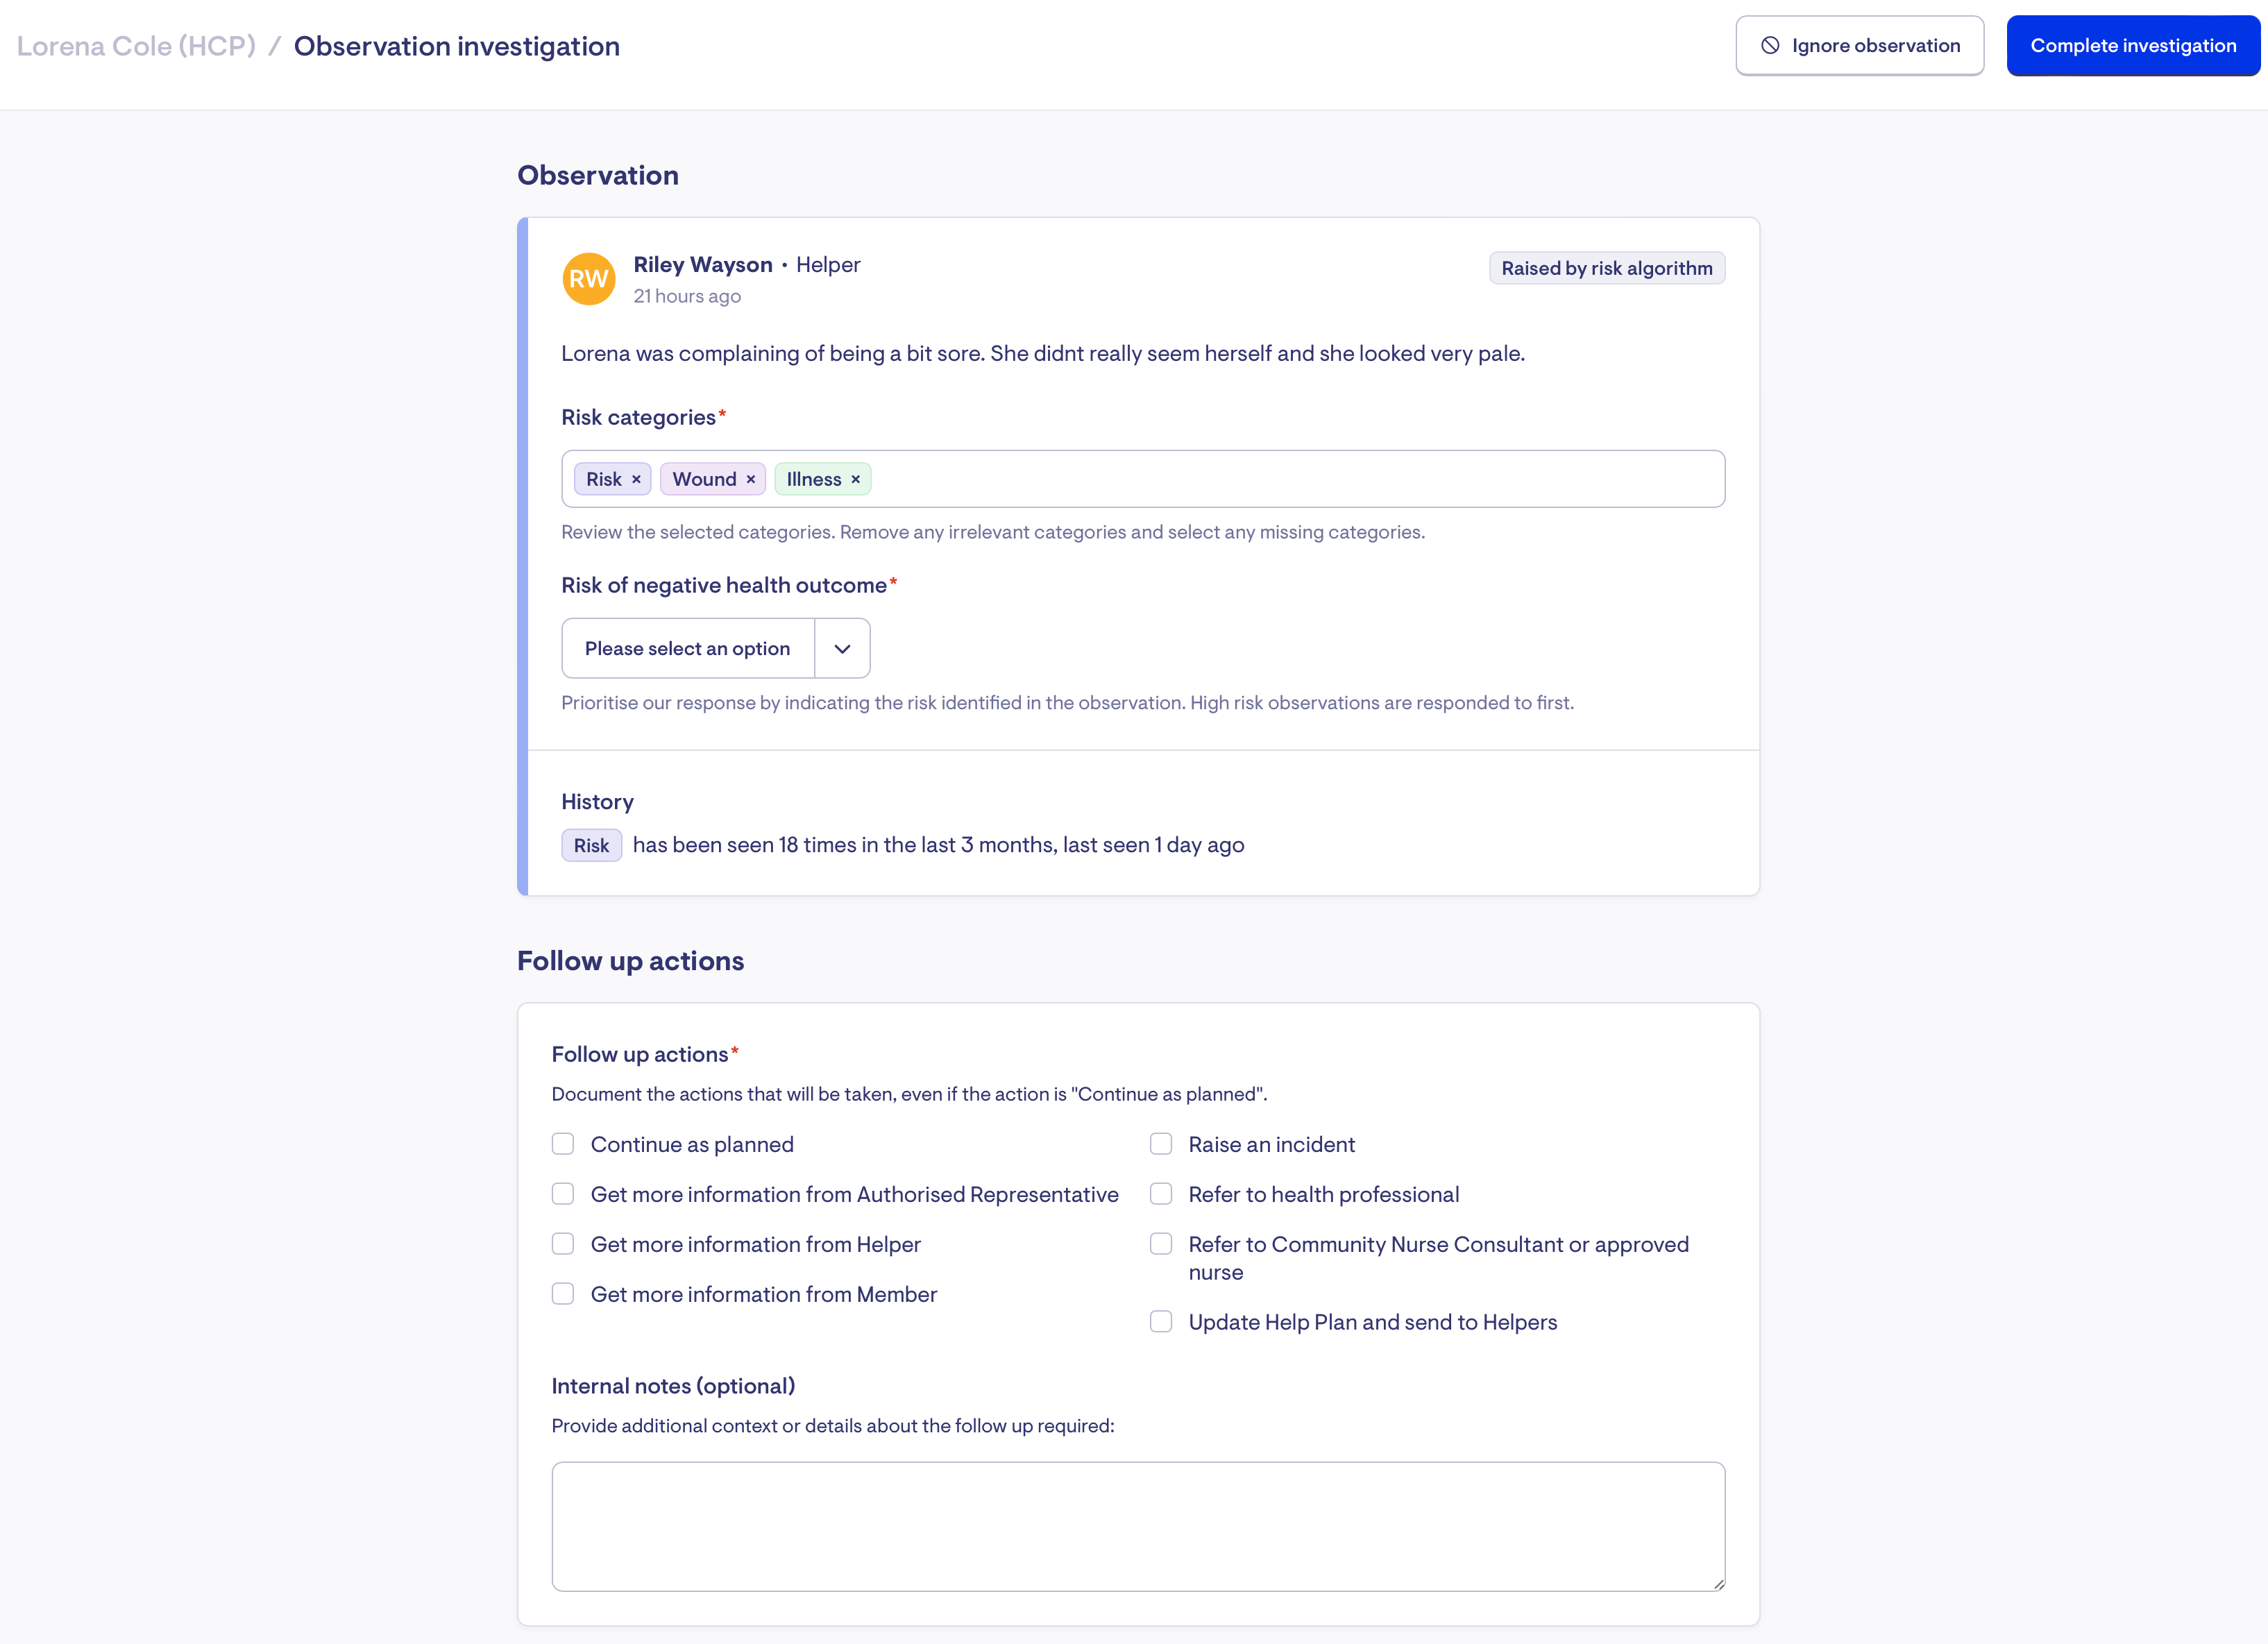
Observations UI enhancements
We've revamped our Observations feature with a fresh new look and enhanced functionality to elevate your experience. The updated User Interface (UI) is just the beginning—we're also working on significant improvements for next month to help you maximise the benefits of Remote Care Monitoring.