We can create personalized Bulk Invoicing Templates that cater to your funding scheme and service needs. These customised templates enable your team to efficiently and precisely input a considerable number of invoices into our system.
❗️The following steps require a Custom Bulk Invoicing Template. Contact Lookout if you would like to have a template configured.
Preparing the template file
Custom Bulk Invoicing Templates have two tabs that allow you to list all Members and Helpers. Adding Members and Helpers into these tabs enable staff to select the correct Member or Helper from a dropdown with the template.
From the main menu, select Finance and then Reports.
Download a copy of the Memberships Report and Helpers Report.
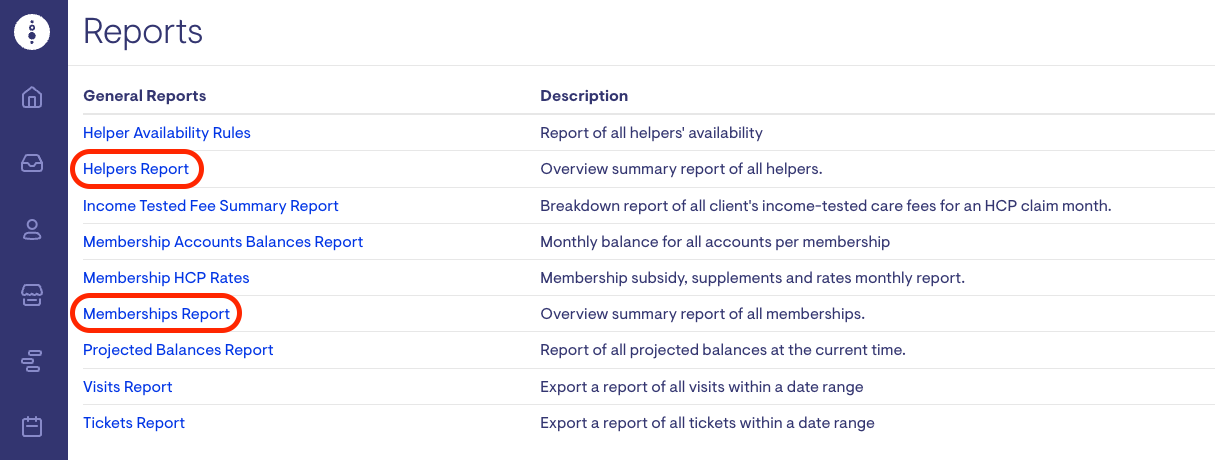
Once downloaded, past the entire report contents into the relevant tabs on the Bulk Invoicing Templates file.
-
Memberships Report is pasted into the 'Members' tab

-
Helpers Report is pasted into the 'Helpers' tab

Adding invoices to the template
Now that the Members & Helpers tabs have the most recent data from Lookout, you can select a template to add invoices. Depending on your funding scheme and workflow requirements, there may be multiple templates to select from.
❗️Any CHSP invoices must be added to a CHSP invoice template to ensure they appear in the DEX report.
Columns in each template are colour coded to indicate what data is required to generate an invoice.
🟢 = Required
🟡 = Optional
🔴 = Automatic
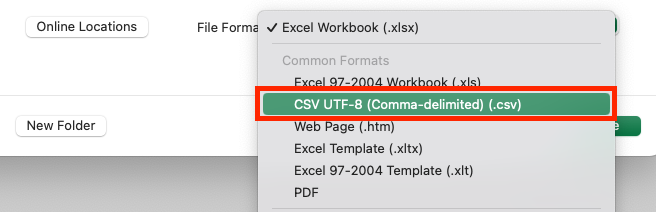
Once all invoices have been added to the template, the template can be saved.
❗️The template must be saved as a CSV file to ensure it can be loaded into Lookout.
Upload the invoices into Lookout
Once your template has been saved as a CSV file, it can be uploaded directly into Lookout using the Invoice Import functionality.
From the Finance tab, select Invoices and credit notes.
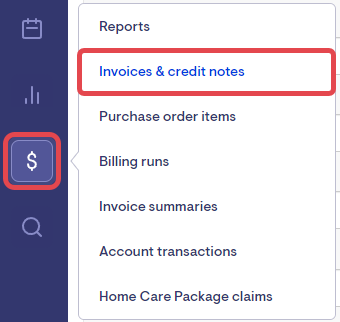
Click Import CSV in the top right to manage your imports.

Click New

Select Choose file and select the file to import.
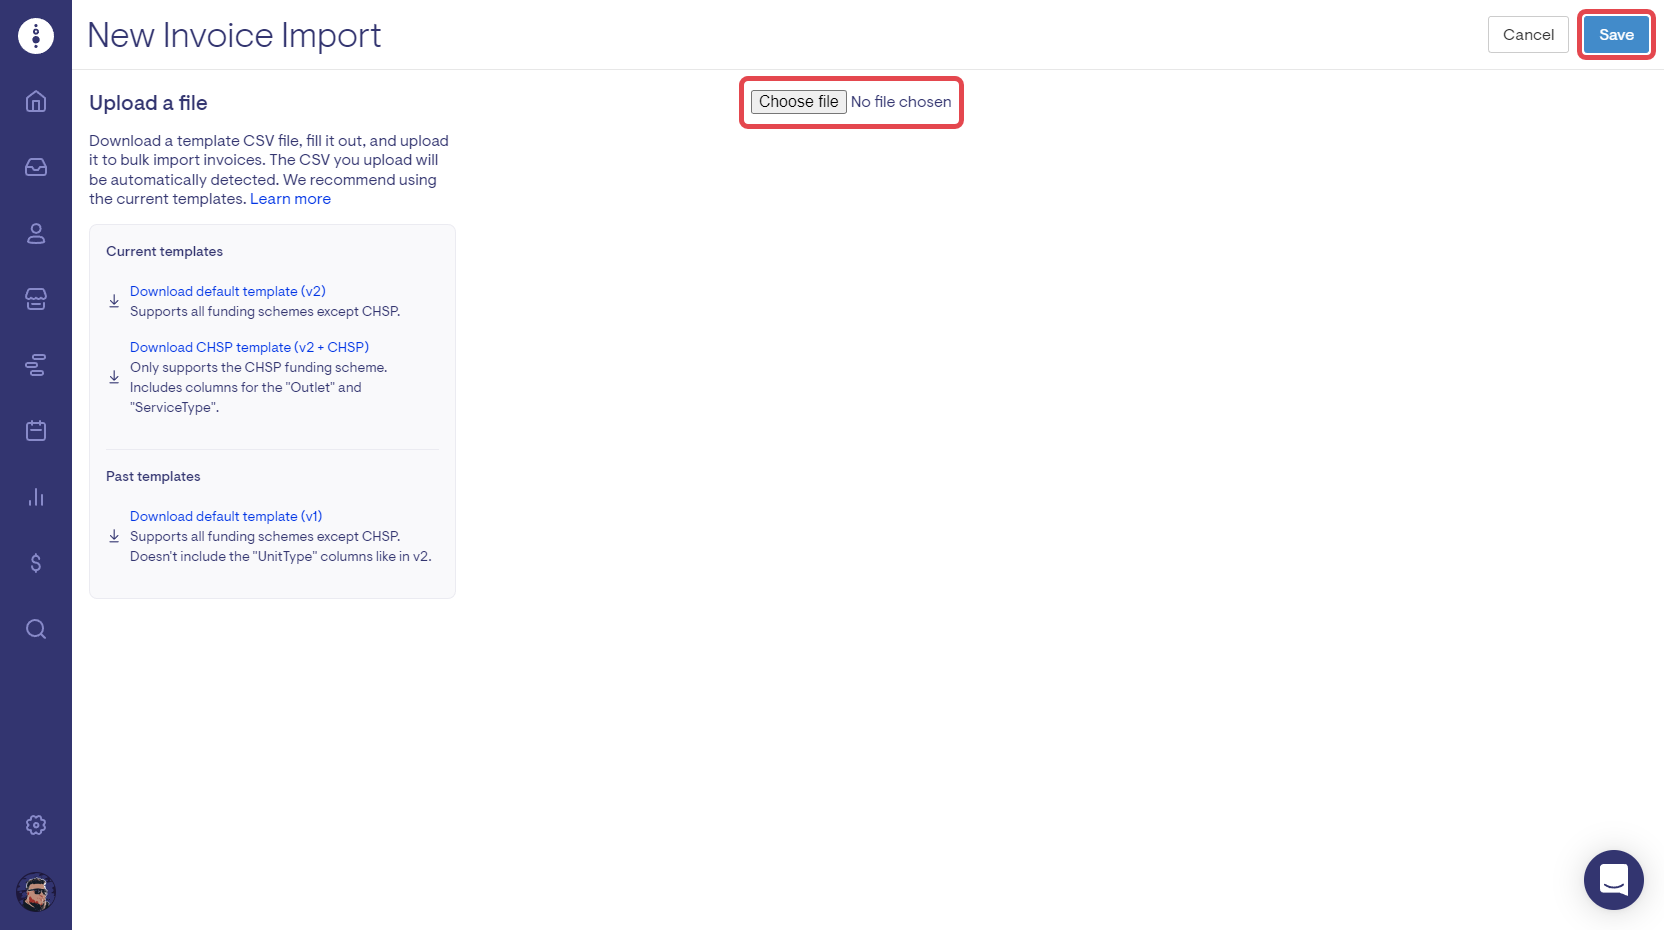
Click Save
You will receive an email when the CSV has finished processing. If errors are encountered while processing the CSV, these will be presented and must be fixed before the CSV can continue drafting invoices.
If the CSV imports successfully, the invoices will be in a draft state.
Click Publish to publish all the invoices associated with the import.
Invoices imported this way cannot be edited. Make edits in the CSV and re-upload if you find something wrong. This is to maintain a clean link between the source CSV and the final invoices.
FAQs
A member or a helper does not appear in the template dropdown
If the member or helper does not appear in the dropdown, they may have been added to Lookout since the Members or Helper tabs in the template were last updated. Please follow the Preparing the template steps to make sure the latest Member and Helper data is available within the template.