The geotagging feature allows your organisation to capture location data related to the check-in and check-out of a visit conducted by a worker using a native (iOS or Android) Lookout app. When enabled, a time and location stamp is captured during the worker's check-in and check-out. This data is accessible in Lookout admin and can be used for auditing and other review purposes.
The geotagging feature is an optional configuration that can be turned on by a company setting. There is no cost to enable this feature. Once enabled, all support workers will be asked to allow location permissions for Lookout.
After granting this permission to the app, no further action is required by the support worker as the location and timestamp will be gathered automatically when they check-in and check-out of future visits.
Learn more: allowing location services in the worker app
💬 For more information about turning on the geotagging company setting, please contact your Lookout representative.
Jump to:
How we report on locations inside Lookout
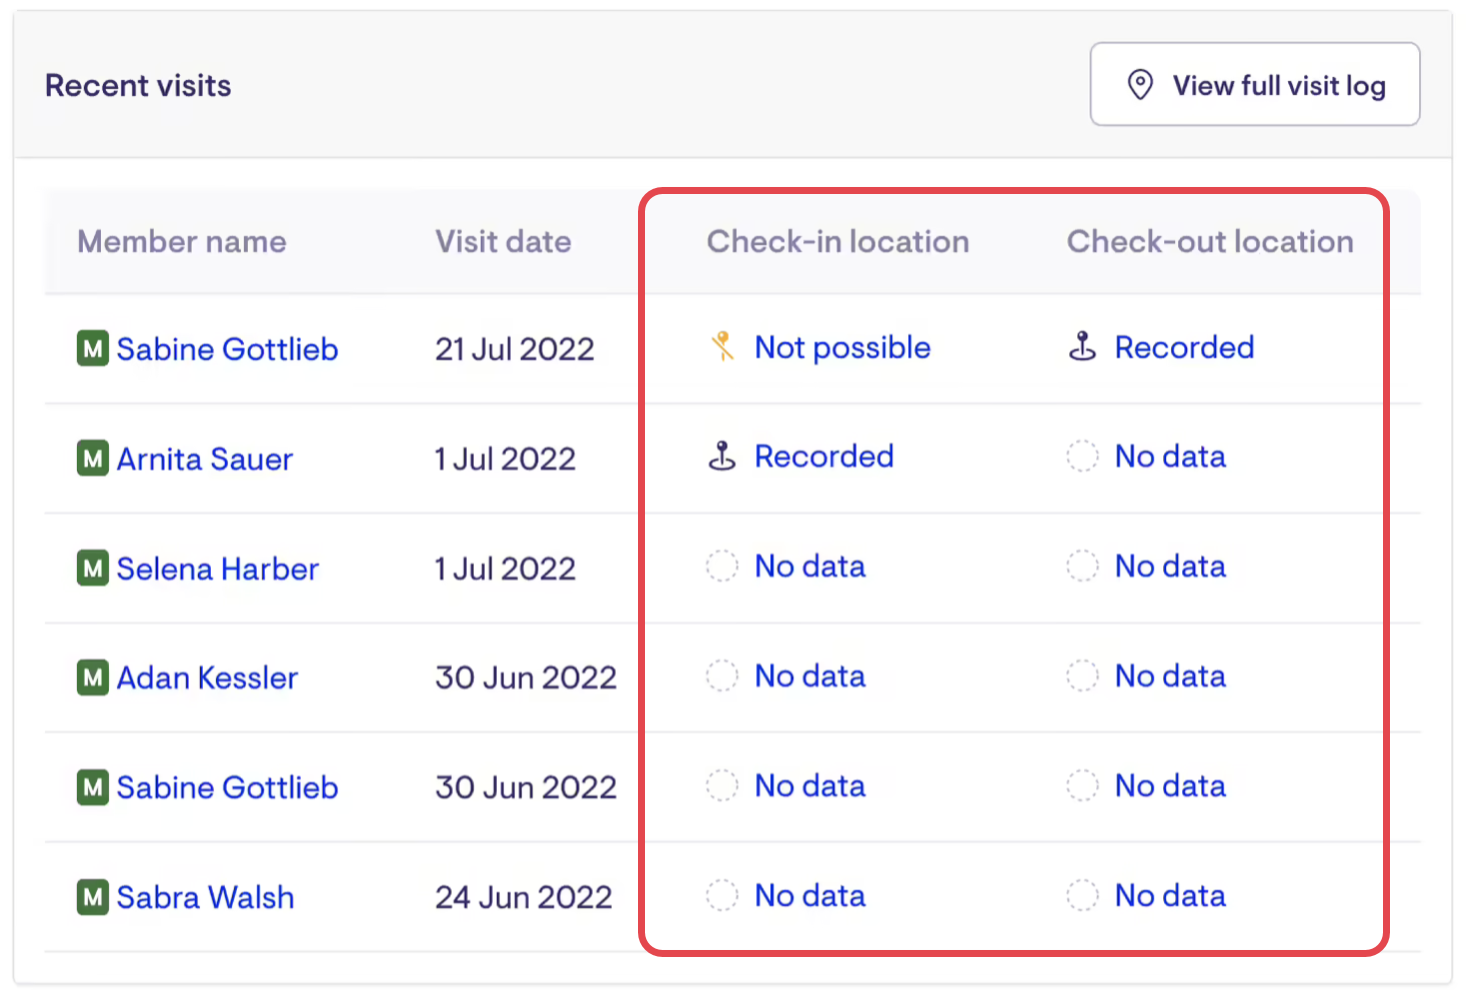
We have four states that are reported on.


Where you will see the geotagging information in Lookout
You will be able to view the the check-in and check-out data from several locations in Lookout.
From the helper dashboard you can see check-in and check-out details under Recent Visits.
From the helper Visit log tab.

From the Punchcards dashboard under the Rostering tab.

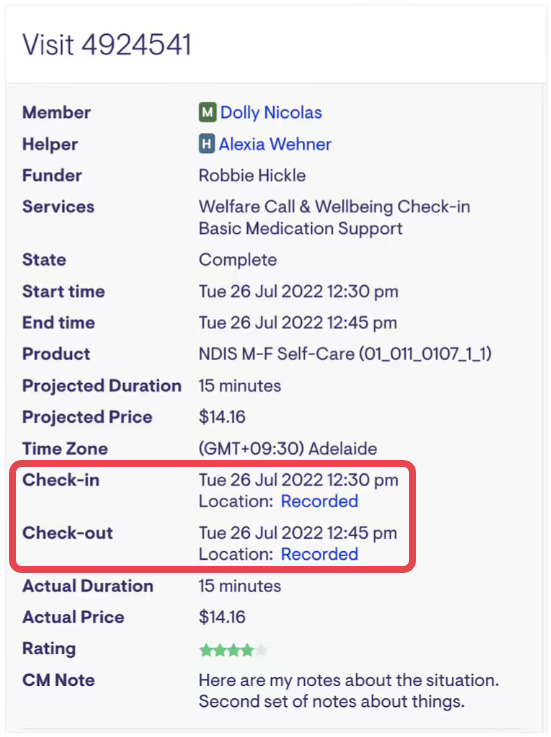
Finally, from the Visit details panel.
Understanding the Visit log details modal
You can open a detailed view of the check-in and check-out location data by selecting the relevant check-in or check-out record. (Denied, Not possible, No data and Recorded)
When location data has successfully been recorded for both check-in and check-out you will see a Visit log modal with a map for both check-in and check-out. Example:
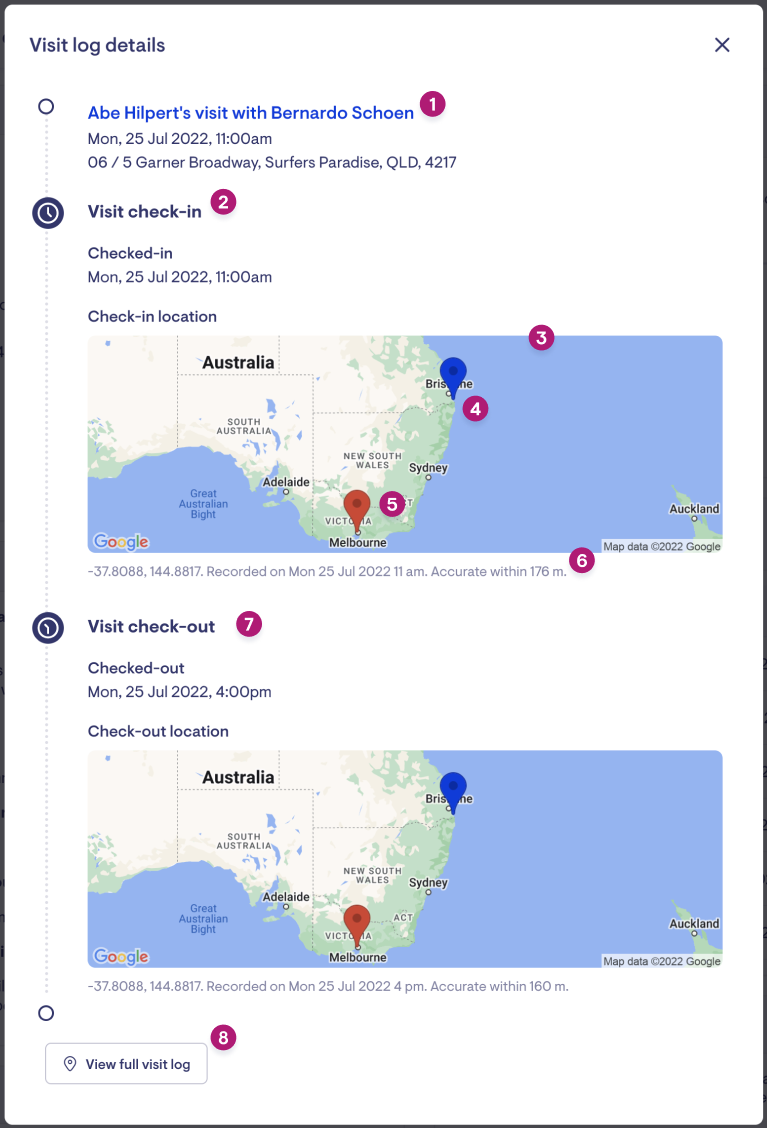
Key:
-
Title of the helper's visit with the member (this will open the full visit details).
-
Check-in details, including check-in time.
-
Static Google map. Shows a marker at helper location on check-in/check-out and a marker for the recorded member address. This map is a link to an interactive Google map page, which shows the distance and directions between the two points. Example:

-
The blue pin is the Member's address map marker.
-
Visit check-in/check-out location map markers (red pins).
-
Recorded location details.
-
Check-out details.
-
Button to see the helpers full visit log for all visits.
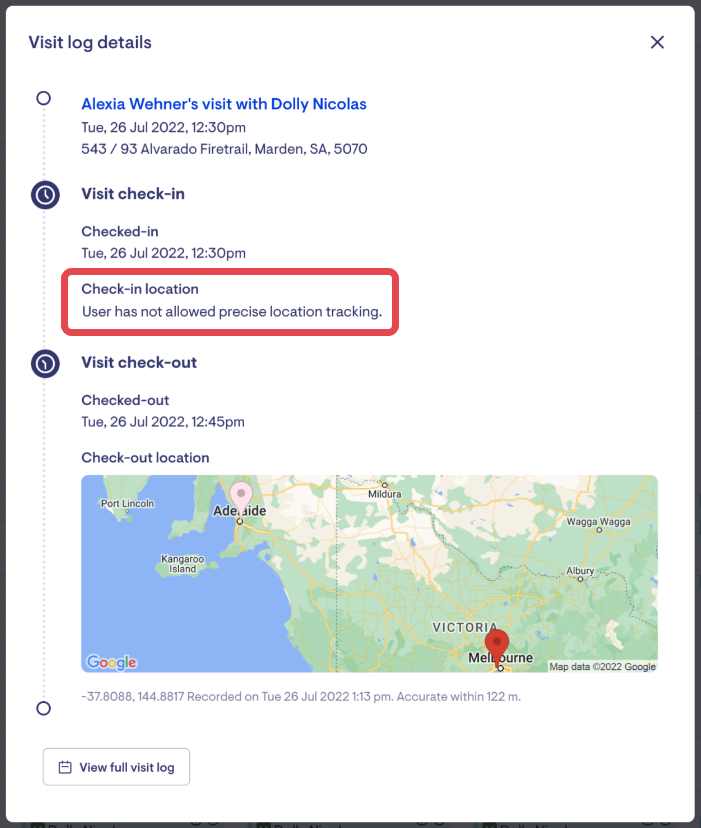
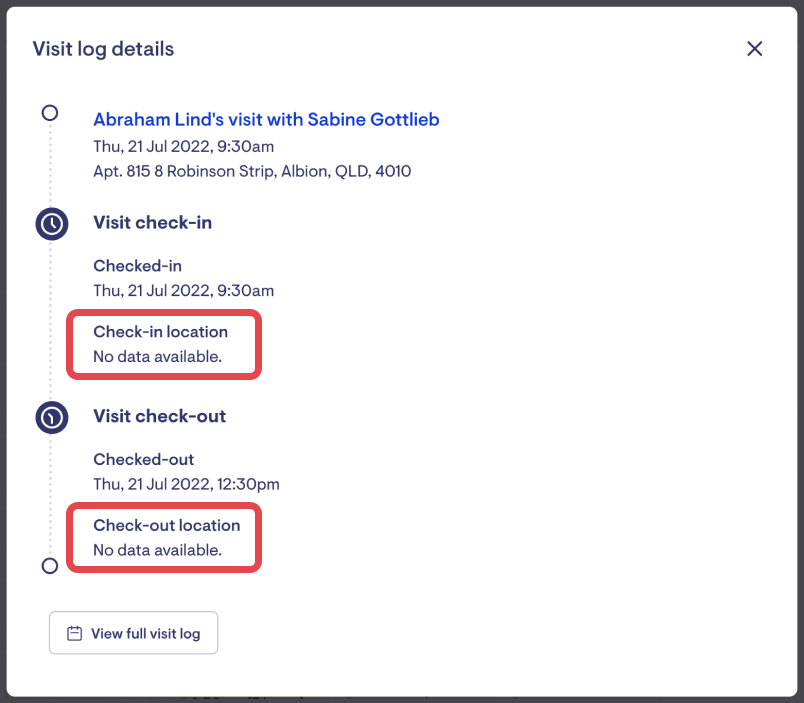
If no data has been be recorded for either check-in or check-out the map is replaced with a description of the reason why the location data has not been recorded.
The example below is what the Visit log details modal will display if no check-in location data has been recorded, but check-out location data has been successfully recorded.
The example below is what the Visit log details modal will display if no check-in or check-out location data was recorded.
FAQs
We want to use this feature but aren't yet. What do I need to do to turn this on for my organisation?
The geotagging feature can be toggled within your Helper Settings.
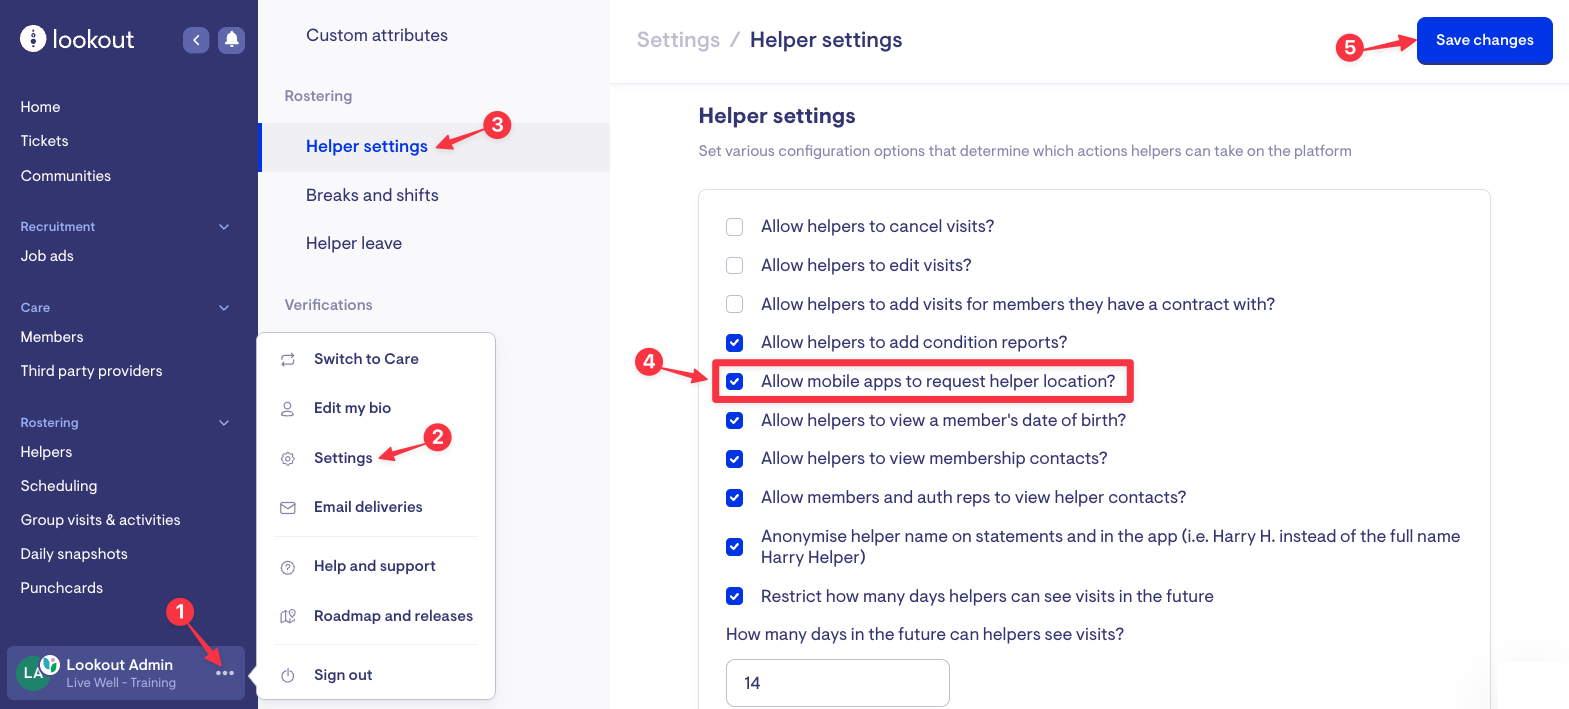
Once this setting is enabled, your Admin environment will include the new geotagging elements. Your Support Workers will also be asked to grant the app location permissions the first time they check in for a visit after the setting is turned on.
What do our Support Workers need to do to get this turned on?
Once the company setting is enabled, your Support Workers will need to grant location permissions to the app. Support Workers should check to make sure they have the latest version of the app, which they can do by going to the app store and checking for an update. So long as they have the latest version, at some point, their app will detect the change and request permissions. Support Workers should follow the prompts and allow location tracking.
Once they allow location permissions, what do our Support Workers need to do?
Nothing! Granting location permissions is the only action your workers need to take - once these are enabled, they will check-in and check-out of visits as normal. Geotagging will happen automatically in the background.
To ensure accurate data, it is recommended that workers check-in and check-out using their native device (e.g. smartphone) at the location and time of the visit. In other words, check-out at the visit site as soon as the visit is complete rather than later at a different location. You can learn more about enabling location services in the Lookout app here.