Tickets can be used for any task that needs to be tracked, communicated about, or even just to remind yourself about something you have to do.
If the same tasks need to be actioned regularly, you can create Ticket Templates. The Ticket Templates can be grouped with similar tasks by creating Ticket Categories.
In the Ticket Inbox, tickets can be viewed by a particular Ticket Category.
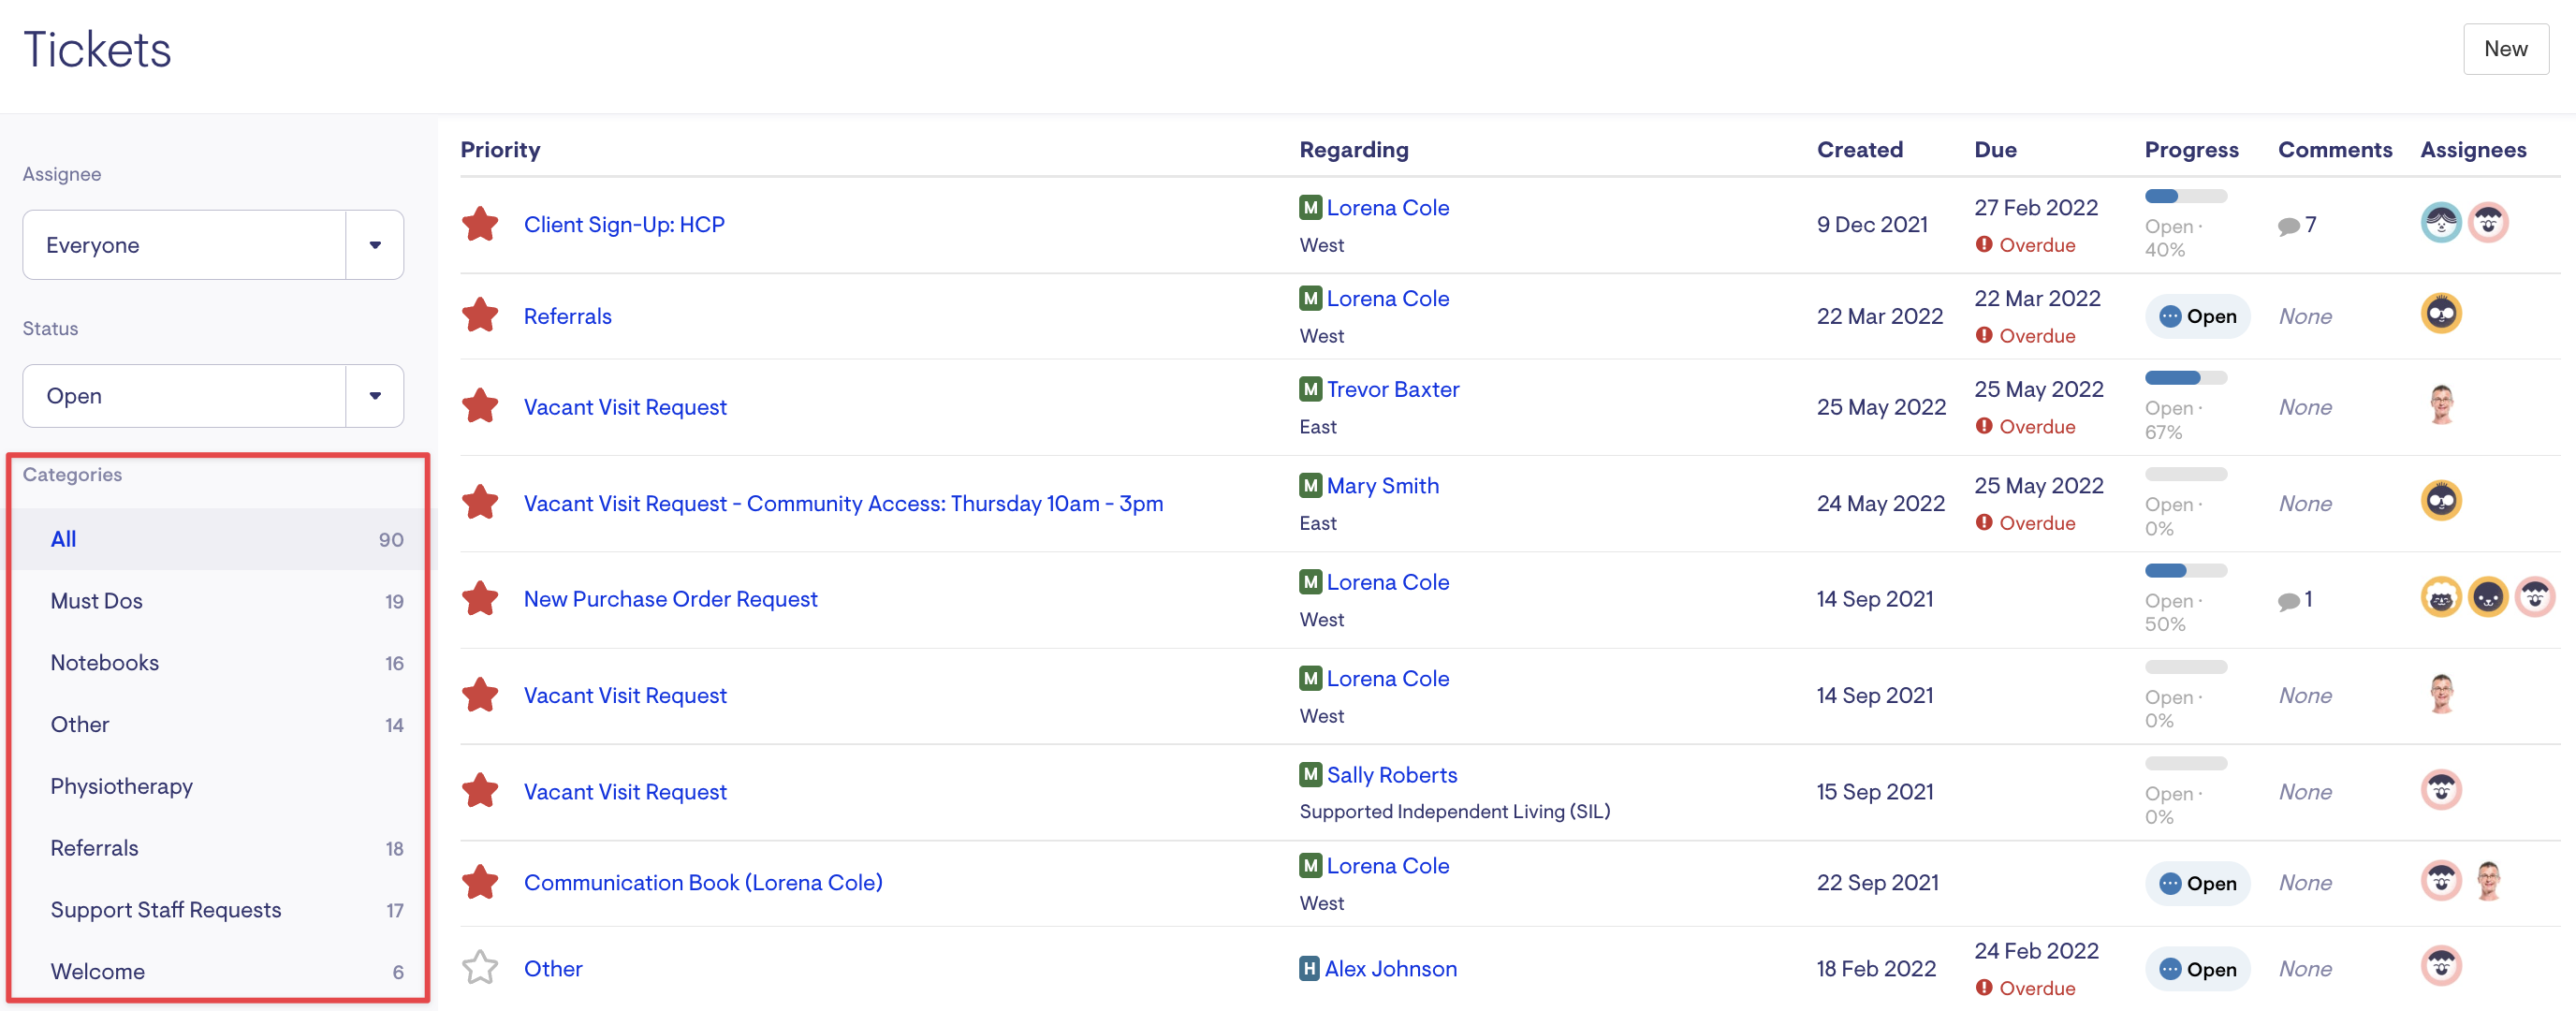
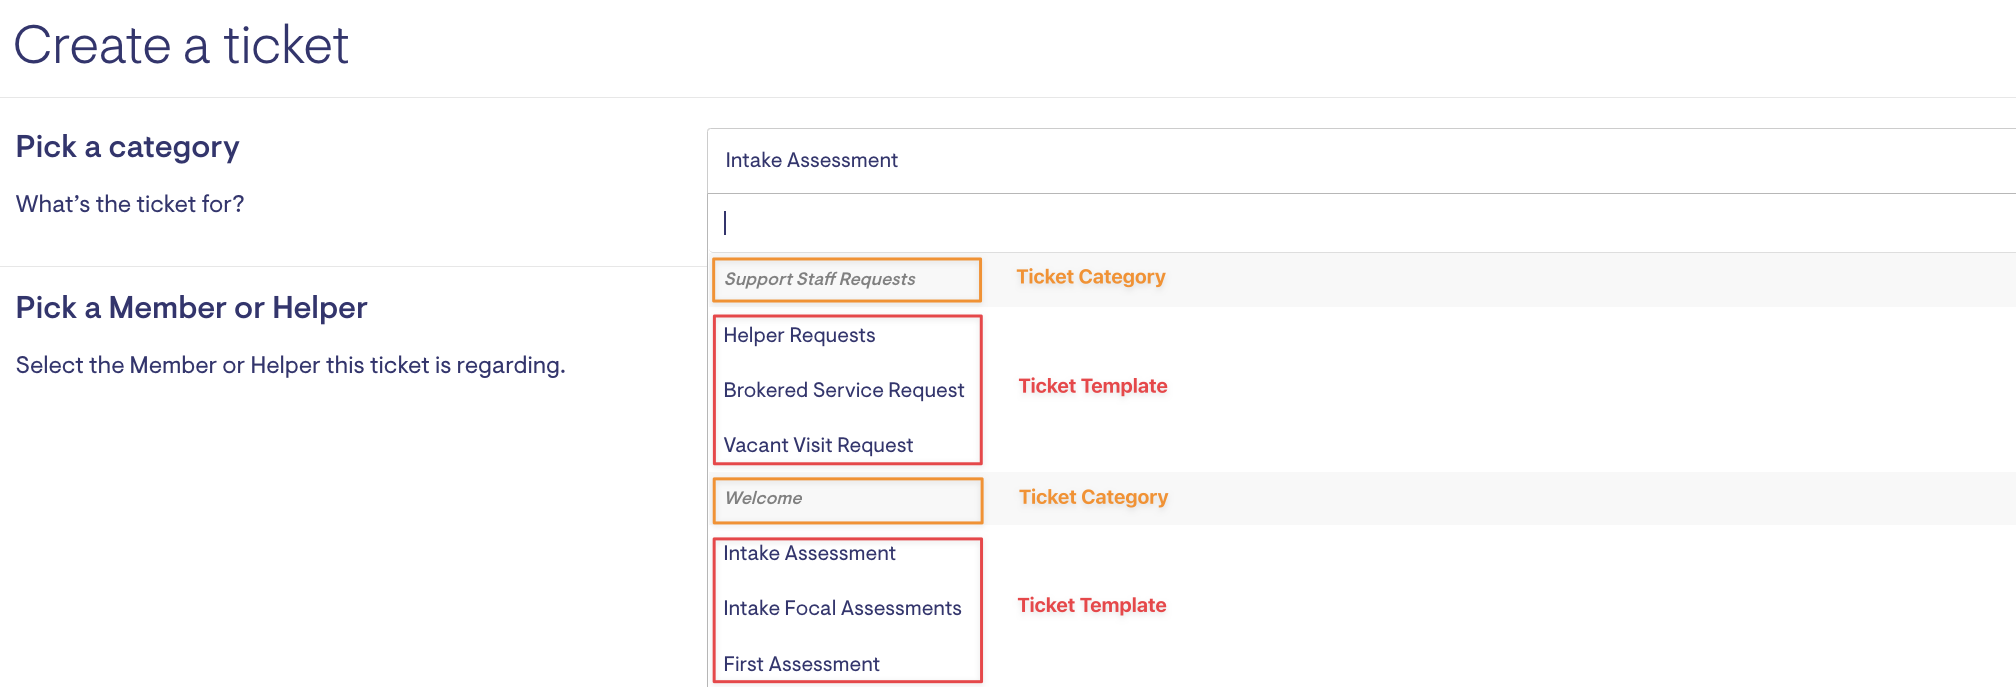
When creating a new ticket from the Ticket Inbox, the Ticket Category will group the Ticket Templates.
Jump to:
Creating a Ticket Category
-
Select the Settings icon from the main menu bar

-
Under Tickets select Ticket categories
-
Select New ticket category
-
Enter the Name of the new ticket category

-
Select Save
Creating a Ticket Template
-
Select the Settings icon from the main menu bar

-
Under Tickets, select Ticket templates
-
Select New ticket template

-
Select the applicable Ticket category from the dropdown list
-
Enter the Name of the Ticket Template
-
Enter the description, insert links or add attachments into the Note section. If you would like particular information to appear on the ticket enter it here, otherwise you can also keep it blank.
-
If applicable add the Assigned roles

-
The Assigned role will select the applicable Staffer/s based on the role set in the community

-
-
If applicable add the Assignee
-
To add Tags to Ticket Templates, please reach out to The Lookout Way to create these for you. We are working on being able to create tags within Admin!

-
Select Save
-
After saving the new Ticket Template, the Todos section will now appear.

-
Select Add a new todo
-
Add the Title and the Note, include any links or attachments
-
Select Save


-
The Todos will appear on the ticket as a Checklist

-

Editing a Ticket Category
-
In the Settings, select Ticket Categories
-
On the right-hand-side of the applicable Ticket Category, select Edit

-
Edit the Ticket Category Name

-
Select Save
Note: This will also update the ticket category name for all existing tickets attached to the original ticket category name.
Editing a Ticket Template
-
In the Settings, select Ticket templates
-
Select the applicable Ticket template name highlighted in blue

-
Select Edit

-
Note: The Todos can be updated before selecting Edit.
-
-
Once you have made the necessary changes, select Save

Note: Existing tickets won't be updated with the changes.