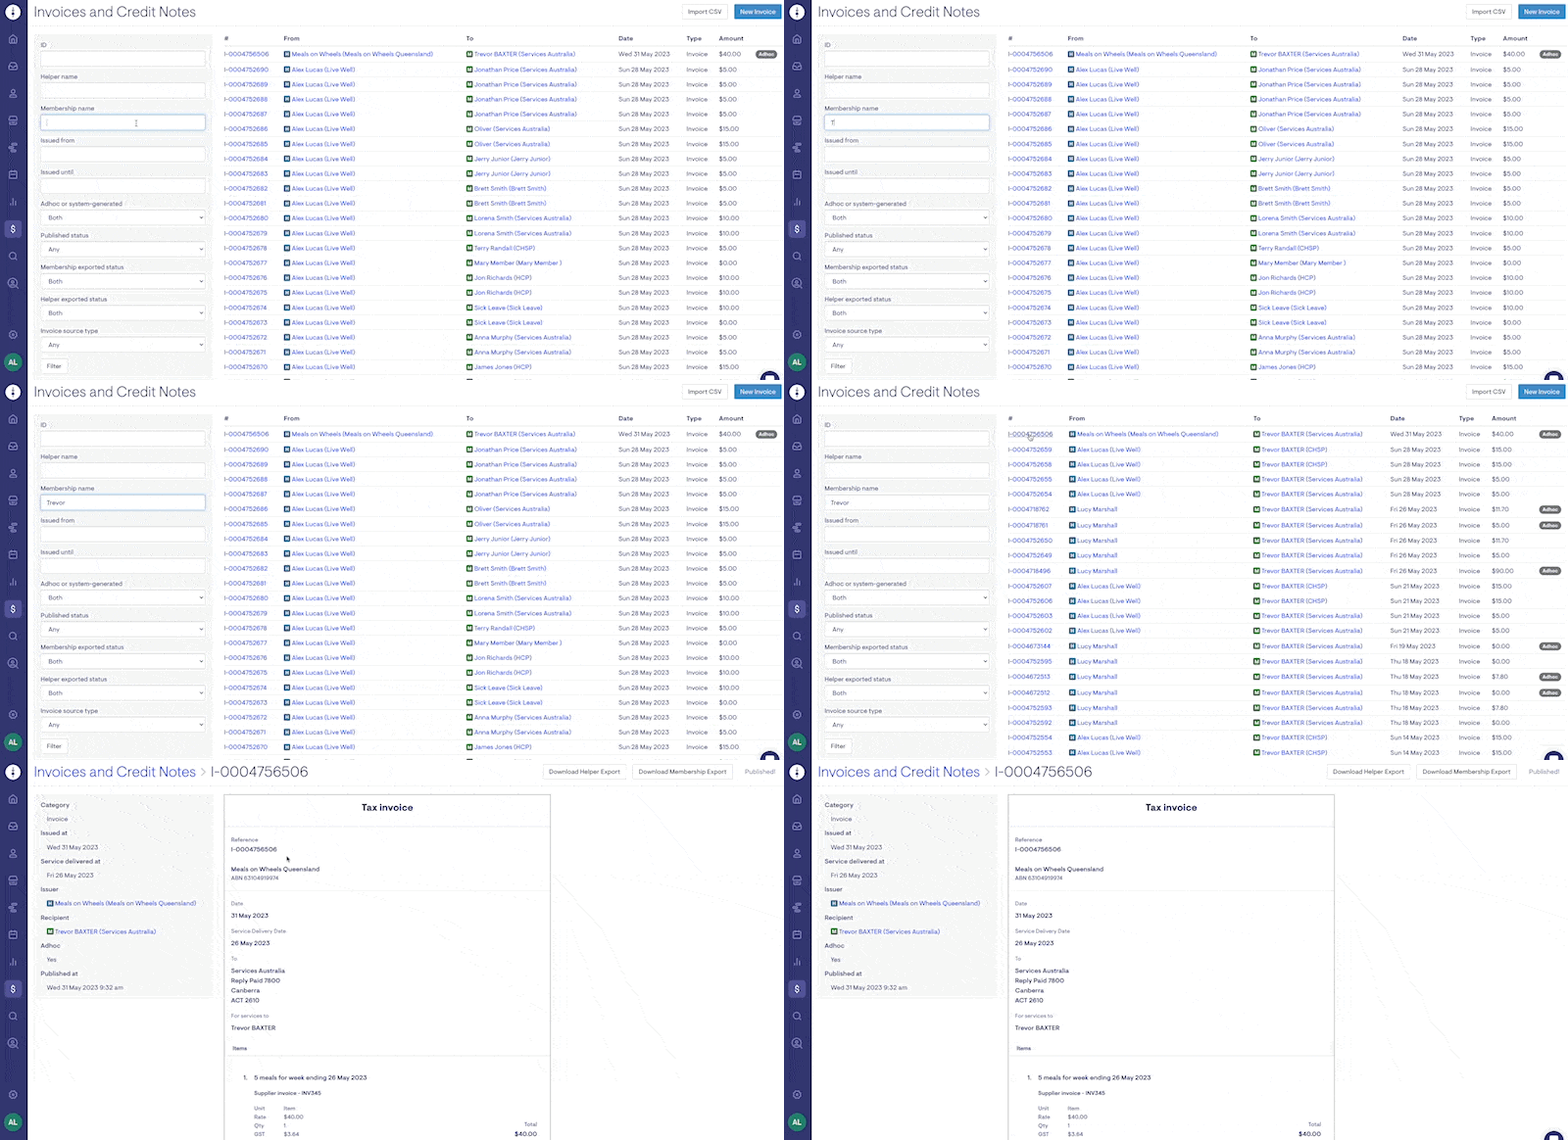
Invoices and Credit Notes
Adjustments can be made by creating ad-hoc invoices or credit notes
Users with the finance role can generate ad-hoc invoices or credit notes on behalf of Helpers, third-party providers, or the Company for things like expenses and promotions.
Finance users can also make corrections to visits in the past and generate the necessary invoices and credit notes to reflect those corrections.
Adding an invoice
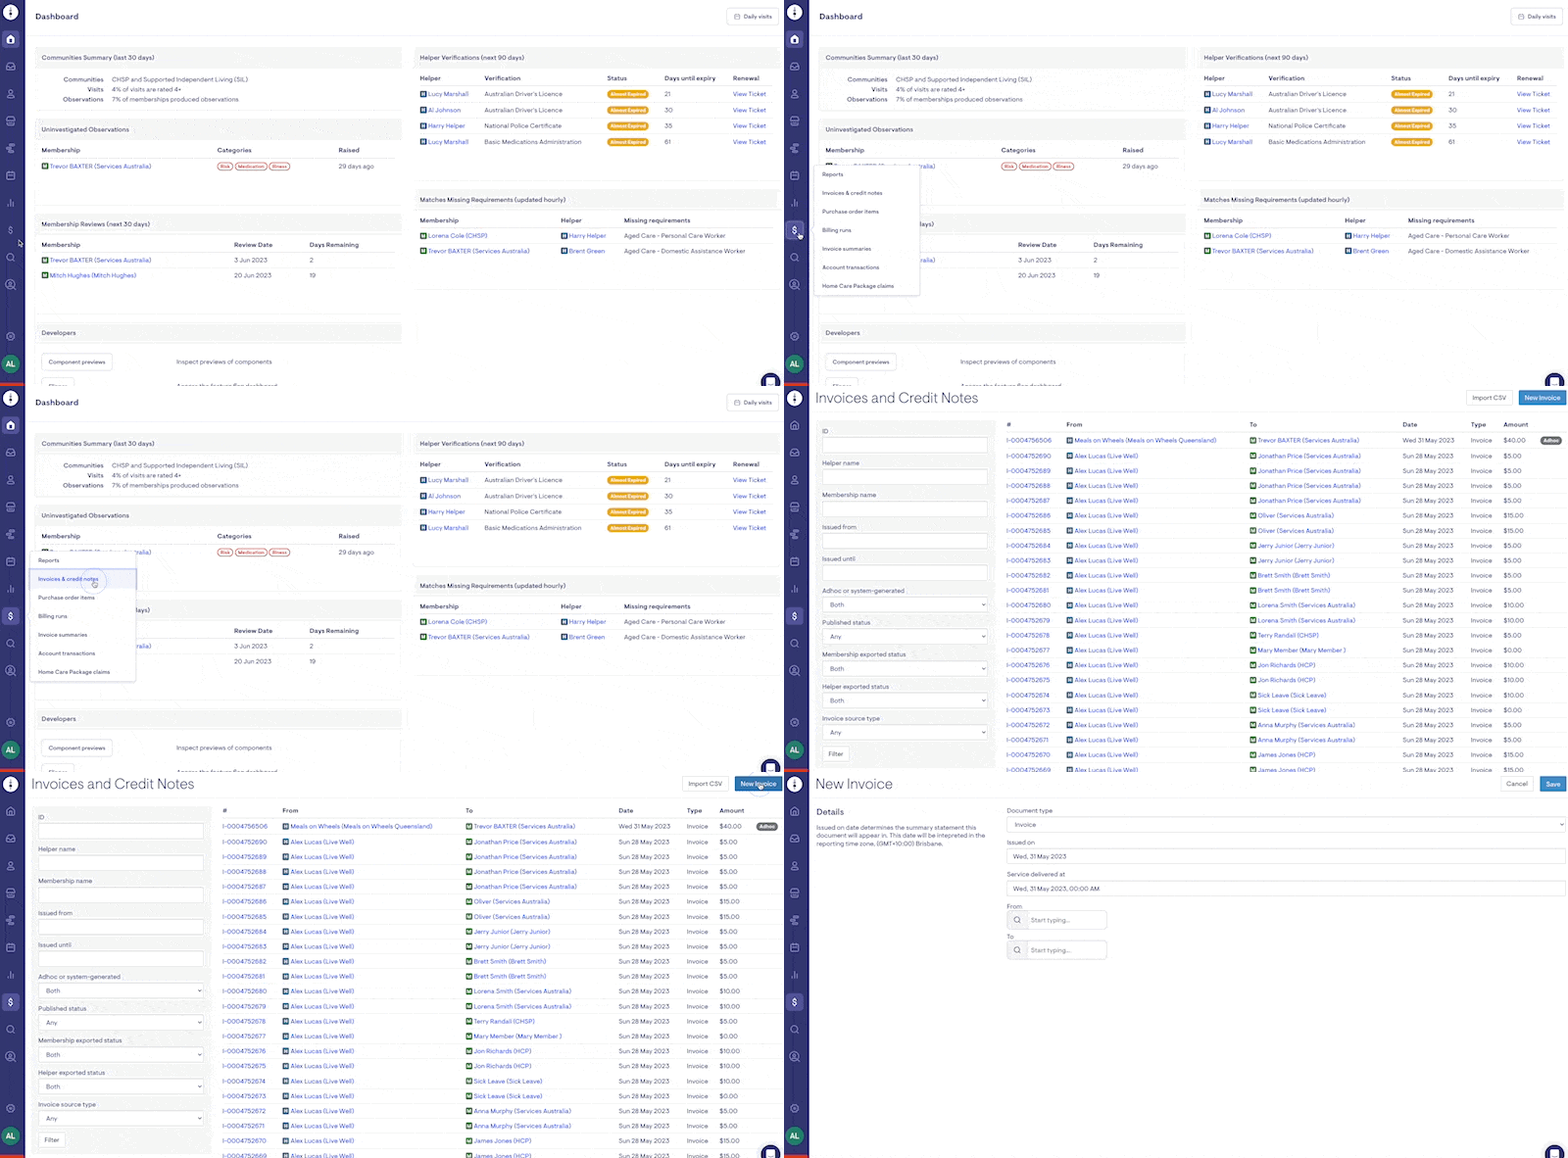
1. Select the Finance icon from the main menu and then Invoices & credit notes, click New Invoice
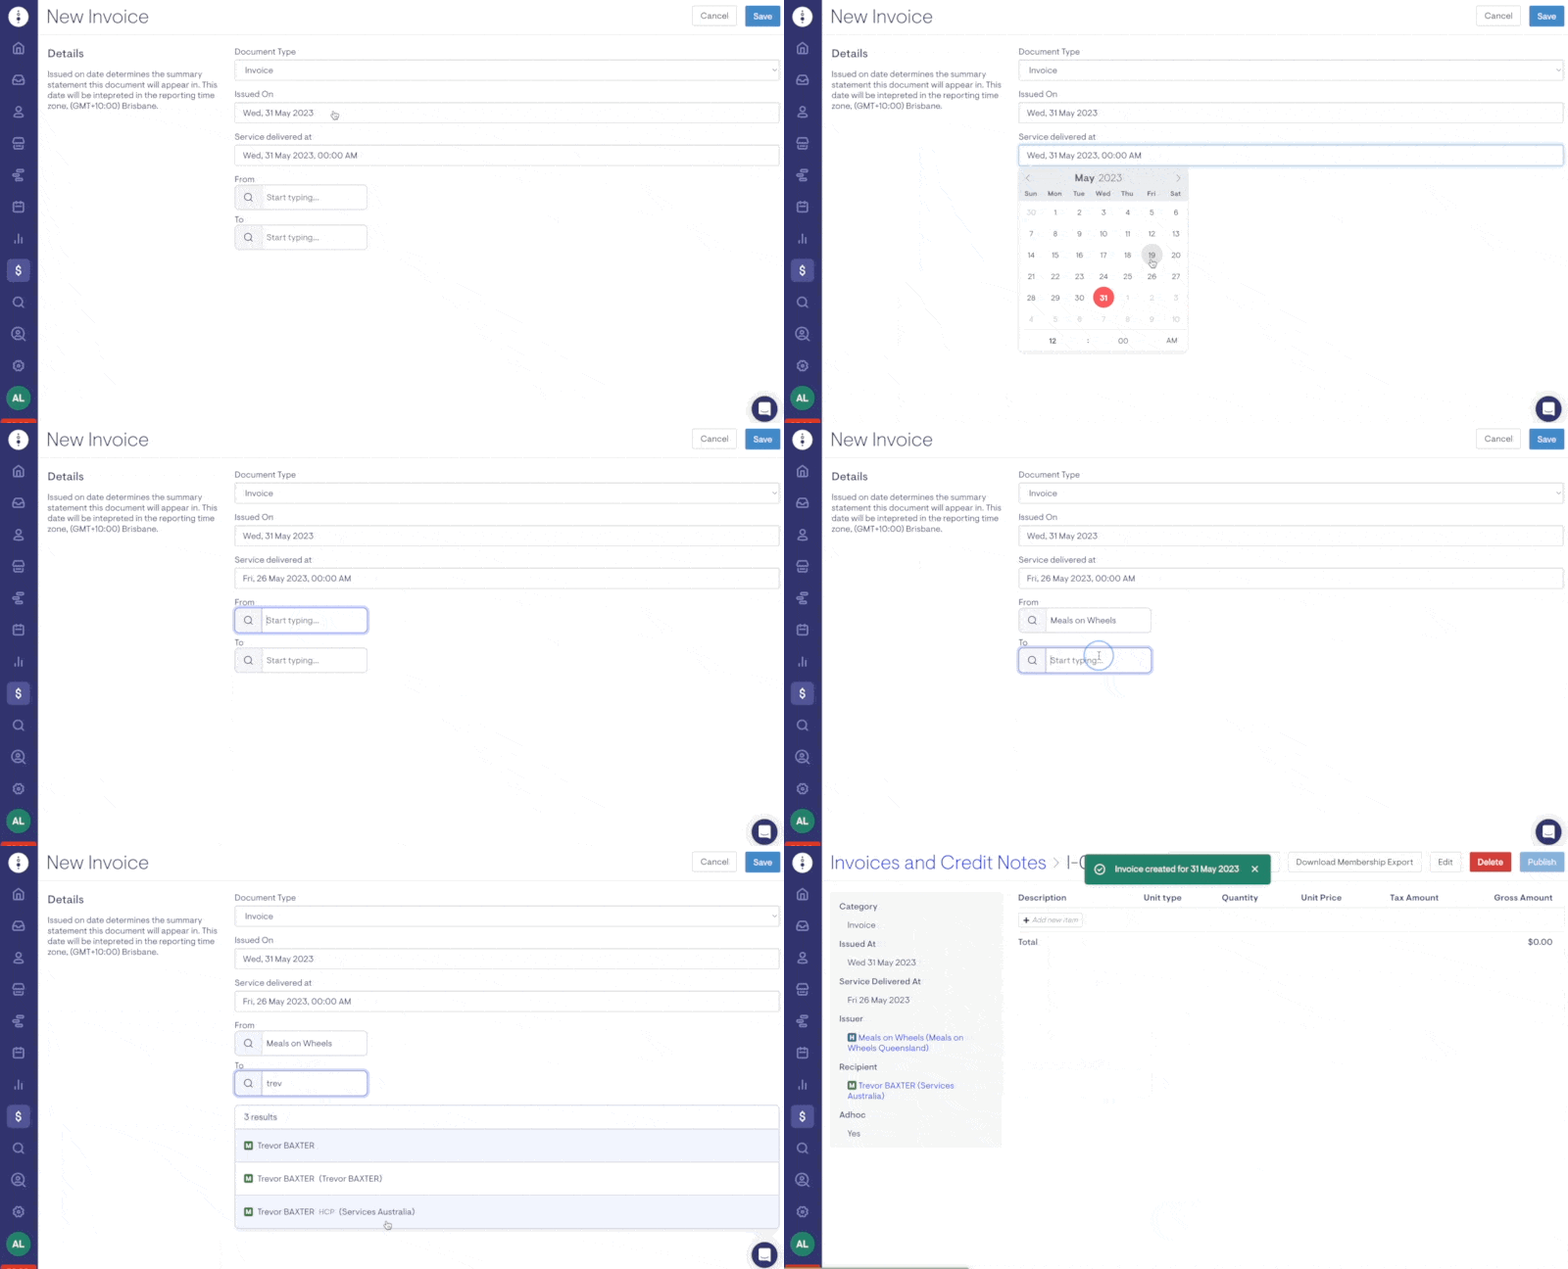
2. Select whether the Document Type is an Invoice or Credit Note, update the Issued On date and Service Delivery date. Select who the Invoice or Credit Note is From and To
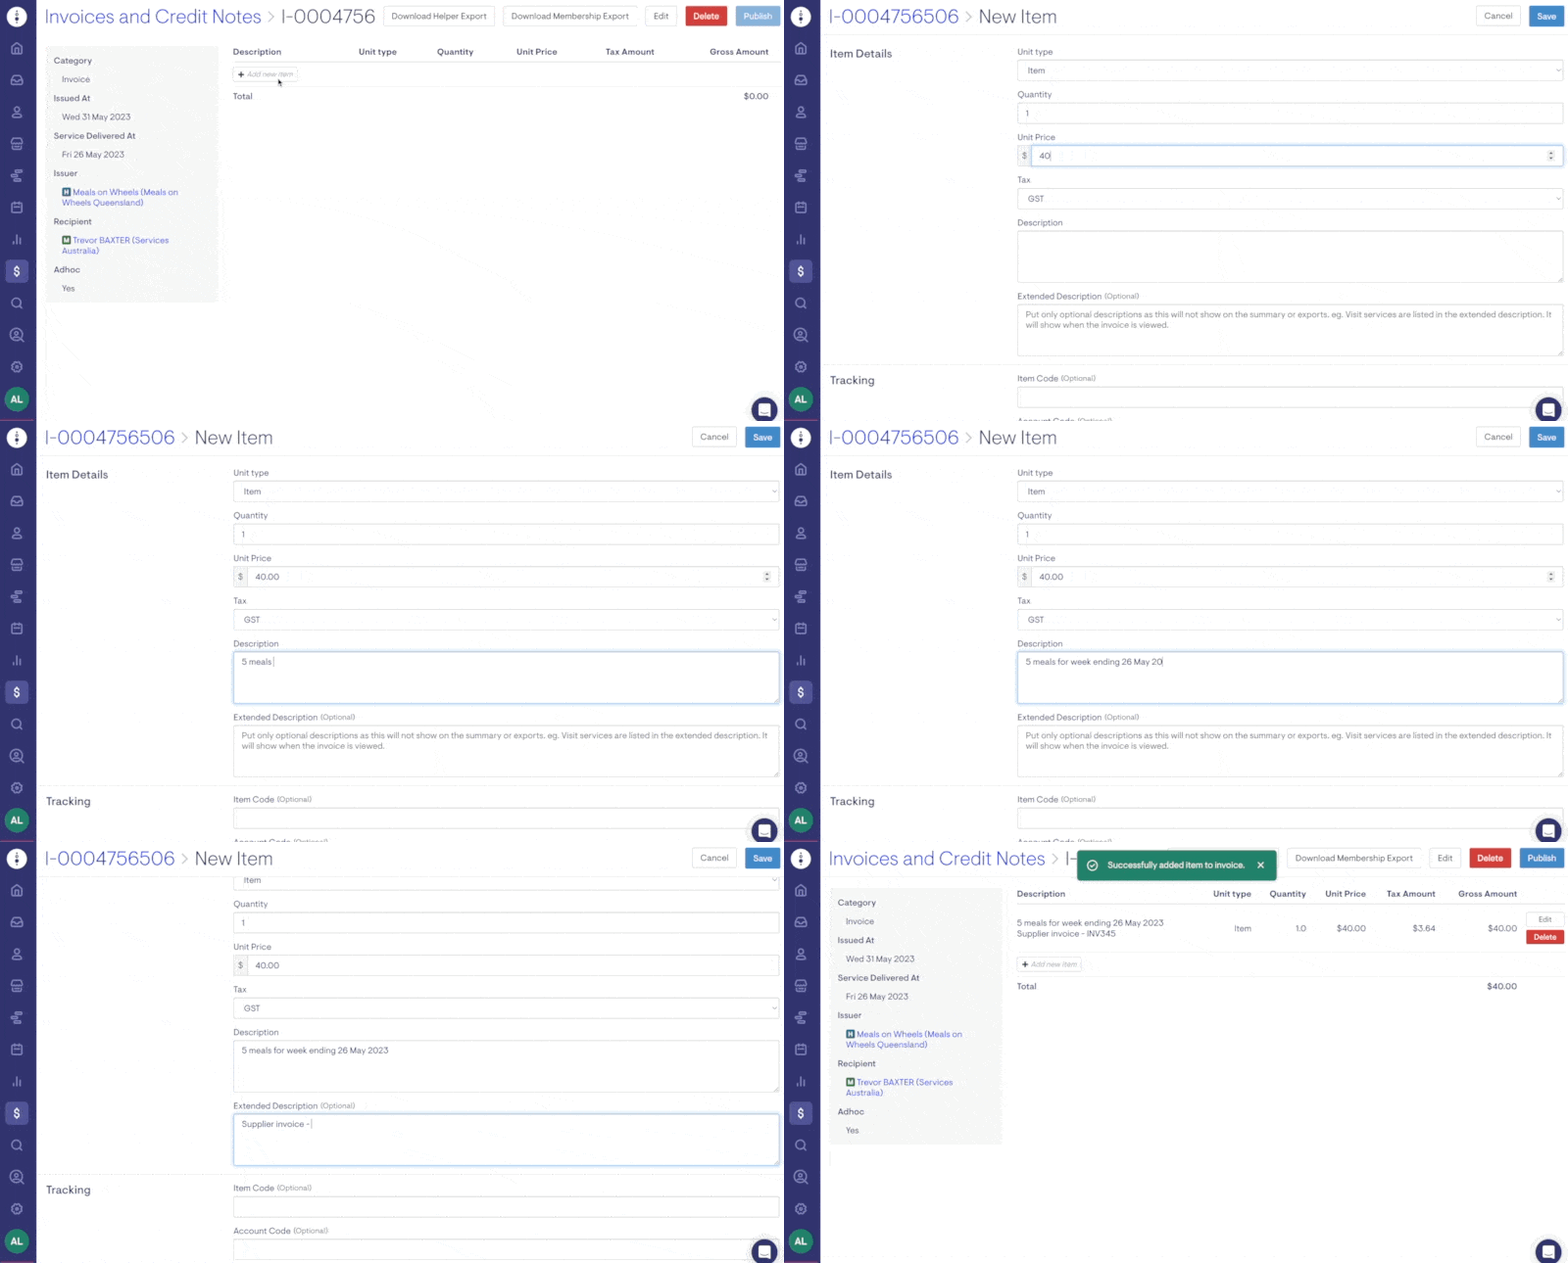
3. Select Add New Item
-
Add in the Unit type - Item, Cost or Hours, Quantity, Unit Price, Tax and Description. If required, enter the Item Code and Account Code, which will appear on selected invoicing reports.
4. Publish the Invoice or Credit Note
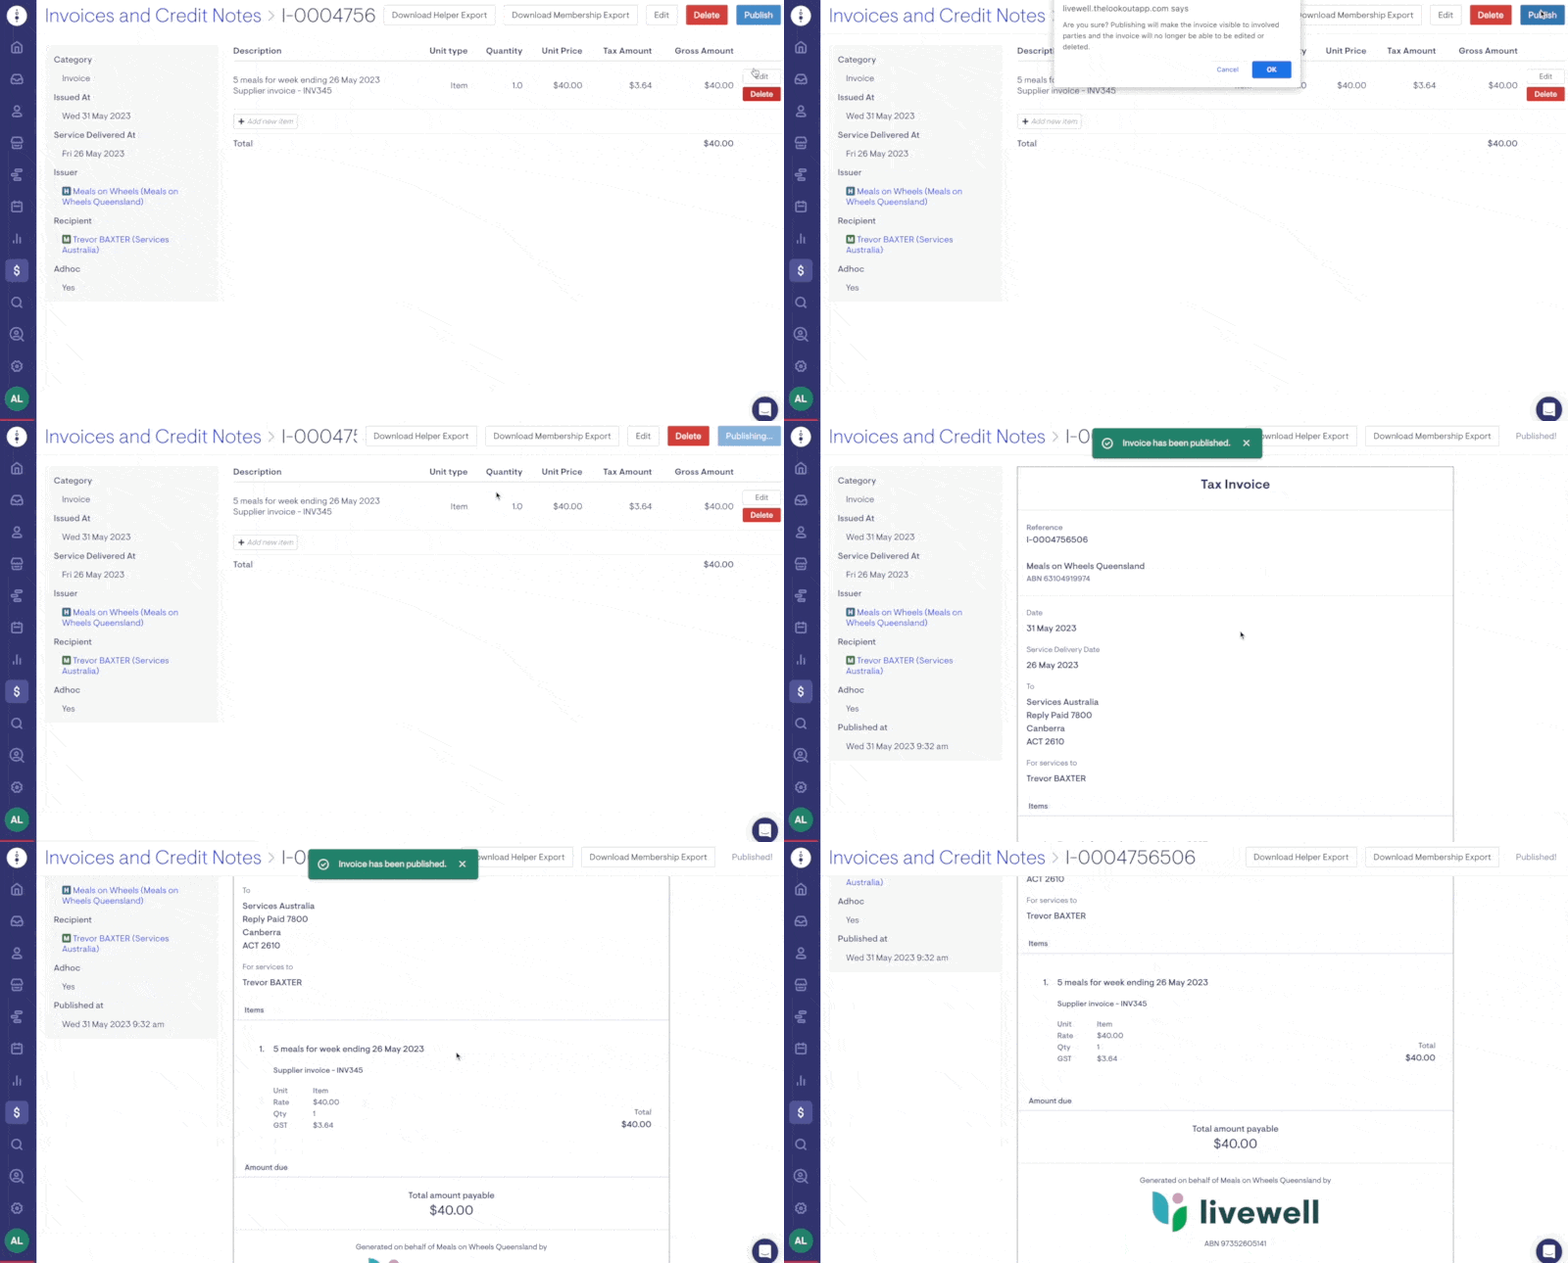
Once Published, you can also select Download the Membership Export or Download Helper Export. The invoice will export the invoice for the billing run and won't appear in the Membership or Helper Itemised report when the next billing run is complete.
Adding a credit note
1. Select the Finance icon from the main menu and then Invoices & credit notes, click New Invoice
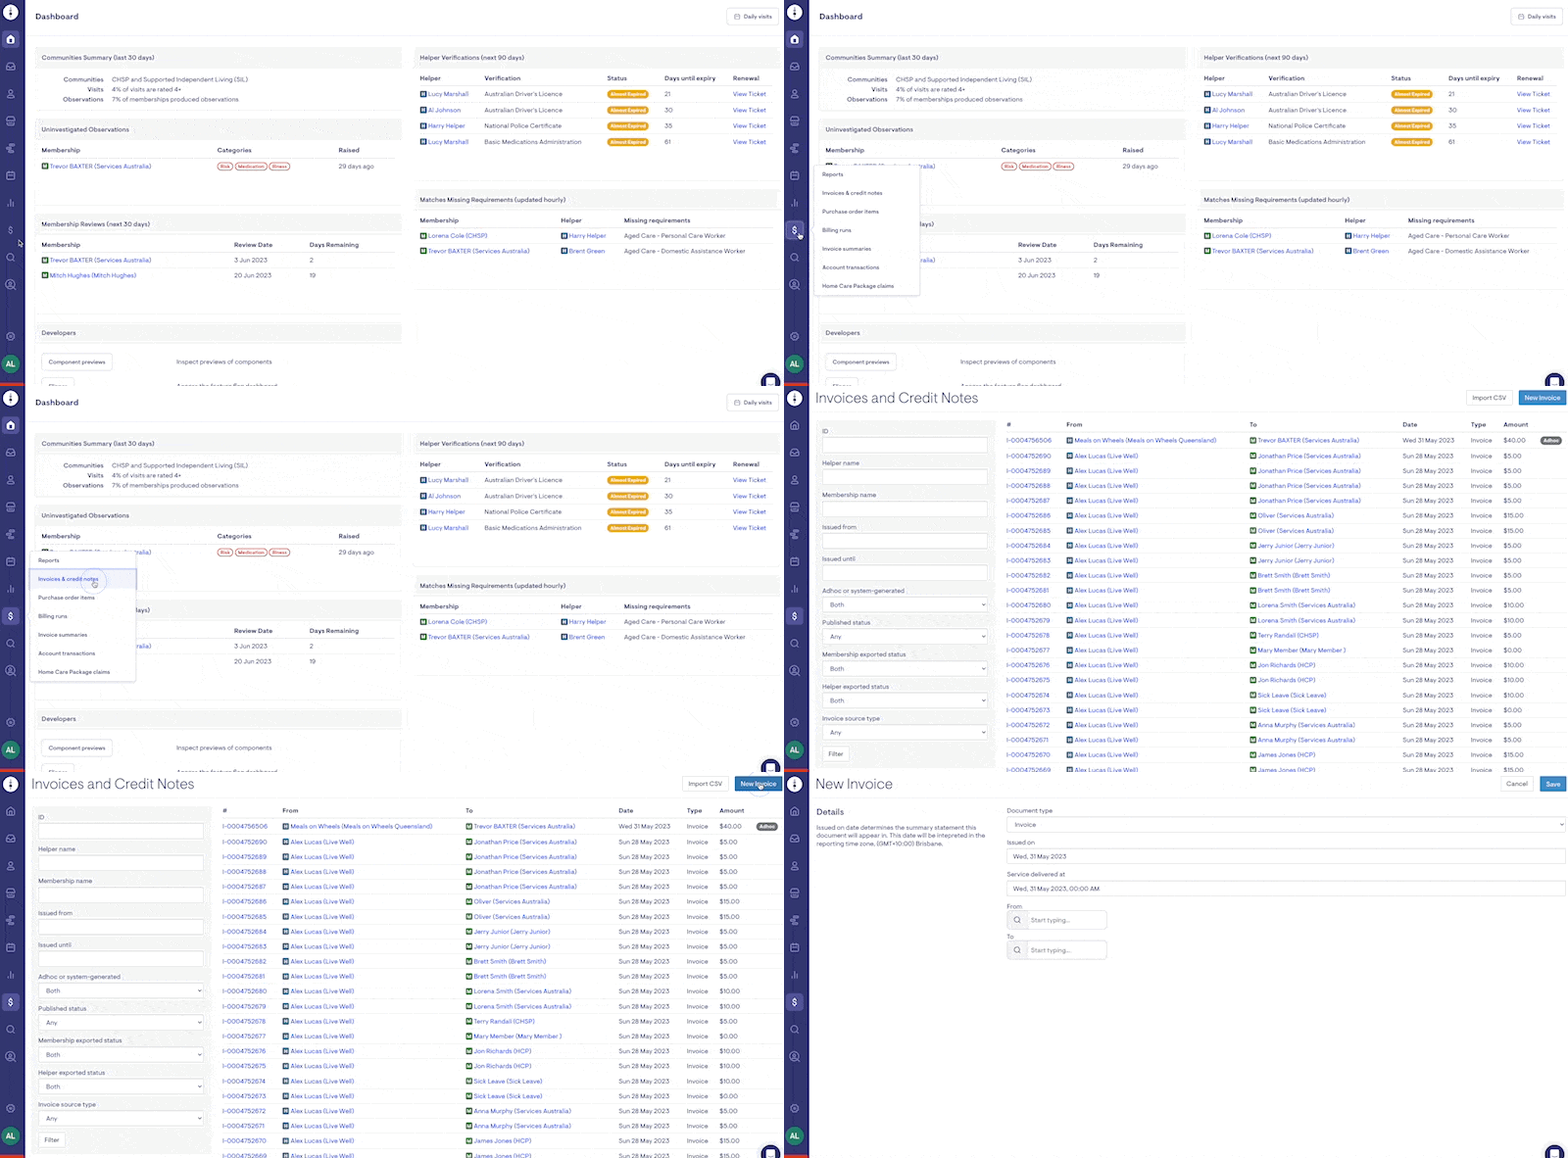
2. Select whether the Document Type is an Invoice or Credit Note, update the Issued On date and Service Delivery date. Select who the Invoice or Credit Note is From and To
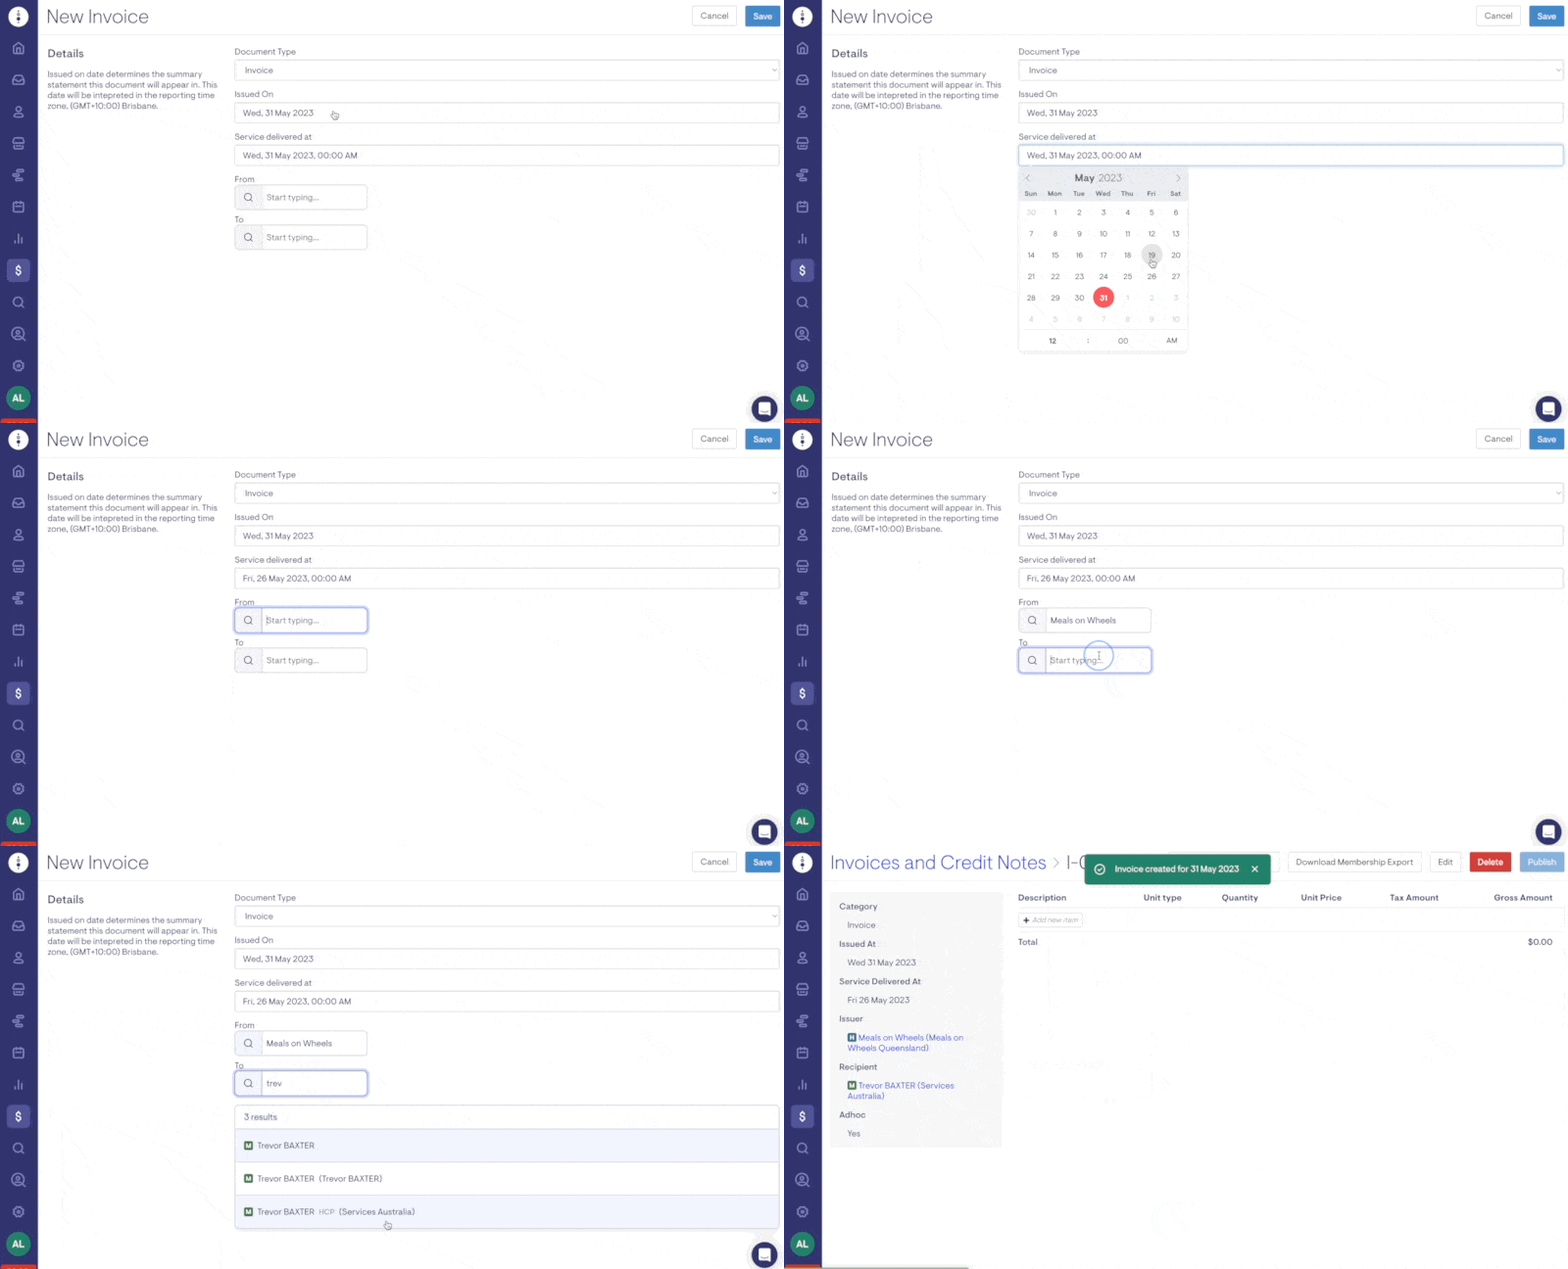
3. Select Add New Item
-
Add in the Unit type - Item, Cost or Hours, Quantity, Unit Price, Tax and Description. If required, enter the Item Code and Account Code, which will appear on selected invoicing reports.
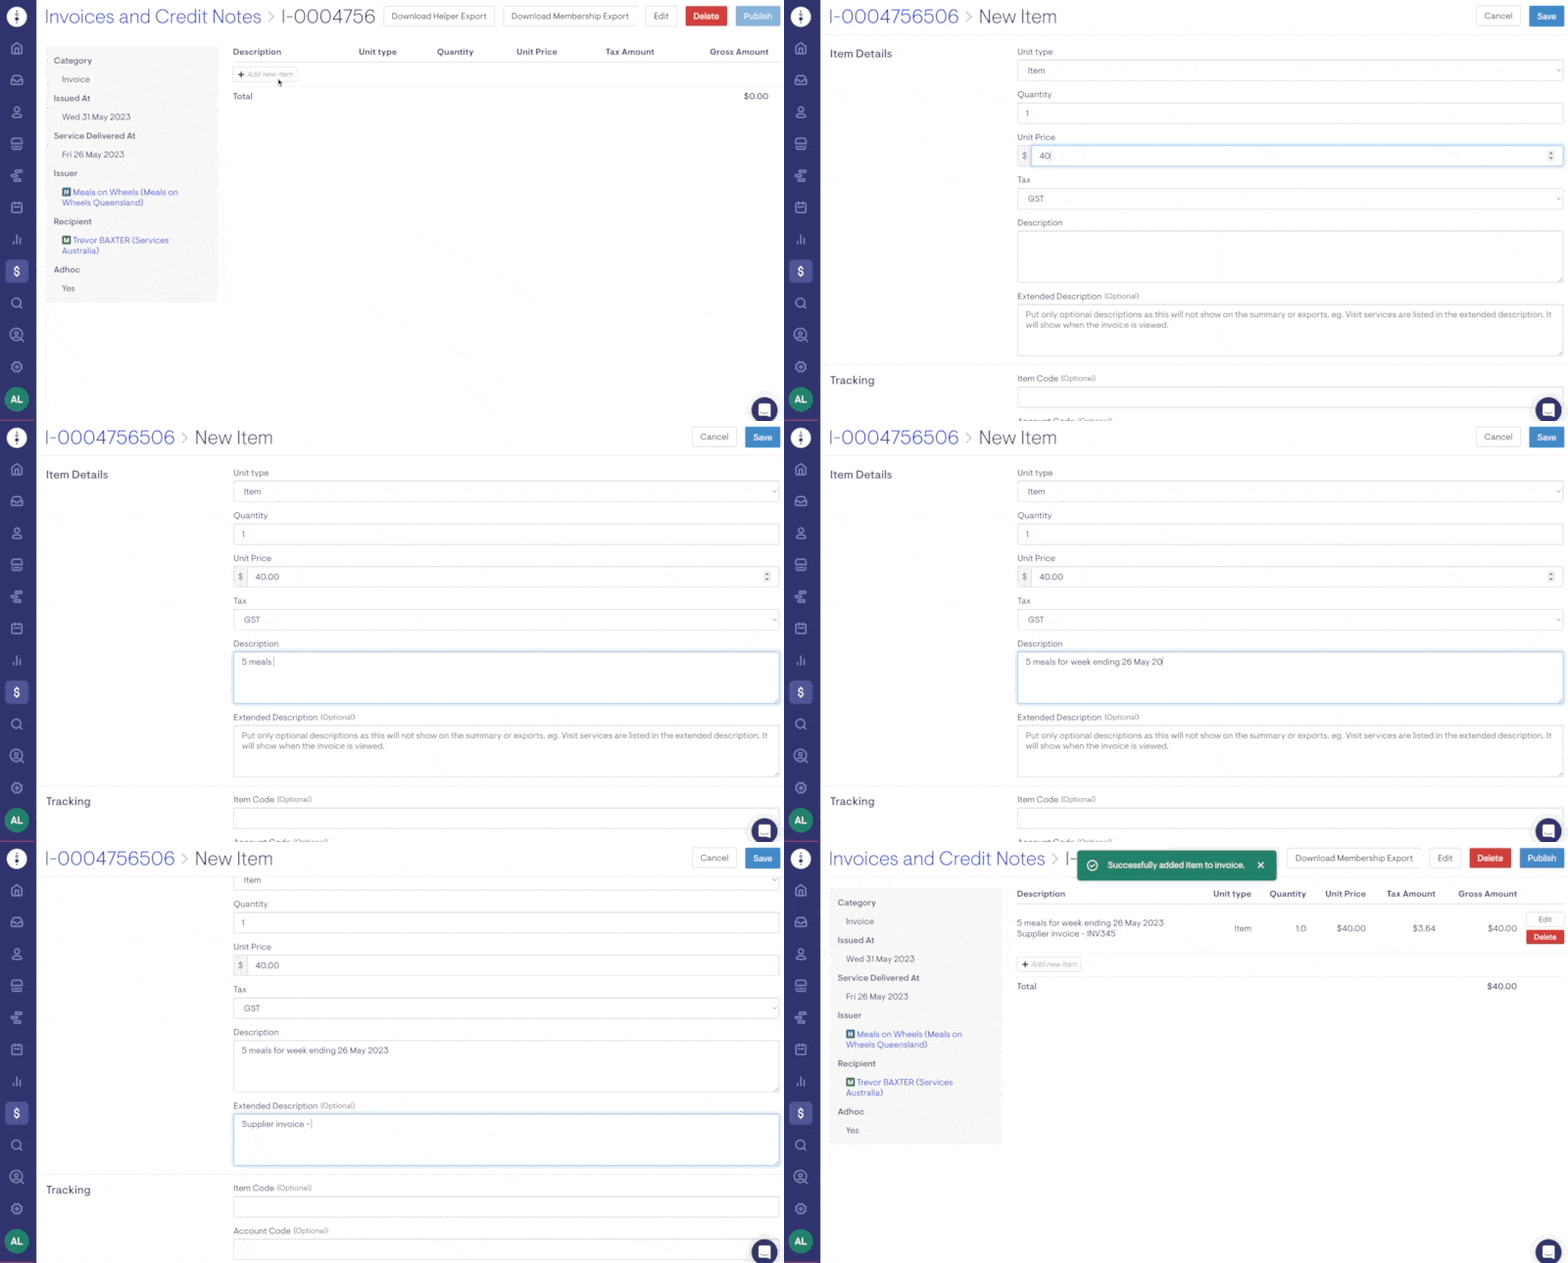
4. Publish the Invoice or Credit Note
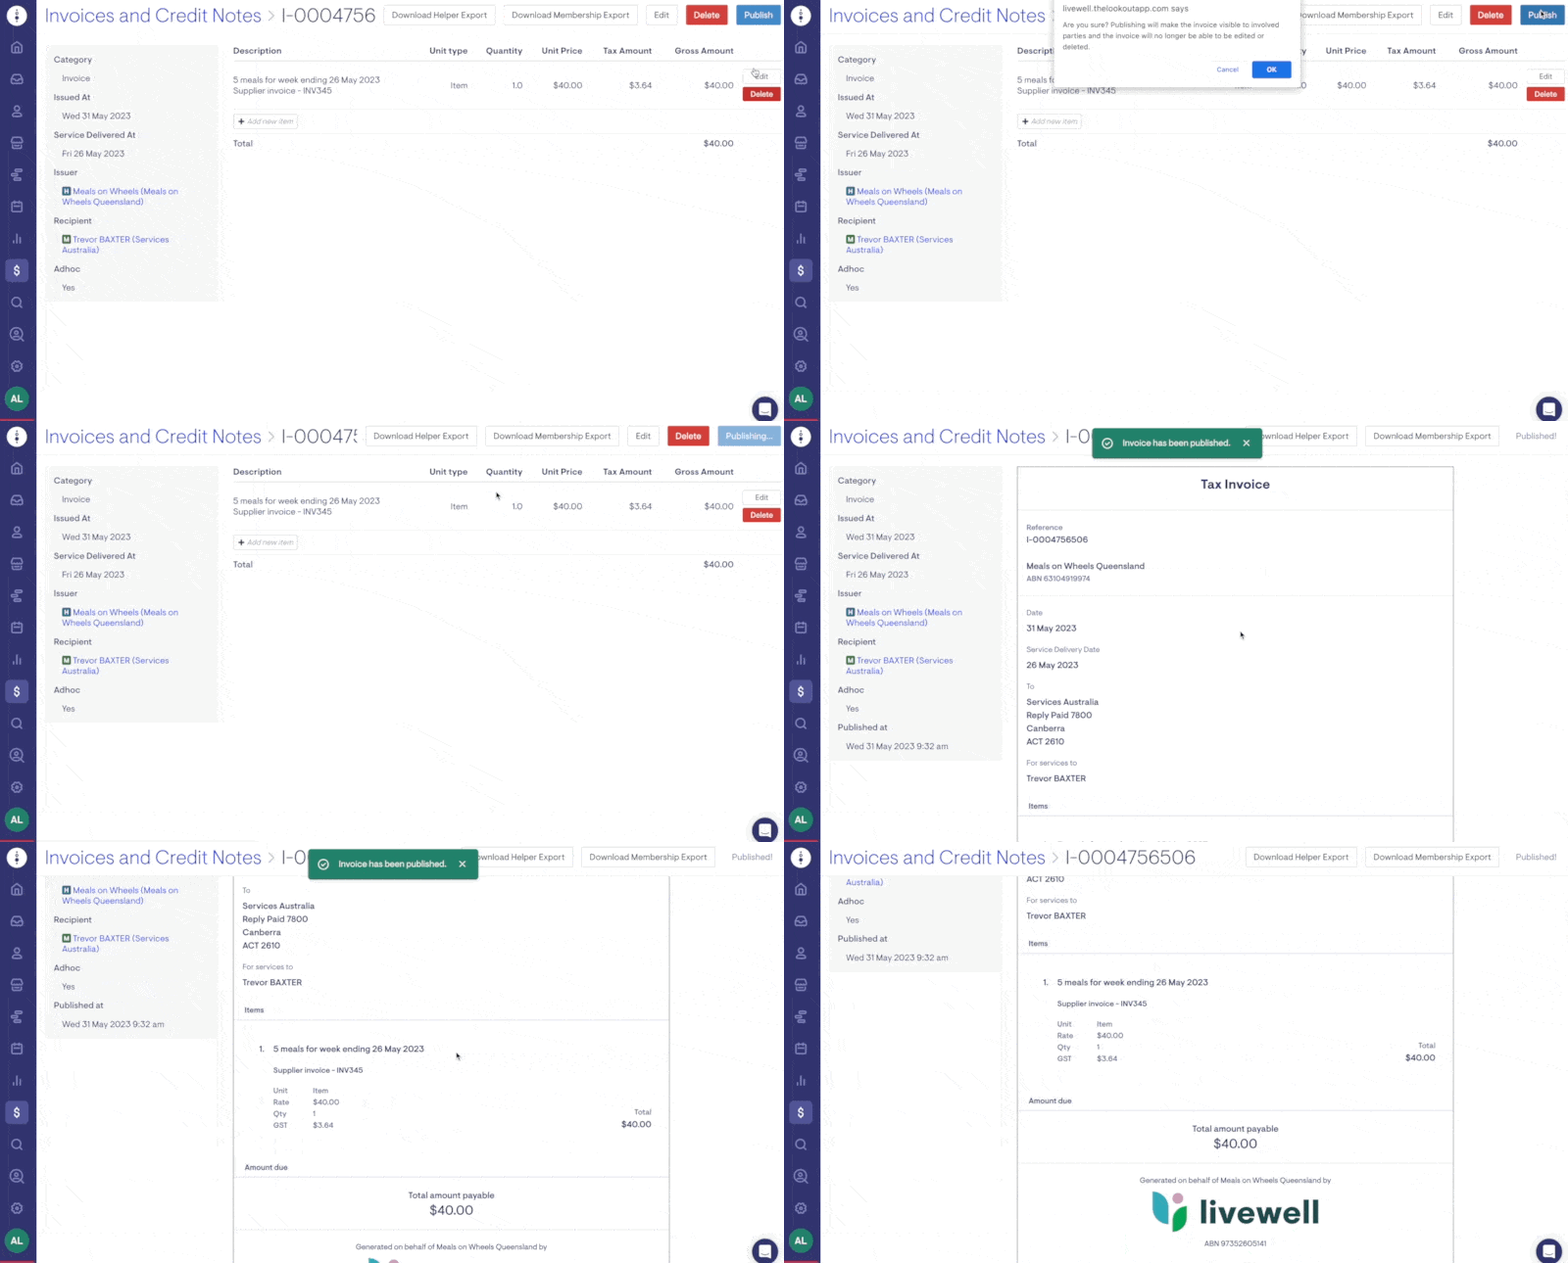
Once Published, you can also select Download the Membership Export or Download Helper Export. The invoice will export the invoice for the billing run and won't appear in the Membership or Helper Itemised report when the next billing run is complete.
Bulk Importation of Ad hoc invoices and credit notes
-
Select the Finance icon from the main menu and then Invoices & credit notes
-
Click Import CSV in the top right to manage your imports

-
Click New

-
Download the example template provided. Once the file is ready to import, select Choose file and select the file to import.

-
Click Save
-
You will receive an email when the CSV has finished processing. If errors are encountered processing the CSV these will be presented and must be fixed before the CSV can continue to drafting invoices.
-
If the CSV imports successfully the invoices will be in draft
-
Click Publish to publish all the invoices associated with the import
Important: Please make edits in the CSV and re-upload if you find something wrong. This is to maintain a clean link between the source CSV and the final invoices. Please do not edit after importing, as this will cause errors.
On 15 March 2024, we launched version 4 (v4) of our invoice import template. It now has extra columns to tag invoices and purchase orders with specific services. This makes it easier to organise your data and create detailed reports in Lookout. You can still use older templates, which the platform will recognise as the new version, with the additional columns left blank.
Searching for Invoices
-
Navigate to Invoices & credit notes after selecting the Finance icon on the main menu
-
Search for the invoice you would like to view by ID, Name, data, Ad hoc status, Published status, exported status or Recipient Type (Member/Helper).
-
Click on the ID Number of the statement you would like to view.
