In this article, you will find a comprehensive guide to the primary rostering tools available in Lookout and helpful tips on effectively utilising them.
Overview of the rostering tools
The rostering tools in Lookout help you schedule efficiently so you can optimise the utilisation of your workforce.
To access the rostering tools, click the 'Rostering' dropdown arrow in the Lookout menu and choose the rostering tool you need from the sub-menu options.

Rostering Tools:
-
Helpers - shows a summary of helpers based on the filters applied and allows the user to add a new helper.

-
Scheduling - shows the schedule view of all support workers.
-
Group visits & activities - displays and allows the management and creation of group activities and events

-
Daily snapshots - or the Daily visits page shows an overview of all visits and the option to switch to Punchcards view. Vacant visits can also be filled from this page.
-
Punchcards - show a daily view of all visits, their status and any variances between what was rostered and submitted by a Care Worker (Helper) when checking out a visit. It is critical to review punchcards before billing runs to guarantee accurate invoicing.

To export availability rules, generate an availability report based on worker availability rules.
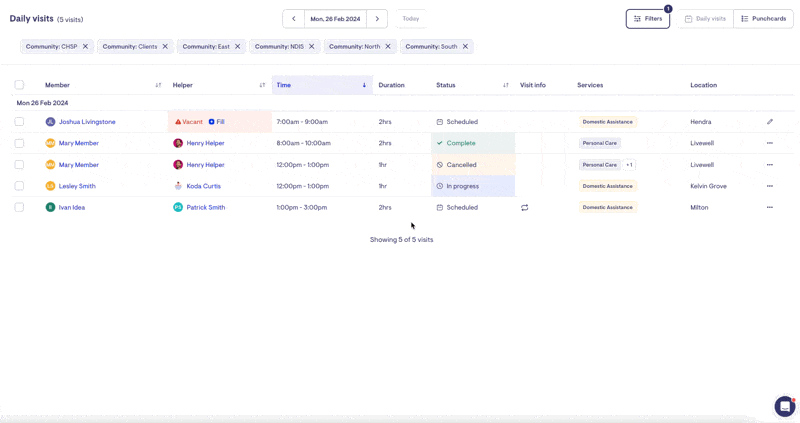
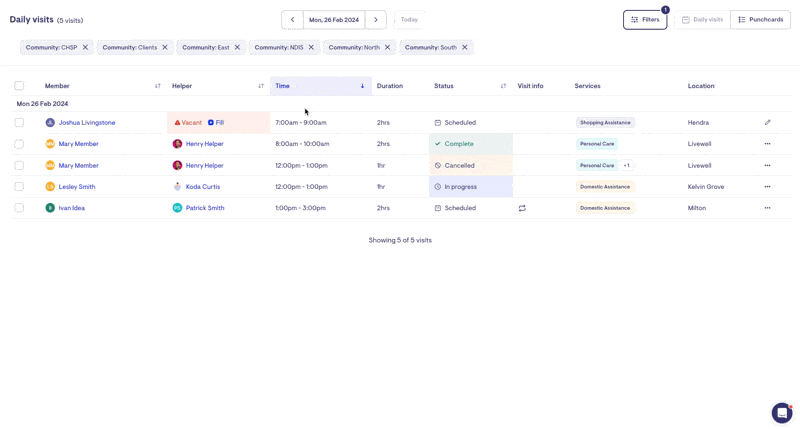
Daily visits (snapshots)
You can select daily visits to see an overview of all visits across all of your clients for a given day.
The default view is the Today view, which gives you a snapshot of the status of all your visits for the day. Daily visits page lists each visit as a row with visit details separated into columns:
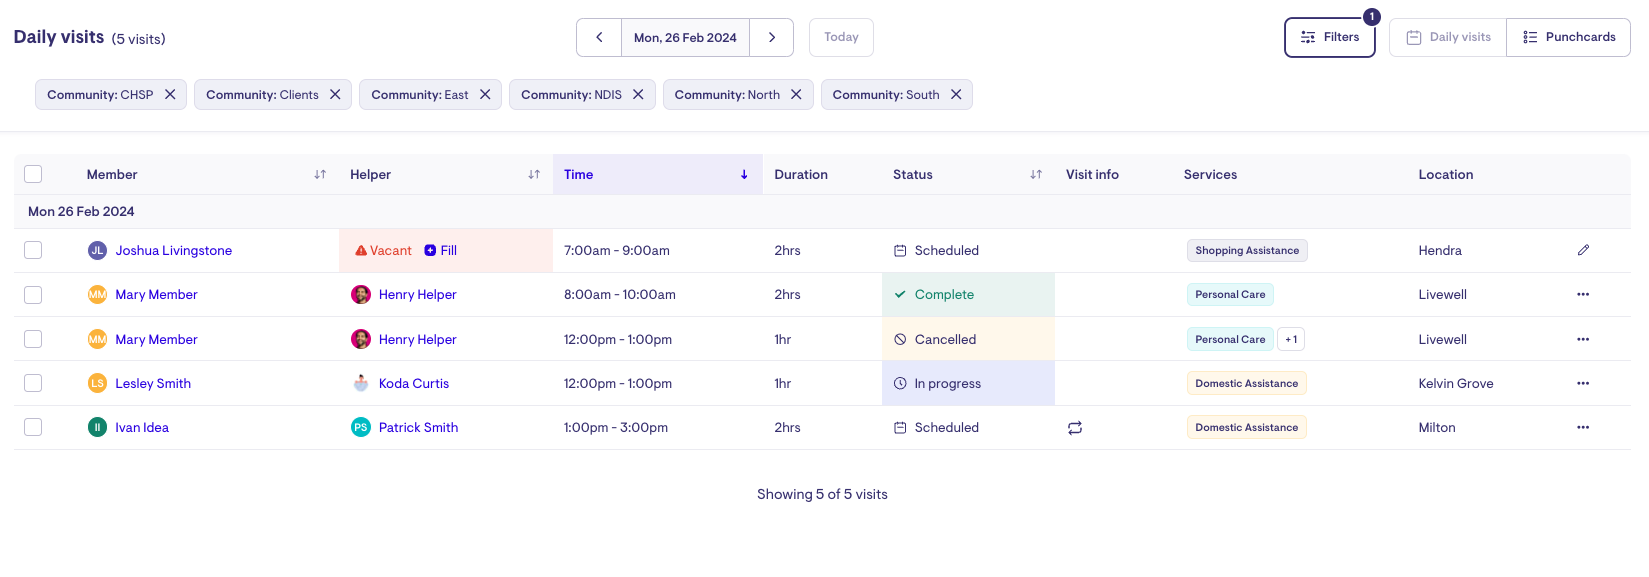
Each visit is colour-coded based on the current status of the visit:
Blue - Visit scheduled with a Care Worker assigned (no longer coloured in daily view and Punchcards, but shows on the Scheduling page and Helper roster)
Green - Completed visit - Care Worker has checked in and out
Red - Vacant visit - Care Worker yet to be assigned
Grey - Visit in progress - Care Worker has checked in but not out
Yellow - Cancelled visit
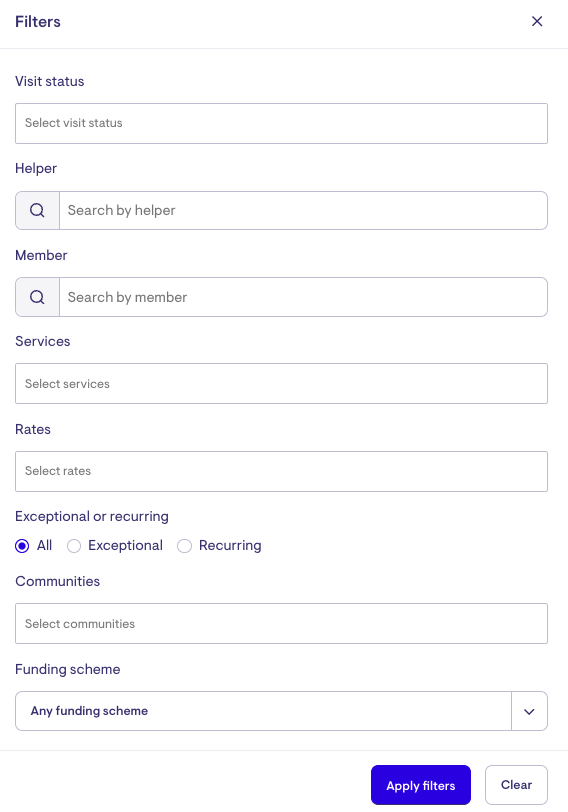
You can filter this view by visit status and by the community using the filter options in the left-hand menu. Select the settings you want to filter by, then press the blue 'apply filters' button to filter the view.
Change to a different day using the arrow or 'jump' options in the upper right-hand corner.
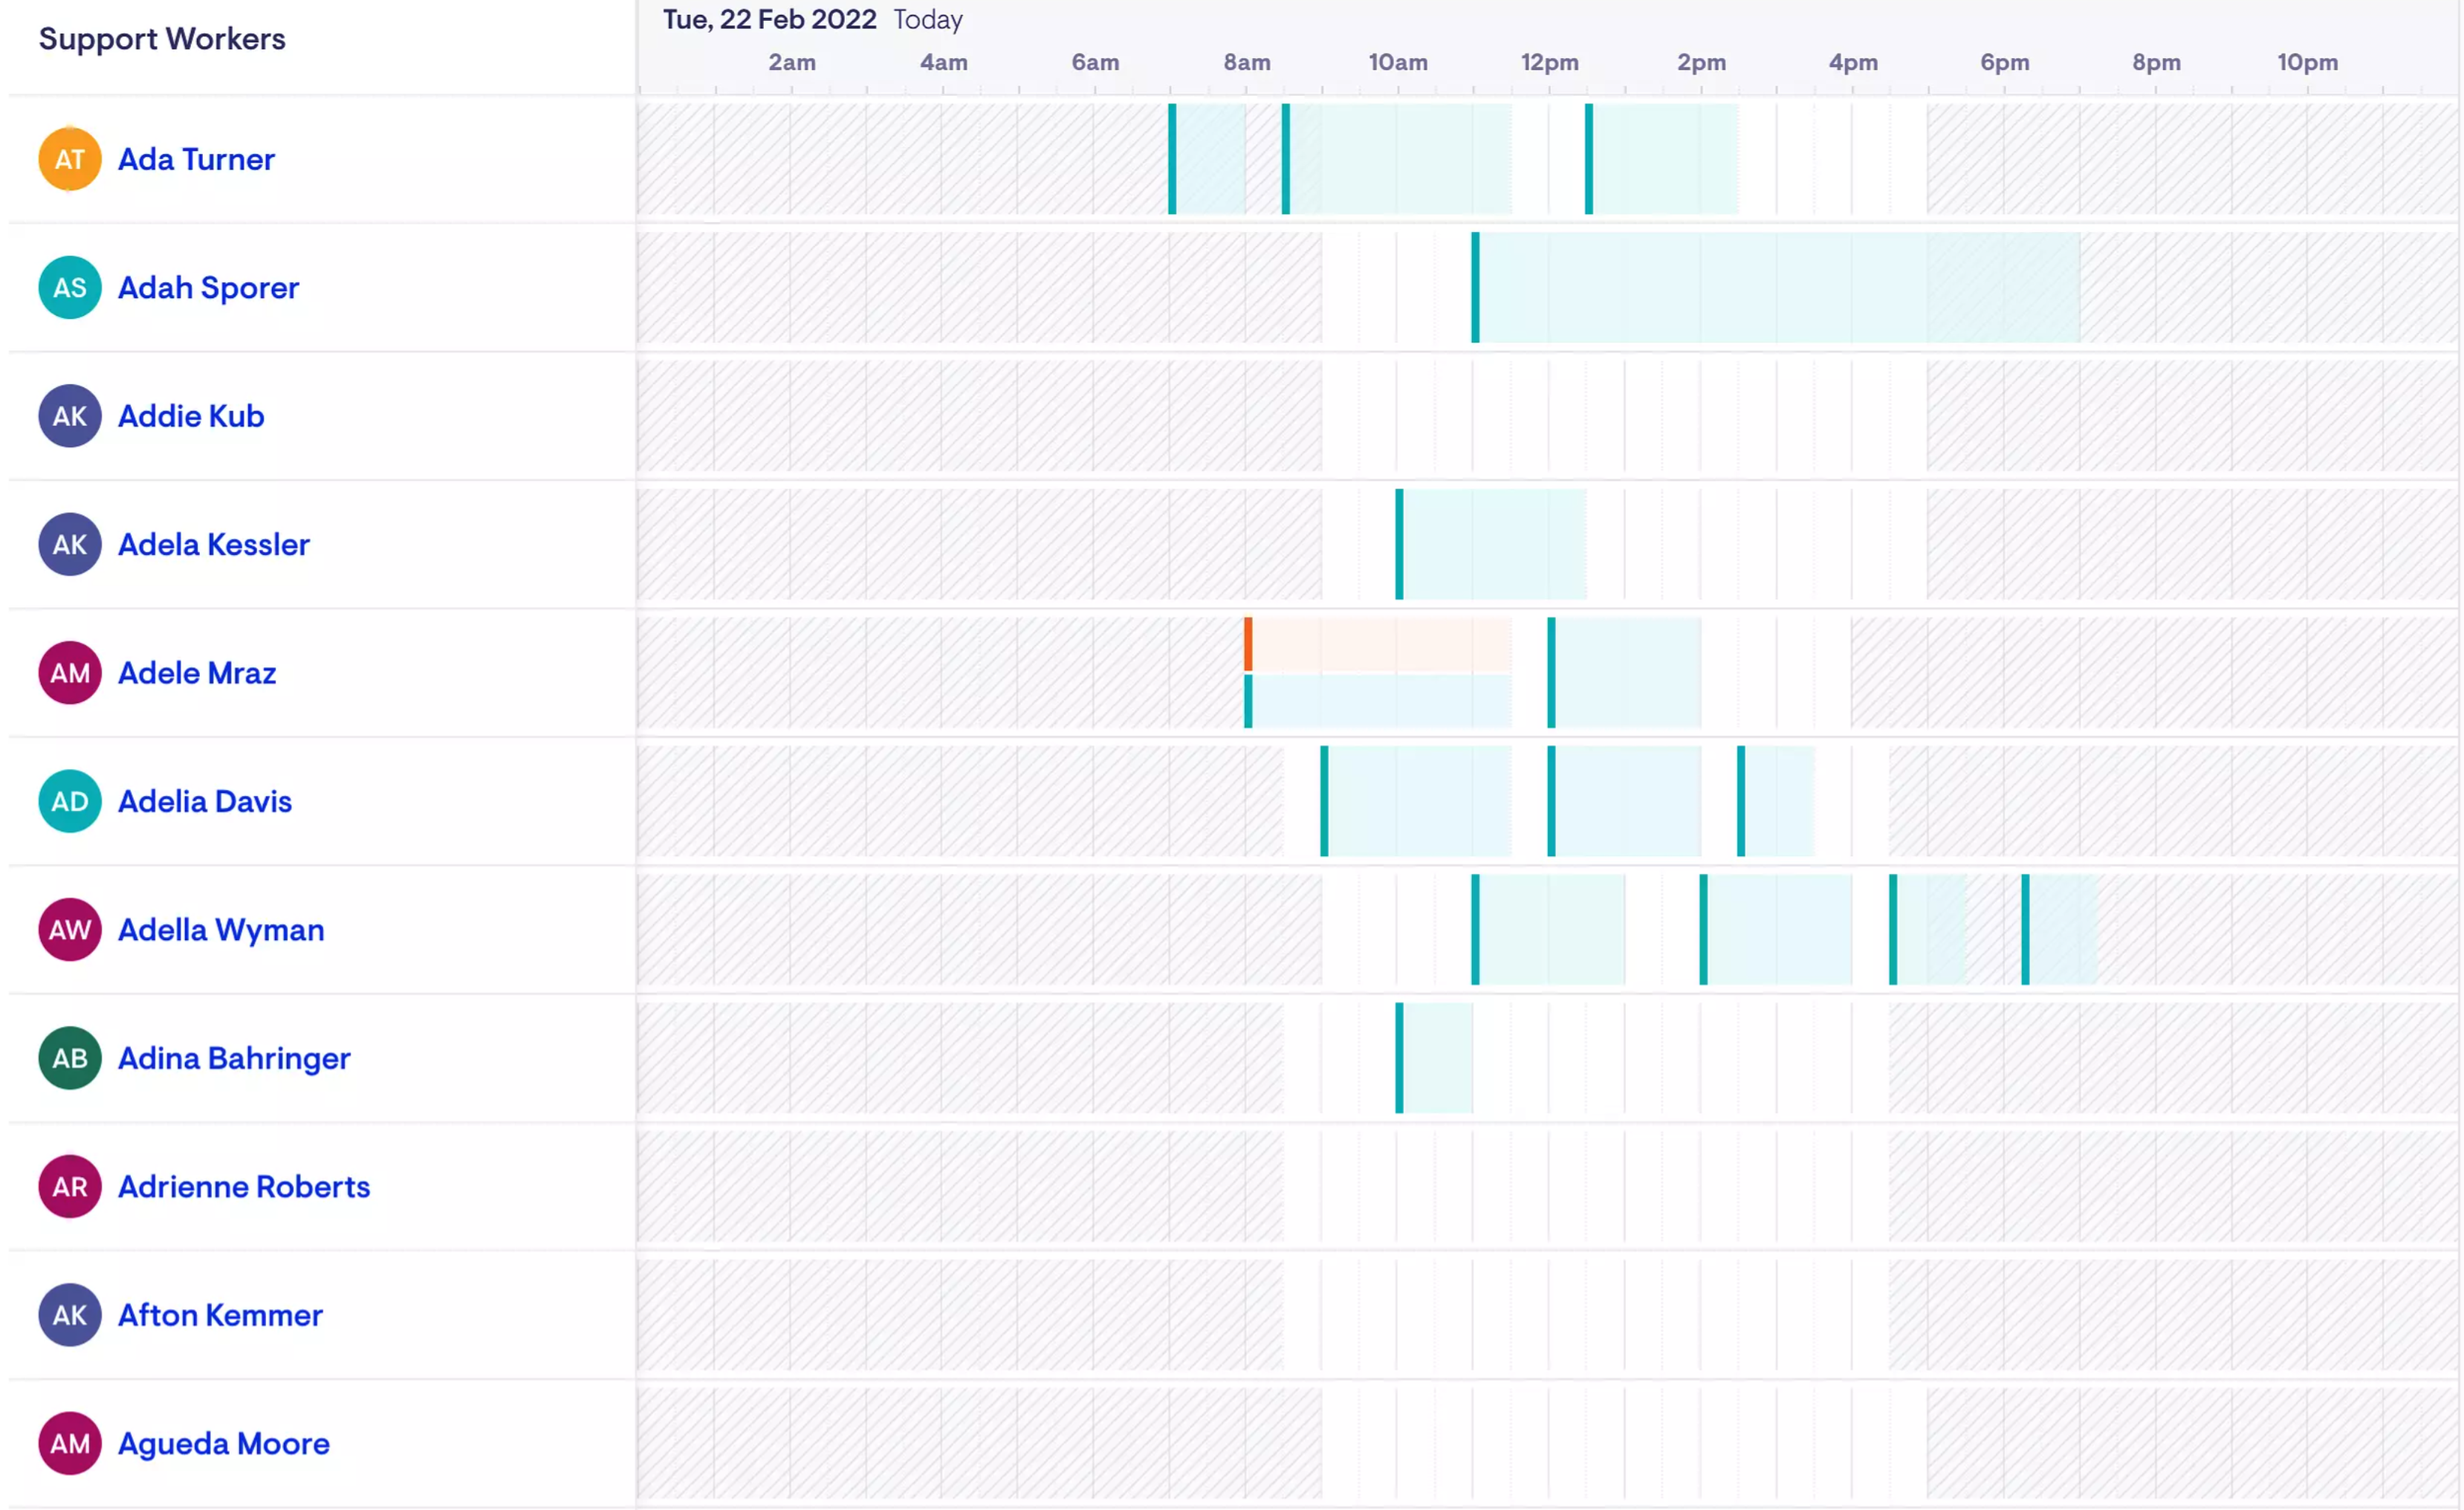
Schedule view (Scheduling)
Select the schedule view to see an overview of your support workers' schedules. This view can help you roster your team. There are 5 different display options:
-
Calendar View - shows a 7-day view of scheduled visits (Monday to Sunday) and highlights the current day.

-
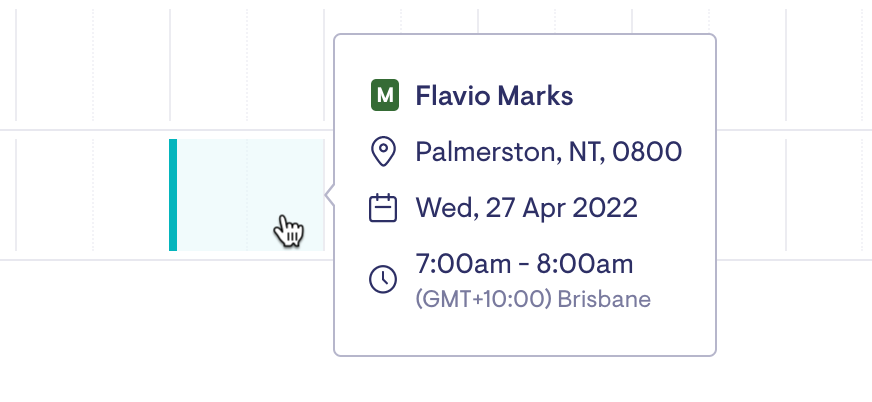
Daily View - shows the daily schedule and availability of helpers. Hover over the visit to see details.

-
Detail view - a close-up version of the Daily View providing additional details about the scheduled visits.
-
Weekly view - an expanded version of the Daily View that spans from Monday to Sunday. Hover over the visit to see details.

-
Condensed view - a condensed version of the Weekly view so the user does not have to scroll to see the helper's full schedule. Hover over the visit to see details.

Change to a different day or date range using the arrow options in the upper middle.

Show or hide vacant visits using the blue 'vacant visit' display button. Click the vacant visit to assign a helper. More information on how to manage vacant visits can be found here.

The schedule view shows your team and their roster. If you have used schedule rules to set availability for a worker, you will see their availability on the schedule. Available time is white, while unavailable time is greyed out.
Please note that helper availability will not impact the ability to schedule a visit.
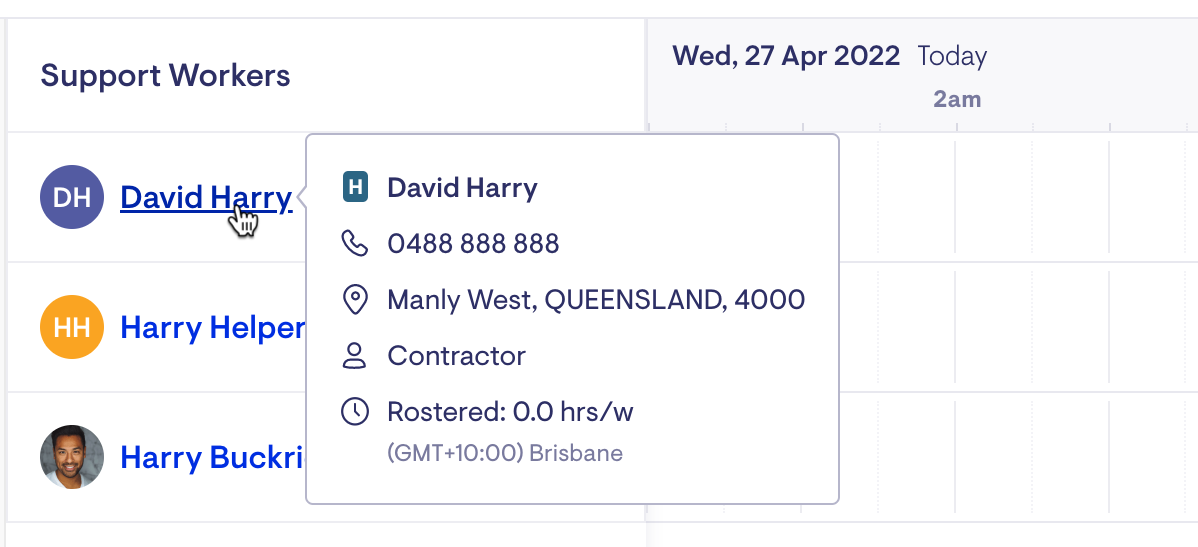
Hover over a support worker's name to open a quick-view pop-up with additional information about that person.
Filters
You can filter which support workers are shown using  and pressing the blue 'apply filters' button.
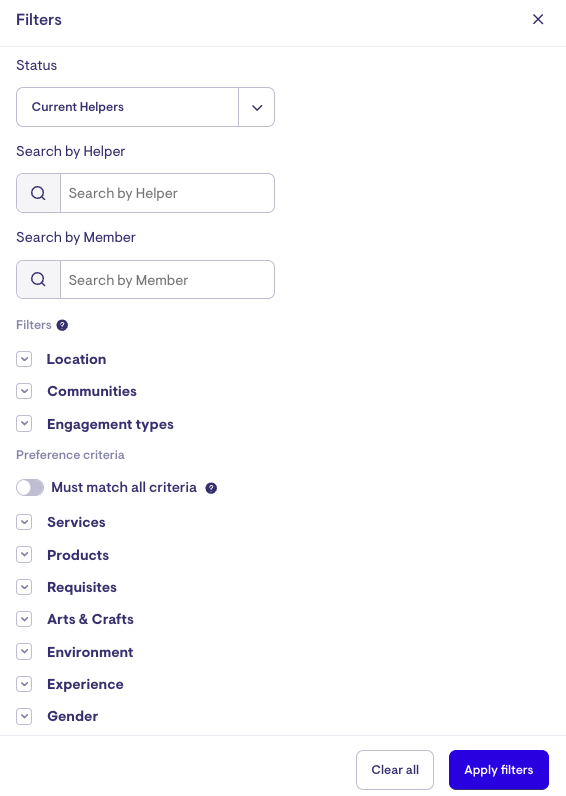
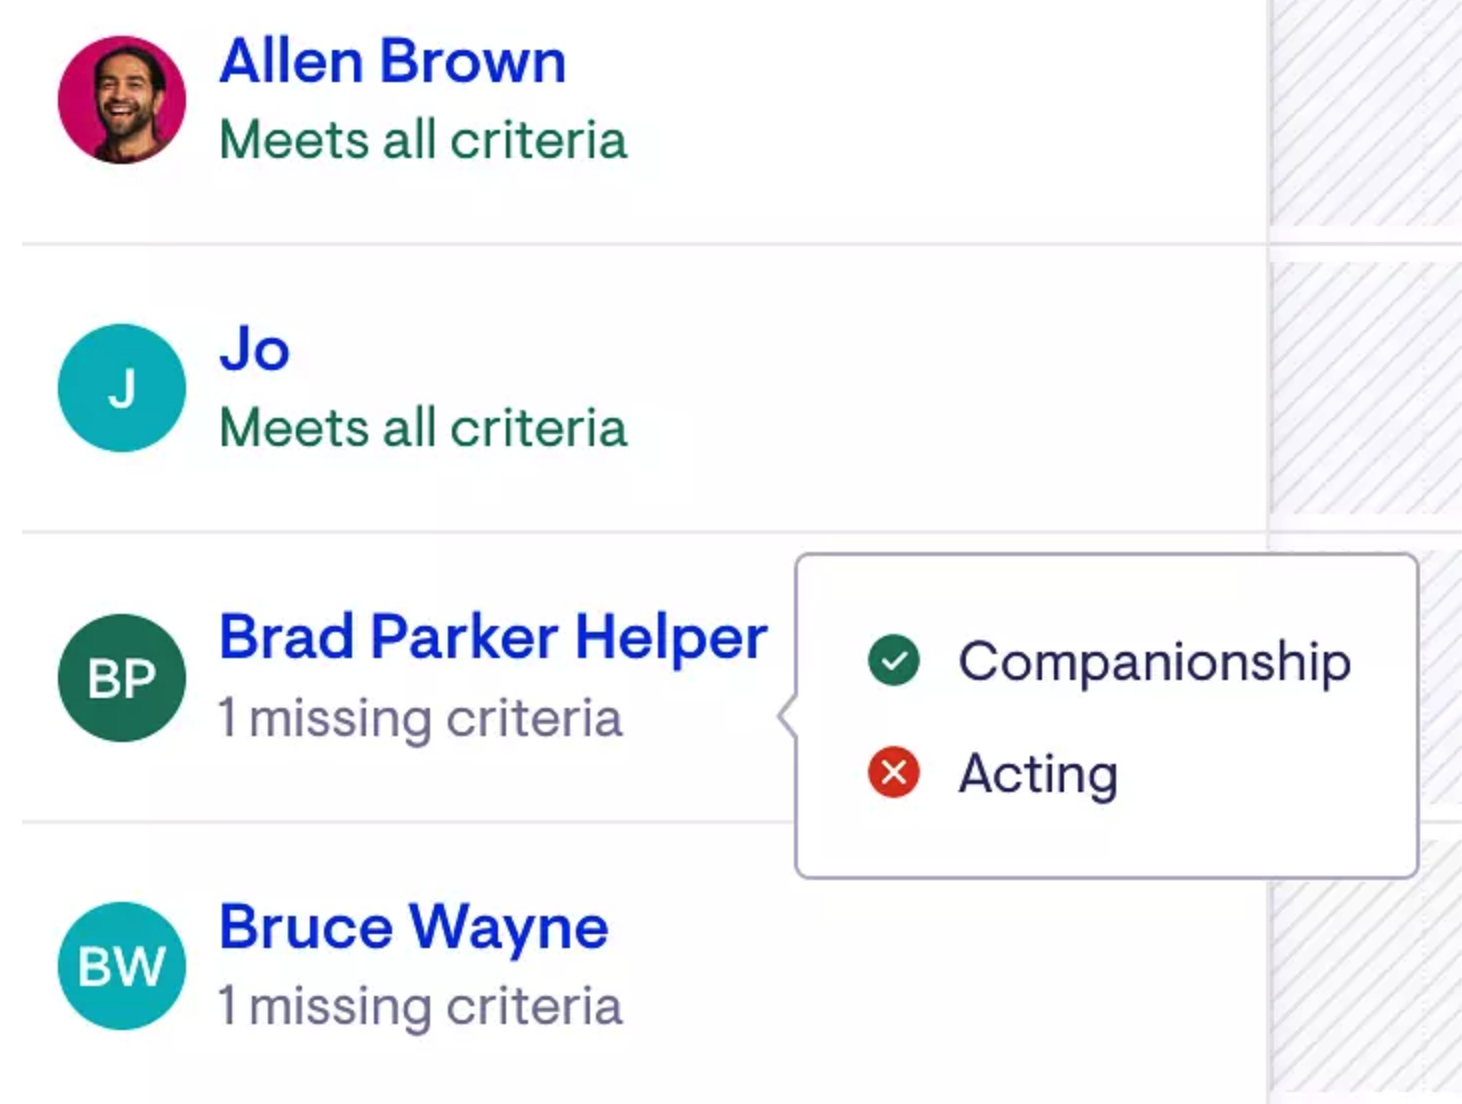
When Preference or Matching criteria are selected by applying filters, you will see a criteria alignment indicator under a worker's name. This will show if the worker meets all criteria or how many criteria they are missing. Hover over the criteria indicator to see which criteria the worker is matched with or missing.
The schedule view can also be filtered by Visit Status using 
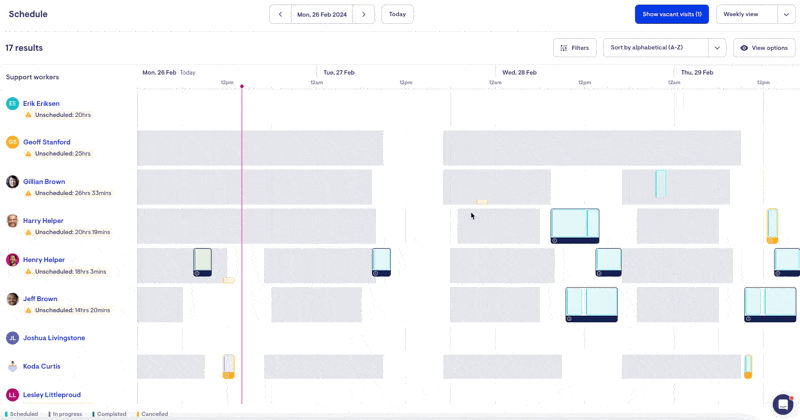
Colour-Coding by Visit Status
All visits scheduled for a support worker will be in the horizontal row next to that worker's name. Each visit is colour-coded based on the current status of the visit:
-
Blue - Scheduled (not yet checked in)
-
Grey - In Progress or Checked-in (but not yet checked out)
-
Green - Completed or Checked-out (checked in and checked out)
-
Orange - Cancelled
-
Red - Vacant (missing an assigned support worker)
How to create a visit from the 'schedule' view
You can add a new exceptional (one-off) or recurring visit for a worker from the schedule. Double-click into a blank space on that worker's schedule to open your visit options.
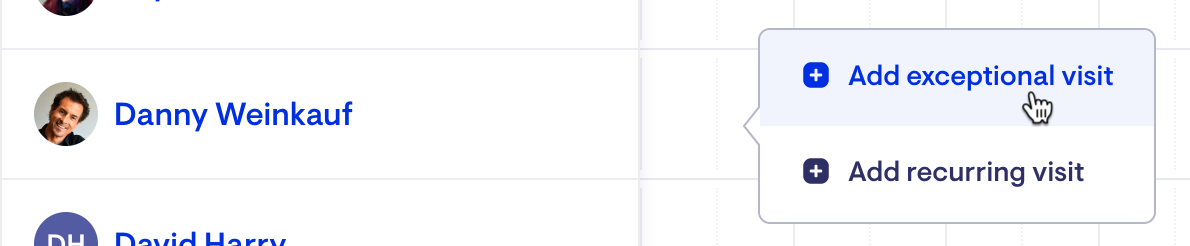
Select the visit recurrence you want by clicking on it. This will take you into the same 'create new visit' workflow when creating a visit from a client's roster. Fill out the visit details and save the visit to complete the process.
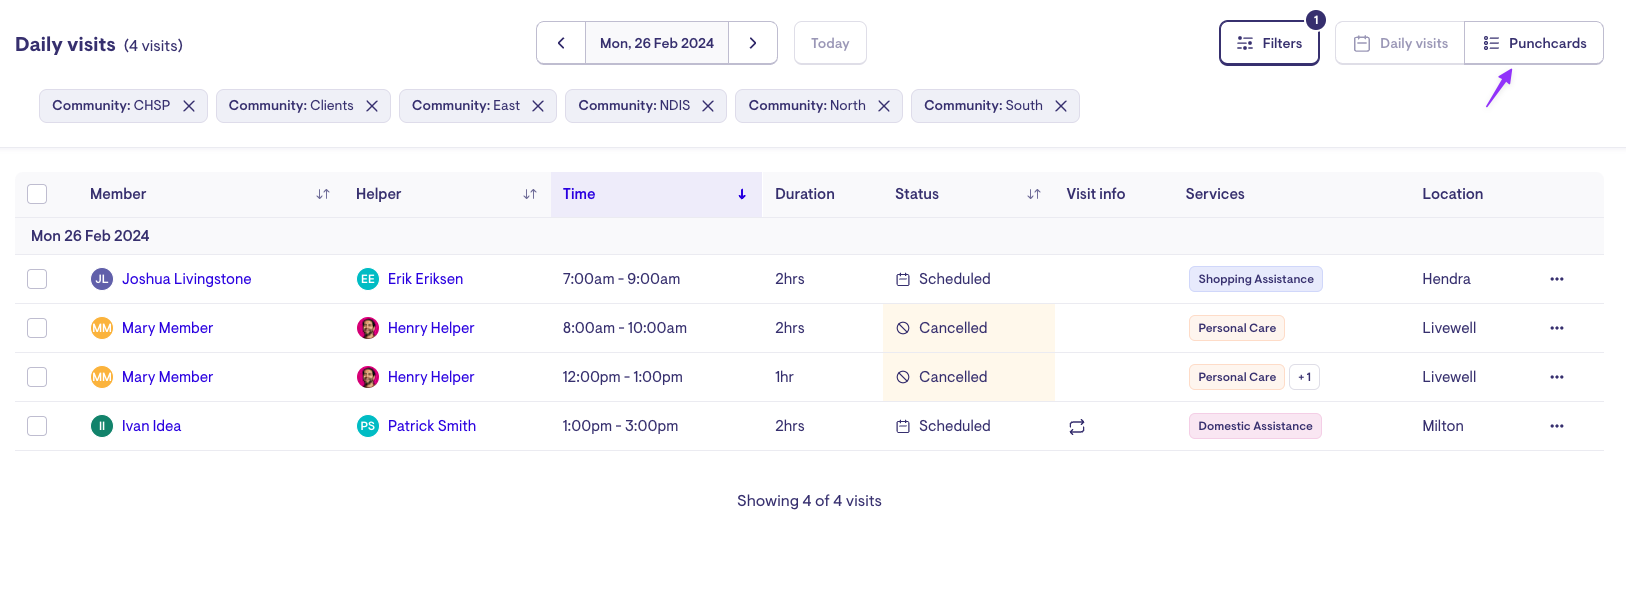
How to fill a vacant visit from the 'daily visits' view
If you have created a vacant visit from a client's roster, you can fill a vacant visit from the daily visits view as follows:
-
Open Daily snapshots and apply a 'Visit status' filter to look for Vacant visits.
-
This will display a list of members who have yet to be assigned a helper and click

-
Select the worker you want to assign to the visit by clicking the 'fill' option on the red dotted square representing the visit in the schedule.
-
Confirm the visit details and hit 'Save'.
-
You will be redirected to the 'daily visits' view, confirming the visit has been filled.