Please dip into the range of articles provided to support you in using Lookout. The below guide is designed as a quick-reference overview for a Care Manager to outline the functionality in Administration view in order to perform day-to-day tasks.
Login
-
You have a unique login and password to access the Admin view of Lookout.
Care Manager Dashboard
As a Care Manager, you have a unique dashboard available to you when you first login to Lookout Admin View. This dashboard is tailored to include information specific to those clients you oversee. The views include:
-
Community Summary
-
Uninvestigated Observations (see more information on Observations on page 8)
-
Membership Reviews (Clients due for a review)
-
Care Worker Verifications (e.g. Police Checks and Qualification expiries)
-
Missing Matching Requirements (Any Care Workers currently scheduled to visit Clients but don’t have appropriate Verifications)
Client Profile
Each client has a profile which contains all information about them including personal details, rosters, care plans, notebook and their health timeline. To access a clients profile, you may simply click the ‘person’ icon on the left-hand side menu and then select which client you would like to view.
Care Plan (Help Plan)
Each client has a care plan which is a consolidated view of all support documentation existing for a client. The Care Plan is visible to both you as an Admin user but also to Care Workers in their app. The plan is designed to support the care worker with successfully delivering the visit and are able to be dynamic and therefore updated at any time. Care Workers can see when the latest change was made via their app.
Your organisation will design their own Care Plan template specifically to meet your internal business needs.
To add, edit or remove elements of the Care Plan simply:
-
Navigate to a Client Profile
-
Click ‘Help plan’
-
Click ‘Edit’
-
Select relevant category from menu on left and then edit alongside the relevant section you wish to change.
If you wish to add a new section, simply navigate to the category and select the new section from the listing at the bottom of each screen.
Notebook
Within the Client Profile is a dedicated Notebook section (also known as progress notes) for you or other staffers to enter notes pertaining to that client. You may upload files, insert images and even pin important notes to the top of the notebook. Pinning a note places it permanently at the top of the notebook for that client meaning it’s always visible rather than filtering down the notebook thread.
In addition to entering notes, all visit checkout notes entered by care workers, and any observations raised will be documented in the notebook as a timeline of events.
Rostering
When viewing a roster, either in a Client Profile or Care Worker Profile, there are a number of considerations including:
Visit Colour Codes:
-
Blue = Scheduled
-
Grey = In Progress (Visit has been checked-in)
-
Green = Completed Visit
-
Orange = Vacant Visit
-
Yellow = Cancelled Visit
View Options:
-
Calendar View – Enables you to view all scheduled visits in a week.
-
List View – Enables you to view all visits scheduled for Client or Care Worker, allows you to filter on a number of variables (day, date, time, visit type and care worker), allows you to bulk edit visits and view the schedule rule (recurring or exceptional visits).
Visit Schedule Options:
-
Exceptional = One-off visit
-
Recurring = Recurring visits determined by rule set (e.g. Every Tuesday at 10am)
With any scheduled visit, you have the opportunity to add some additional configuration items to the visit see Should Know & Must Do below.
Should Know
A Should Know is a way to communicate important information to a care worker regarding that specific visit. An example might be “Mary was discharged from hospital on the weekend” or “It’s Mary’s Birthday today, wish her happy birthday!”. When scheduling a Should Know, the care worker is not required to acknowledge the message and therefore you shouldn’t use this option to request tasks to be completed.
To schedule a Should Know:
-
Click into newly scheduled visit from Roster View.
-
Refer to visit details panel on right-hand side of screen
-
Click ‘Add a Should Know’
-
Enter Title and Description
-
Click Save
Must Do
A Must Do is a way to request that a care worker completes a specific task as part of that specific visit. An example might be “Please change wound dressing and report how the wound is healing”.
When scheduling a Must Do, the care worker is required to acknowledge the message and provide a report back via the check-out process to notify the Care Team of the progress made pertaining to that task.
To schedule a Must Do:
-
Click into newly scheduled visit from Roster View.
-
Refer to visit details panel on right-hand side of screen
-
Click ‘Add a Must Do’
-
Enter Title and Description
-
Select who should be notified of the Must Do Response
-
Click Save
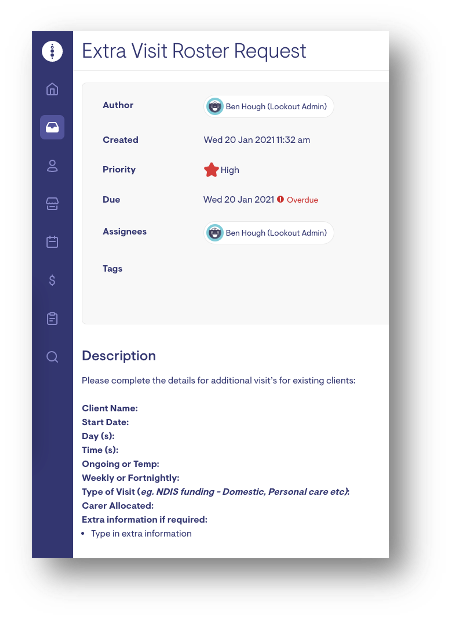
Request Extra Visit
If you need to request an extra visit to be scheduled for a client, you may utilise the tickets functionality to make this request to Rostering.
Create Ticket for an Extra Visit:
-
Click into Tickets menu item from left-hand side of screen
-
Click on ‘New Ticket’
-
Choose Ticket Template = Extra Visit Roster Request
-
Choose Client (Member)
-
Click Save
-
Next choose who to assign the ticket to complete the task (e.g. Rostering).
-
Select if a high priority
-
Enter Due Date
-
Enter details prompted to assist Rostering to schedule the visit.
-
Click Save
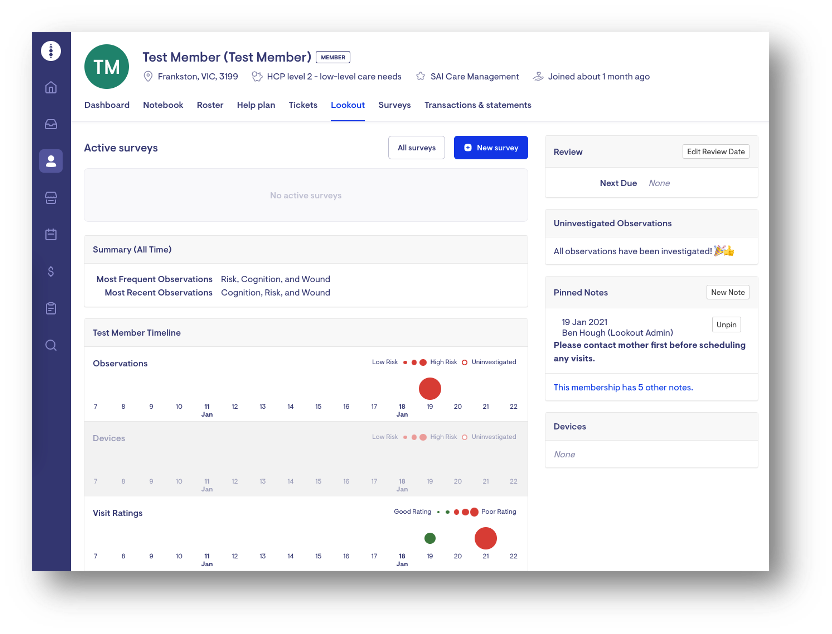
Client Health Timeline
Each client has a Health Timeline which exists under the ‘Lookout’ tab on a Client Profile. This timeline contains a visual overview of any previous visits, visit ratings and observations raised. You can click into any of the coloured dots to see more information specific to that visit. This health timeline is automatically updated whenever a visit is completed and notes following the visit are entered and/or raised as alerts.
Observations
Unique to the Lookout platform are observations and alerts which are raised off the back of a Care Worker entering notes at the end of a visit. Lookout has an inbuilt algorithm which scans these notes and puts them into context and detects possible risk.
Any observations which are flagged by the algorithm will be brought to your attention via your Care Manager Dashboard in the section ‘Un-investigated Observations’ or on a Clients Health Timeline which exists under the ‘Lookout’ tab on a Client Profile.
When you receive an un-investigated observation, you are required to ‘investigate’ the observation to determine the most appropriate next steps (if applicable). Observations are recorded on the relevant section of the client health timeline using both large and small dots of either red, green or grey colours. You may click onto a dot to bring up the relevant notes, details of the visit check-out and if applicable, observations along with your follow-up actions captured as part of resolving that observation. Small dots mean low risk or a good rating whereas the larger the dot, the higher risk and/or poor rating associated with that particular visit.
These observations are designed to assist you as a Care Manager in your day-to-day oversight of your clients and help you to focus on those which need to the most attention at any given time. The algorithm is designed to try and prevent risks related to a client’s health from escalating. Remote Care Intelligence presents a wide range of benefits to your role as a Care Manager. Too often, notes following a visit are entered into physical notebooks in the home and no one is able to monitor these notes and therefore you as a Care Manager cannot be aware of what’s happening in the home or be able to proactively detect possible issues ahead of them becoming major problems. Lookout aims to overcome this challenge and the notes entered following a visit are a crucial step in solving this challenge.
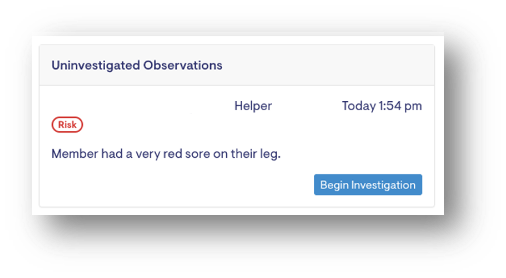
To investigate an observation, follow the steps below:
-
Click ‘Begin Investigation’
-
You will be reminded of what the observation was along with any relevant history of observations for the client.
-
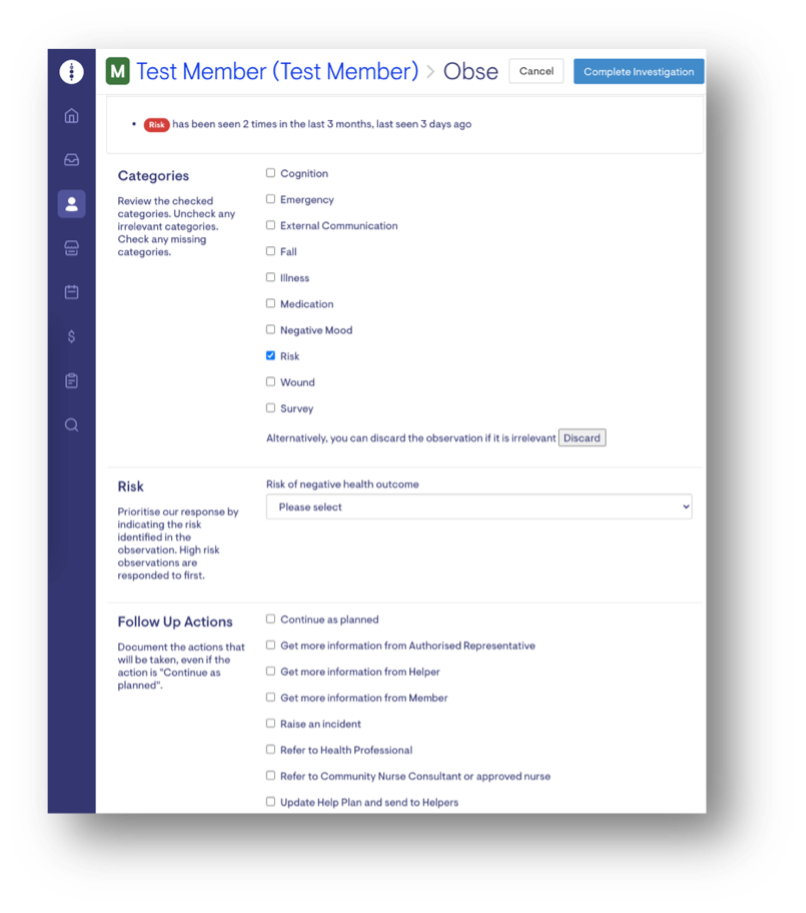
You will need to categorise the observation. The system will attempt to categorise based on the notes entered however please add/remove categories as needed.
-
If an observation should not have been raised and there is no further action required (i.e. The system interpreted the notes incorrectly and there was no risk) please click ‘Discard’ observation.
-
Assign a level of Risk based on risk of a negative health outcome occurring.
-
Select the most appropriate follow-up action you’re planning to take.
-
Click ‘Complete Investigation’ in the top right-hand corner.
-
Now that you have investigated the observation, it will be recorded in both the Client Notebook and Client Health Timeline.
Tickets
Lookout has an inbuilt ticketing and collaboration tool designed to assist you with common day-to-day tasks whilst keeping everything documented alongside the appropriate client and/or care worker.
A number of ticket templates have been created and each one contains a description section which usually requires you as the ticket creator to enter additional information along with a checklist of action items relevant to that task and/or process.
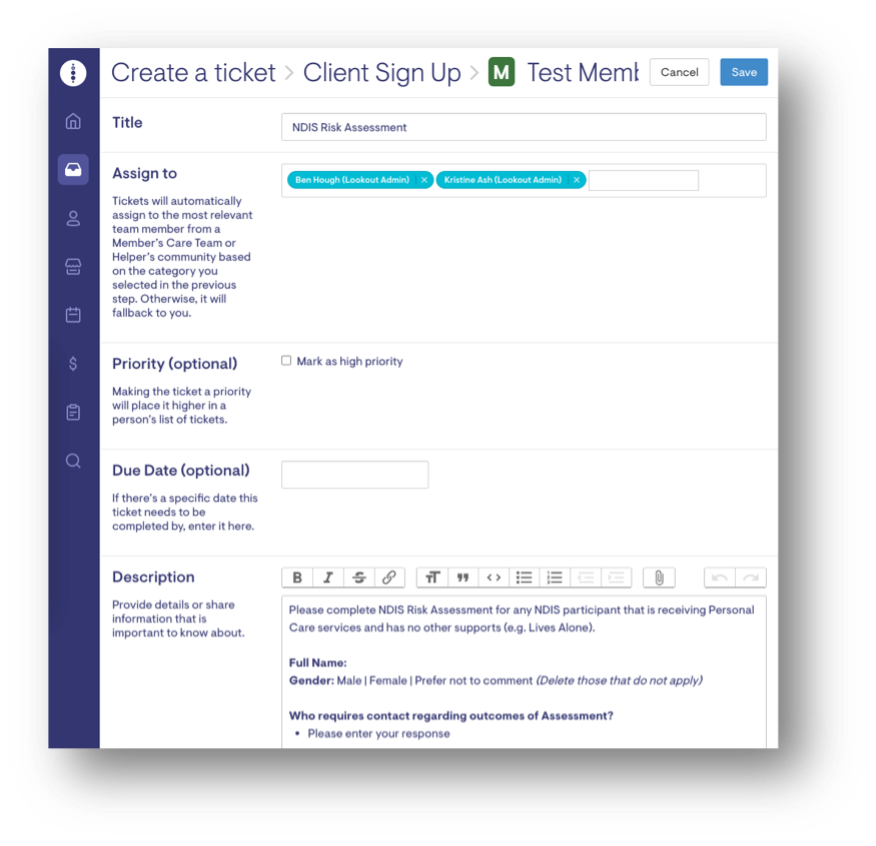
To create a new ticket:
-
Click into ‘Tickets’ from the menu on the left-hand side.
-
Click ‘New’ in the top right-hand side of the screen.
-
Select your ticket template and Client/Care Worker it’s regarding.
-
Follow the prompts to set who to assign the ticket to, due date, priority and necessary additional information.
-
Click ‘Save’ to create the ticket.
-
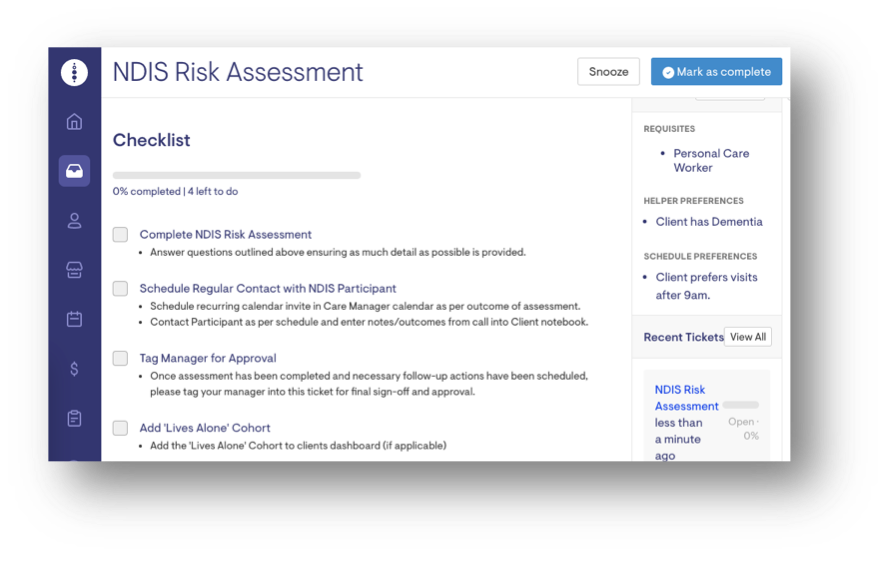
You will now see the created ticket. From here you may edit the information included in the ticket description, add additional assignees, check off items from the checklist and also add extra comments as part of the Ticket Discussion section. If you wish to tag new people into the discussion, simply type ‘@’ followed by their name (they will need to be loaded as a Staff Member in Lookout).
-
At any time, you may choose to mark the ticket as complete or hit Snooze. Snooze is a great feature if you’re unable to progress a ticket until a known future date. The ticket will then disappear from your tickets inbox until the snoozed date at which point it will reactivate and therefore remind you of the task.
Glossary of Terms
Helpers (Care Workers)
Helpers are the term used by the Lookout platform to describe Care Workers.
Members
Members is the term used by the Lookout platform to describe your clients.