
This guide explains what rates and products are, why they matter, and how to set them up. It covers creating a rate, the settings that make up a rate, linking rates to services and membership plans, updating and archiving rates, and how a Helper's own prices are set.
New to pricing terms? You may find it helpful to review our Lookout: Glossary of terms alongside this guide, which explains key words like rates, services, and membership plans in plain language.
What are Rates and Products?
Rates (also referred to as products) define the pricing for the services that Helpers provide to Members. Each rate carries details such as a name, description, pricing, tax settings, finance codes, and the rules for when it should apply.
Rates are the foundation of Lookout's smart rates feature. When you link a rate to the right services and membership plans, Lookout can automatically recommend the correct rate when a visit is created - based on the service, the visit's day and time, and the Member's membership plan.
A note on terminology: In Lookout, "rate" and "product" refer to the same thing - the priced item you set up here. You may see both words used across the system.
Why it matters
Well-set-up rates keep your pricing accurate and consistent, and they power much of Lookout's automation. Getting them right means:
- Visits are priced correctly - the right rate is suggested automatically at rostering.
- Less manual effort - you're not choosing prices from scratch each time.
- Consistent invoicing - the same rules apply everywhere the rate is used.
Before you start
-
You are logged into Lookout as a staff member.
-
You have finance permissions. Configuring rates requires finance access - if you can't see the rates area, ask an administrator within your organisation to review your permissions.
Creating a rate
Step 1: Navigate to rates
-
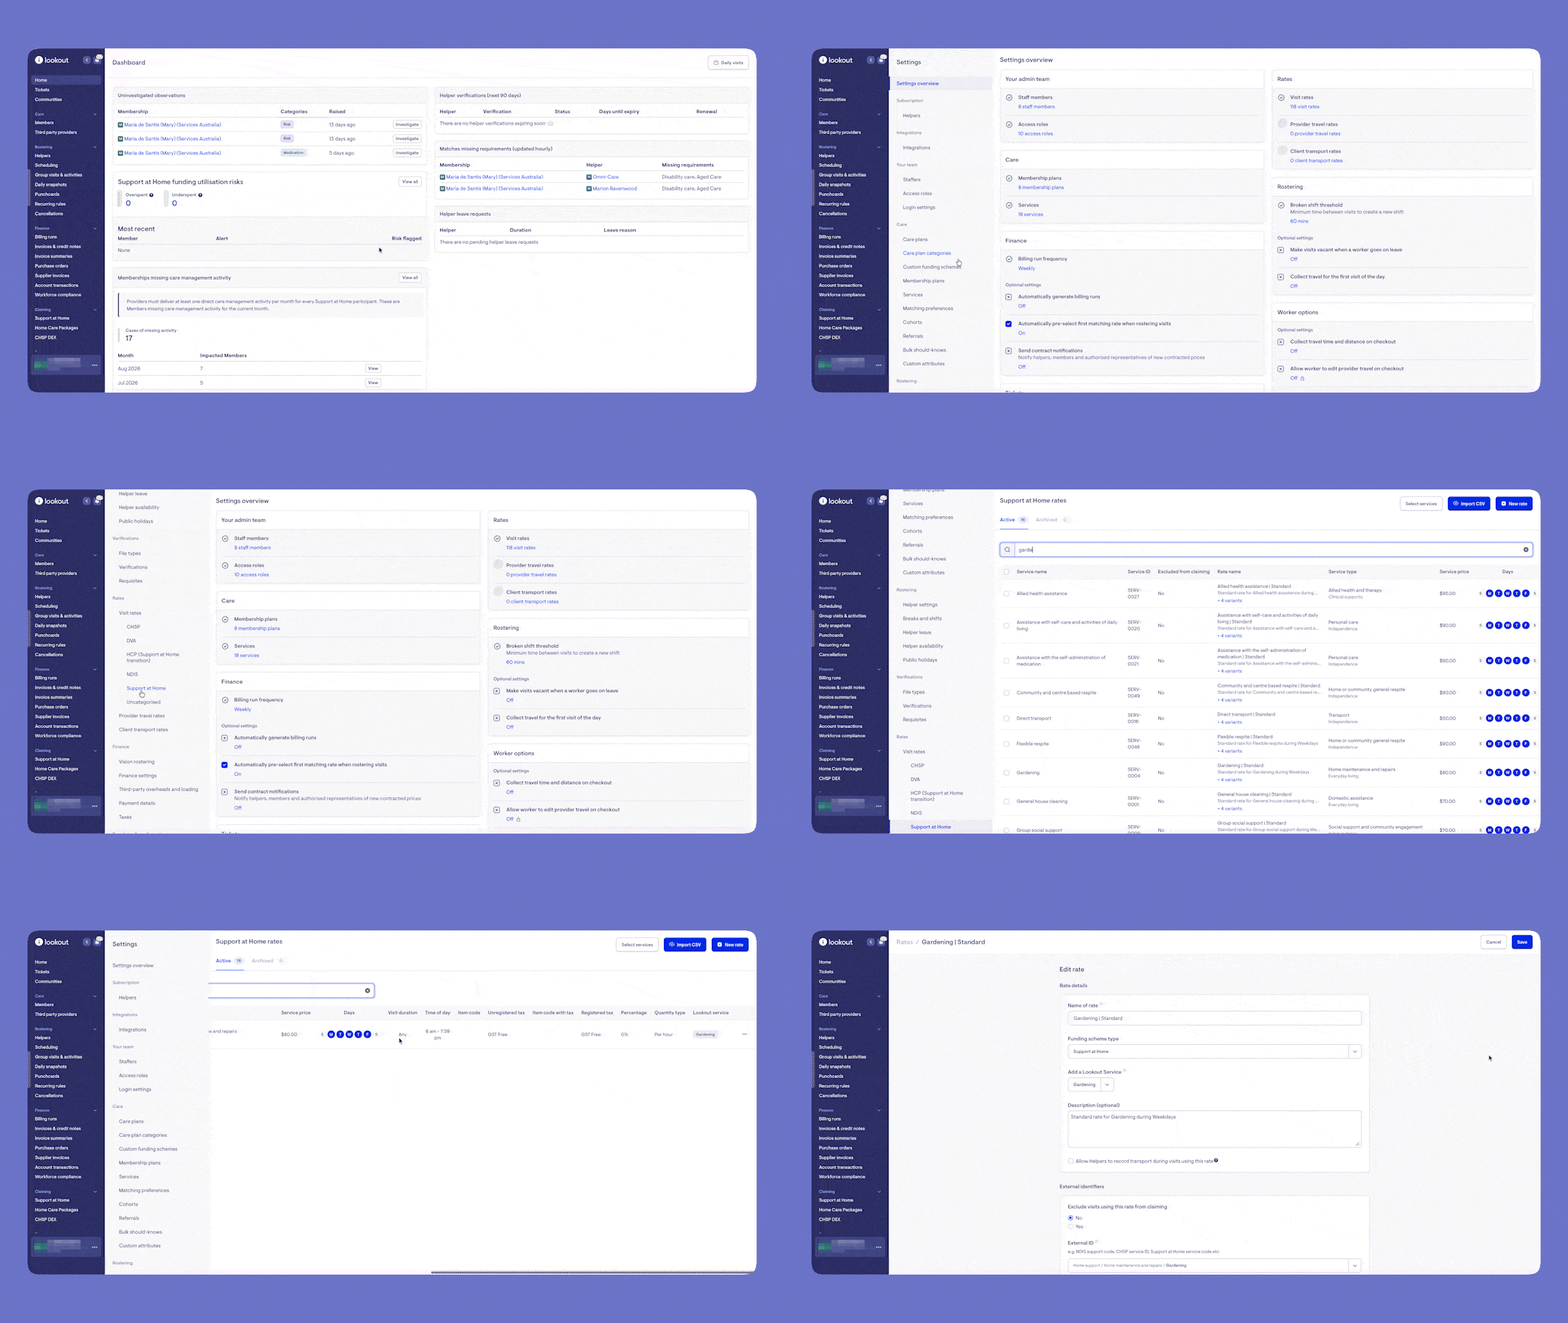
From your home dashboard, navigate to the overflow menu by clicking the ellipsis (...) next to your name in the bottom left-hand corner.
-
The overflow menu will open - click Settings.
-
In the main settings, navigate to the Rates section, then click Visit rates.
-
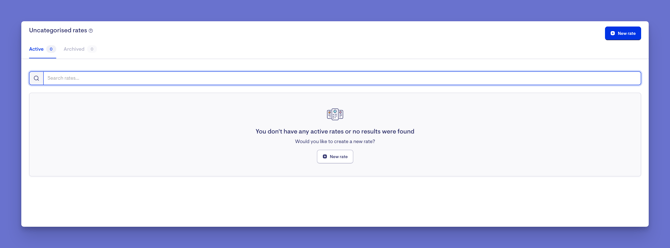
This may load the uncategorised rates screen by default. Ignore this for now, as your rates will filter by funding type as you add them.
-
Click the + New rate button in the centre of the screen or the blue + New rate button in the top right corner. Both will load the same screen.
Step 2: Complete the rate's settings
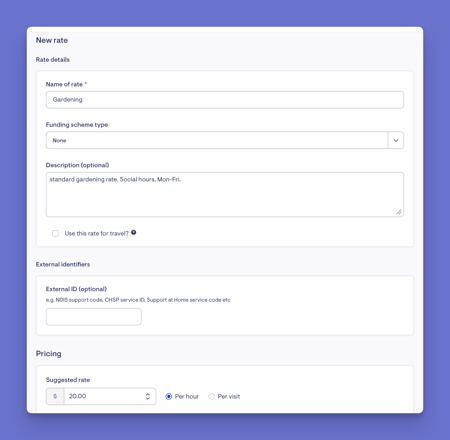
A rate is made up of several parts:
-
Rate details: The name and description shown within Lookout and on invoices. A funding scheme type that this new rate may carry.
-
External identifiers: For example, NDIS support code, CHSP service ID, Support at Home service code, etc.
-
Pricing: How the rate is charged (for example, per hour or per visit) and the price. You can also set price limits (a minimum and maximum) where applicable.
-
When the rate applies: The rules that let Lookout automatically apply the correct rate, such as the applicable days, time range, and visit duration.
-
Finance & invoice settings: How the rate is taxed (registered and unregistered tax settings) and the associated finance codes.
-
Complete each part, then click the blue Save button in the top-right corner.
-
A green banner will display to confirm that your new rate has been created.
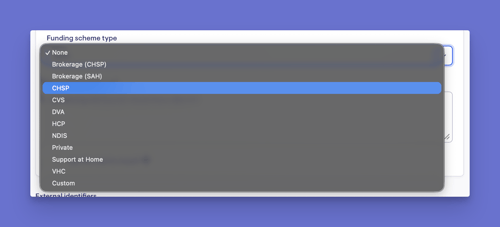
Top tip: Depending on your setup, a rate may also carry a funding scheme type (for example, Support at Home), which shapes some of its settings and codes.
Step 3: Link the rate to services and membership plans
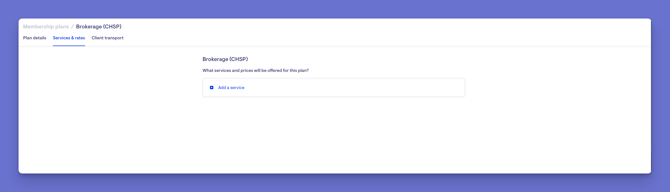
After creating a rate, link it to all the services and membership plans it can be charged against. This is what lets Lookout recommend the right rate during rostering.
You can link rates to a plan from the membership plan's Services & rates area - see our article on Creating and Managing Membership Plans.
Editing or updating a rate
- From your home dashboard, navigate to the overflow menu by clicking the ellipsis (...) next to your name in the bottom left-hand corner.
- The overflow menu will open - click Settings.
- In the main settings, navigate to the Rates section, then click Visit rates.
- Alternatively, click the Funding scheme type heading to narrow down the rates displayed.
- Use the search bar to find the rate you want to update or edit.
- Click the rates ellipsis (...) button, then Edit. You may need to horizontally scroll to find the button.
When you change a rate's price, Lookout asks how widely to apply the change, so you can control who's affected. The options are:
- Apply to all existing and future Helpers and contracts
- Apply only to Helpers and contracts currently using the default price
- Apply only to new contracts created from now on
You can also set the date the change should take effect from. Choose the option that suits your situation before saving.
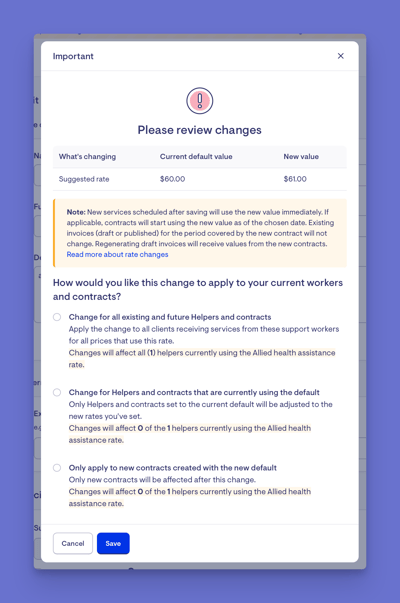
Please note: A rate can only have one price change applied at a time. If a previous change is still processing, you'll need to wait for it to finish before making another.
Archiving a Rate
Rates can be archived and restored at any time. Archiving removes the rate from view but doesn't disrupt existing work.
- In the rates area, locate your rate and select its ellipsis (...) button.
- Select Archive and confirm your actions.
- A green banner will appear confirming your changes, and the rate will now appear under the archived tab.
- You can unarchive a rate by clicking its unarchive button at any time.
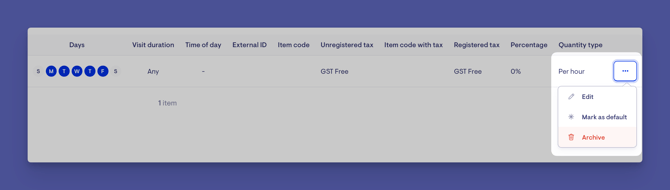
Please note: Any existing contracts using the rate will remain in effect until those contracts are renewed.
Setting a Helper's products & prices
Each Helper has their own set of products and prices, based on the rates they offer. You can either keep the default price for that rate or customise it for that Helper.
- From the main navigation menu, click Helpers under the Rostering section.
- You'll see a list of all the Helpers you have access to.
- Select a Helper from the list, using the search and filter to narrow down the results if needed.
- Click their name to open their dashboard - a complete view of their details, communities, services, contracts, schedule, and more.
- Scroll to the Products & Prices section and select Edit.
- Select the rates the Helper should offer, adjust any default prices if needed, and when ready, click Save.
Please note: A Helper's products and prices can only be edited by a staff member with the appropriate workforce access.
Troubleshooting
I can't see the rates area or the option to create a rate
Configuring rates requires finance permissions. Ask an administrator to review your access.
Lookout isn't suggesting the right rate at rostering
-
Check the rate is linked to the relevant service and membership plan.
-
Check the rate's "when it applies" rules (days, time, and visit duration) match the visit.
My price change won't save
A rate can only have one price change applying at a time. If one is still in progress, wait for it to finish, then try again.
I archived a rate but it's still being charged
Existing contracts continue on the rate until they're renewed. Archiving only stops it being used for new contracts.
I can't edit a Helper's products and prices
This requires the appropriate workforce access. Ask an administrator to review your permissions.
Still Need Help?
If you're still experiencing issues, please contact our Support Team and include:
-
Screenshots (if possible)
-
The exact steps taken
-
Any error messages received