You can manage Vacant Visits and request Care Workers (Helpers) to fill the visit by using tickets. These allow you to advertise a visit or create a new match in the Administration view. Lookout allows you to:
-
Create or change a visit to become vacant
-
Utilising the Vacant Visit add-on in a ticket, you can invite Helpers to roster on for a visit and keep track of their responses.
-
The invitation is sent to the Care Worker via the app, where they can respond.
-
If you have invited multiple Care Workers, the software allows you to select the most appropriate Helper after receiving their responses.
-
Once selected, the Care Worker is assigned to the visit and contracts are automatically created (if none previously existed) with a simple click of a button!
Jump to:
Instructions
Create a Vacant Visit Request ticket
A Care Worker (Helper) Request Ticket must first be created. For more information on tickets, please refer to the Ticket support article.
-
Navigate to the Tickets menu item in the left-hand sidebar
-
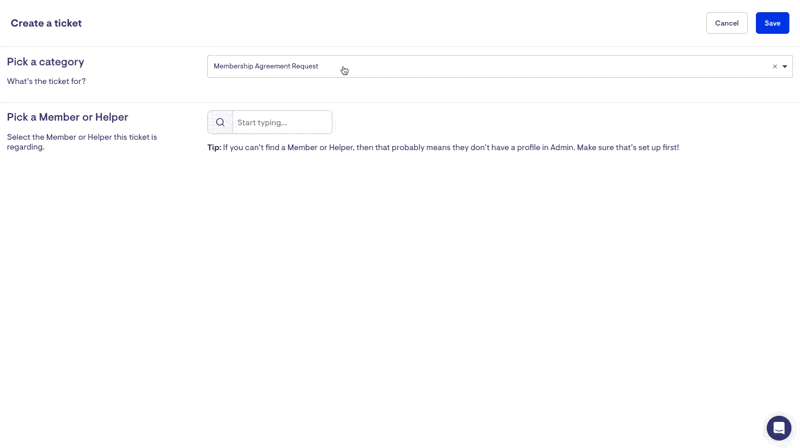
Click on the top right-hand button that says New
-
Select the category of the ticket - Vacant Visit Request
-
Select the Member this ticket is regarding
-
Click Save
-
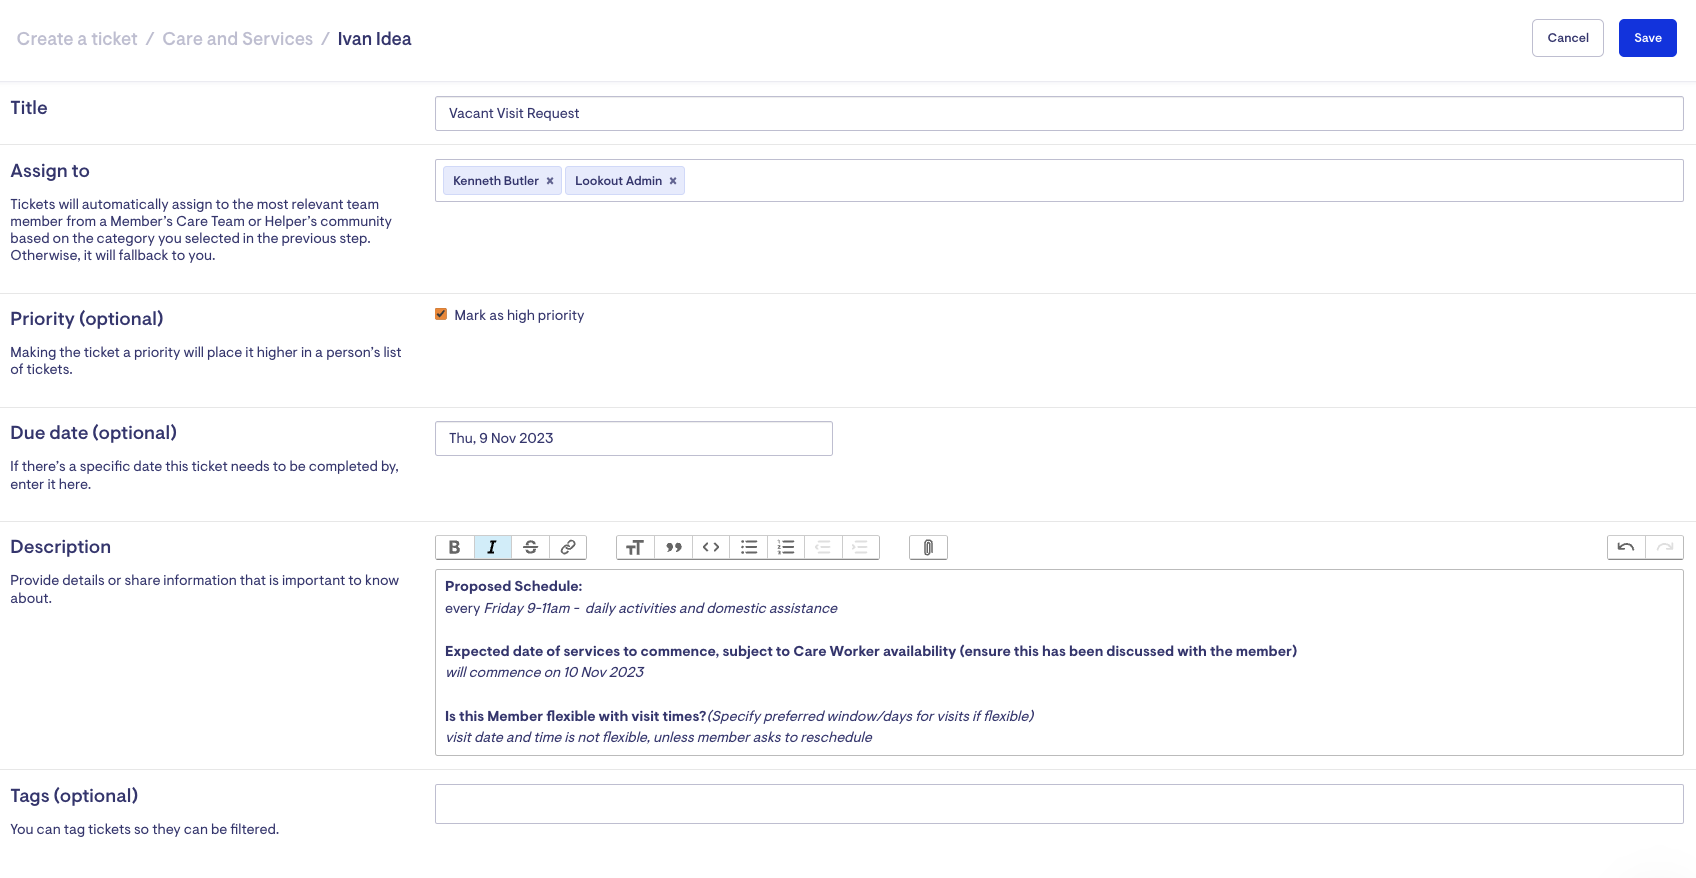
You will now see a page where you can fill out the details of the ticket.
You can:
-
Assign it to yourself and/or others
-
Set its priority if needed
-
Set a due date if needed
-
Add details of information to share with other team members in the description
-
Add tags for filtering if desired
-
-
Click Save and you should have successfully created a new ticket.
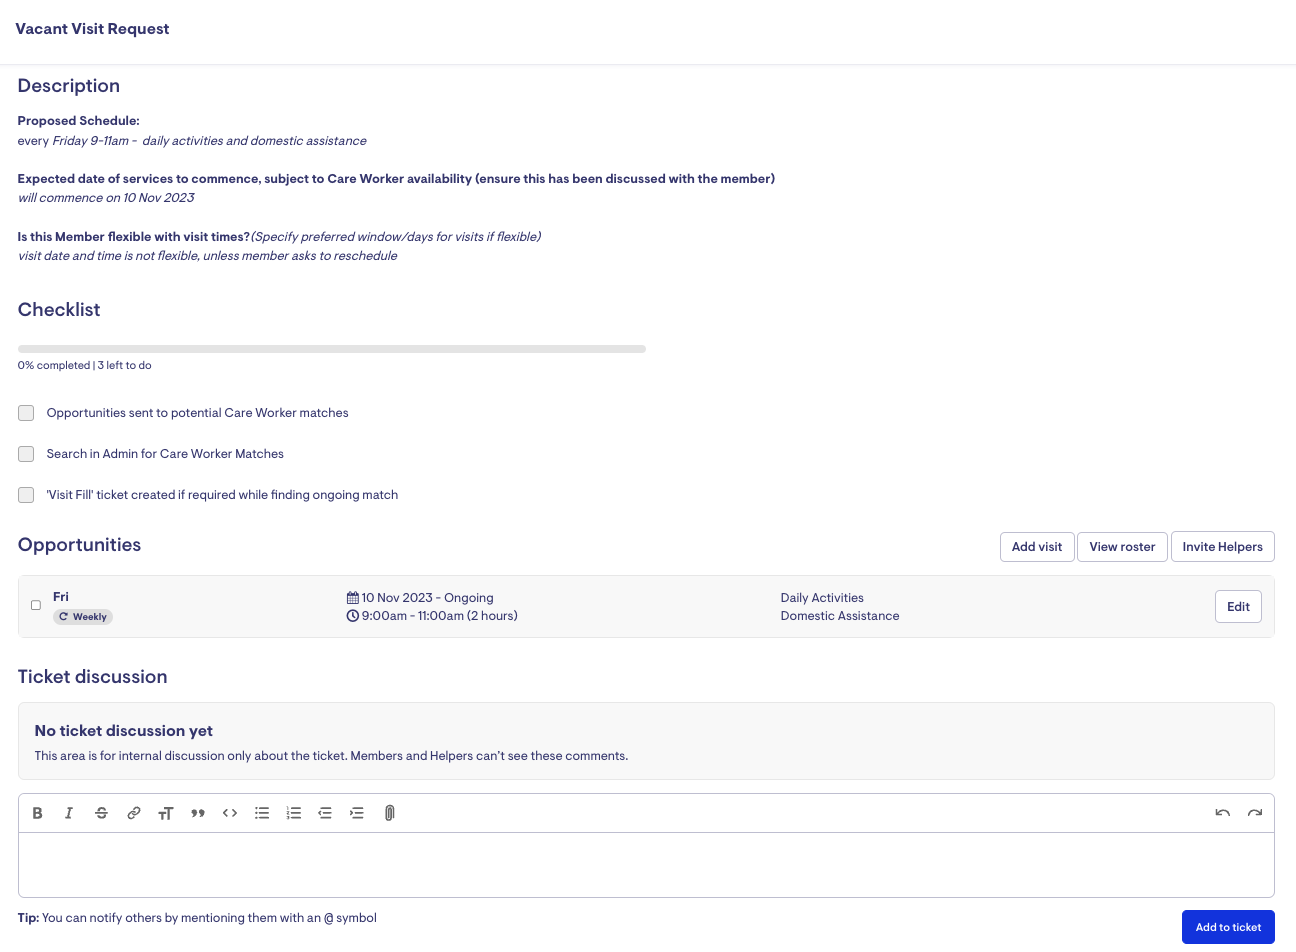
If you scroll down on a Care Worker (Helper) Request ticket, you will notice a section that's been added called 'Opportunities'. This space will detect when a Member has upcoming vacancies in their roster and display them so you can then select the ones you'd like to fill by inviting Helpers to respond to them.
Invite Helpers
-
Select a vacancy(s) you'd like to fill.
-
Click the button labelled "Invite Helpers." This means you'll invite the same Helpers to respond to each selected visit. If you want to invite different Helpers to different vacancies, you need to select each visit individually and send separate invites for each group of Helpers.

-
Select from the Recommended Helpers
-
Select Helpers by searching for Helpers via the dropdown. You'll notice the dropdown has sections for Helpers already contracted to the Member, and then other Helpers who are within a 30km distance of the Member.

-
You'll then be directed to the invitation screen to fill it out. You can then select the Helpers you'd like to invite.

-
-
Once you've invited Helpers to the opportunity, you'll be directed back to the Helper Request ticket. You'll see a summary of the opportunities you'll be inviting Care Workers to respond to.

Care Worker View
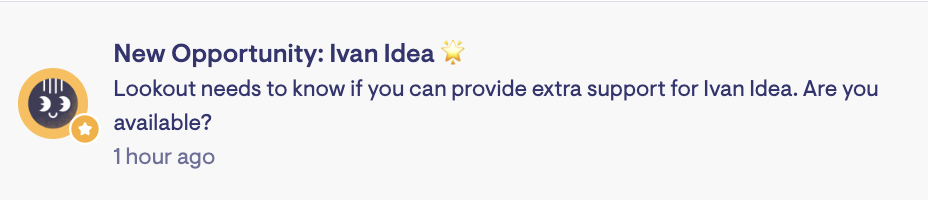
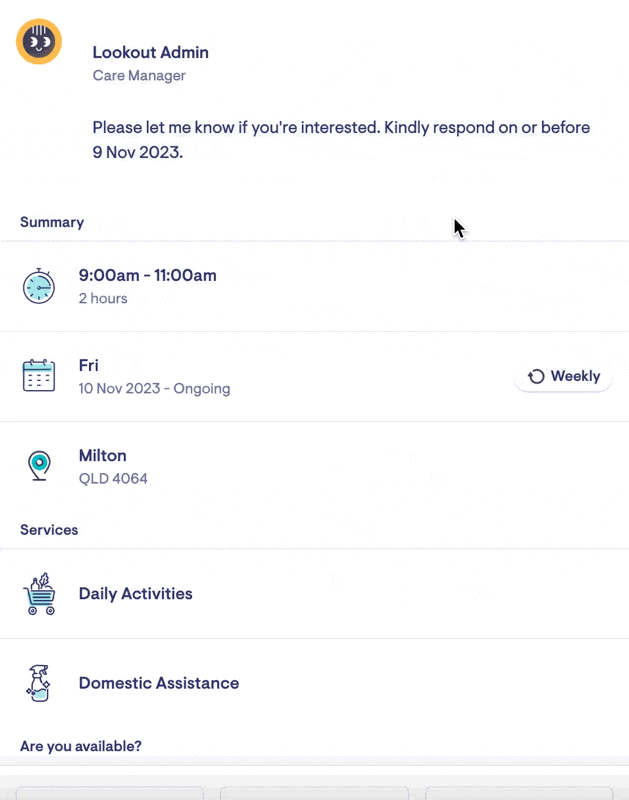
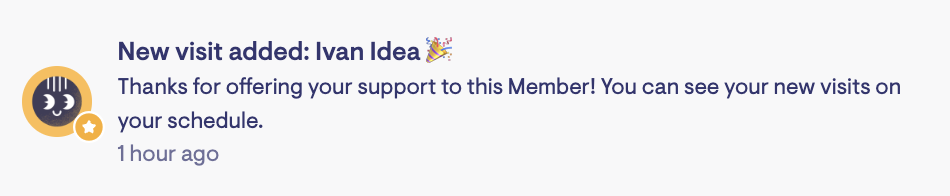
Care workers will receive a notification for a new opportunity. They can view the invite and send a response by clicking the notification.
Care Workers will see all the details of the visit, but they will not see the hourly rate or pricing specified on the ticket. Additionally, they won't know which other helpers have been invited for the same opportunity.
Further information when creating an invitation:
-
Your invitation message should avoid discussing the days, times or services for the visit - they will see this information anyway - this can cause confusion, especially if you've selected multiple visits to invite a Care Worker to respond to. They receive individual invitations for each visit instead of in a batch as you see it. For instance, you could be referring to "Monday" in your invitation, but they're looking at the invite for the Wednesday opportunity. This is why it's important you don't mention days, times or services in your message since it could conflict with the details of the opportunity they're looking at.
-
Instead, focus on encouraging the Helpers to respond and give them a bit of extra detail about the Member or anything more specific about the visits.
Notification of Helper Response
When a Care Worker responds, you'll receive an email notification alerting you to their response. It will direct you to view the Helper Request ticket so you can take further action.
Viewing Responses and Filling the Vacancy
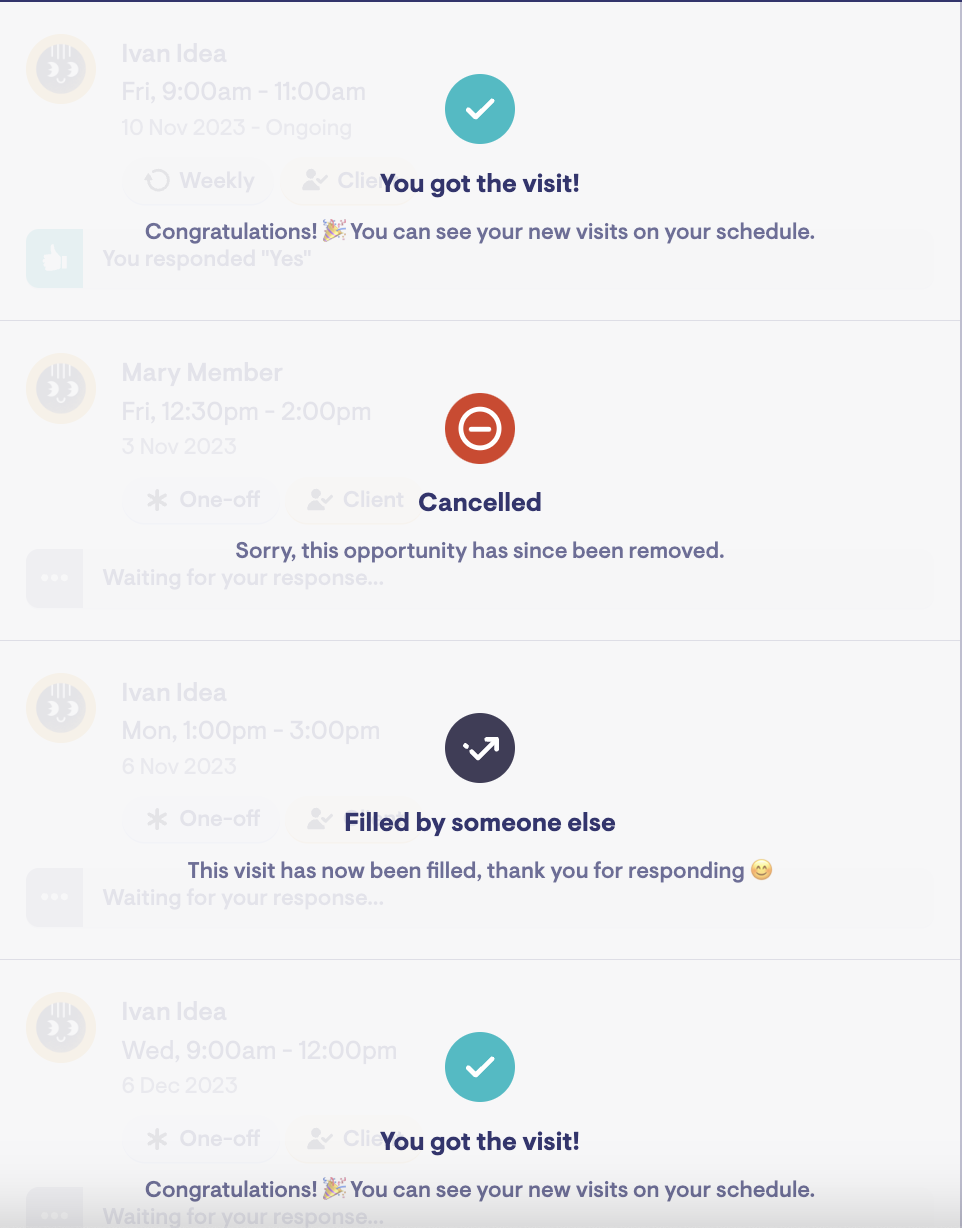
As responses come through, the Helper Request ticket will update with the Helpers' Yes, No, or Maybe response. They may also leave a note too. You can then easily compare and choose the best candidate to fill the visit.
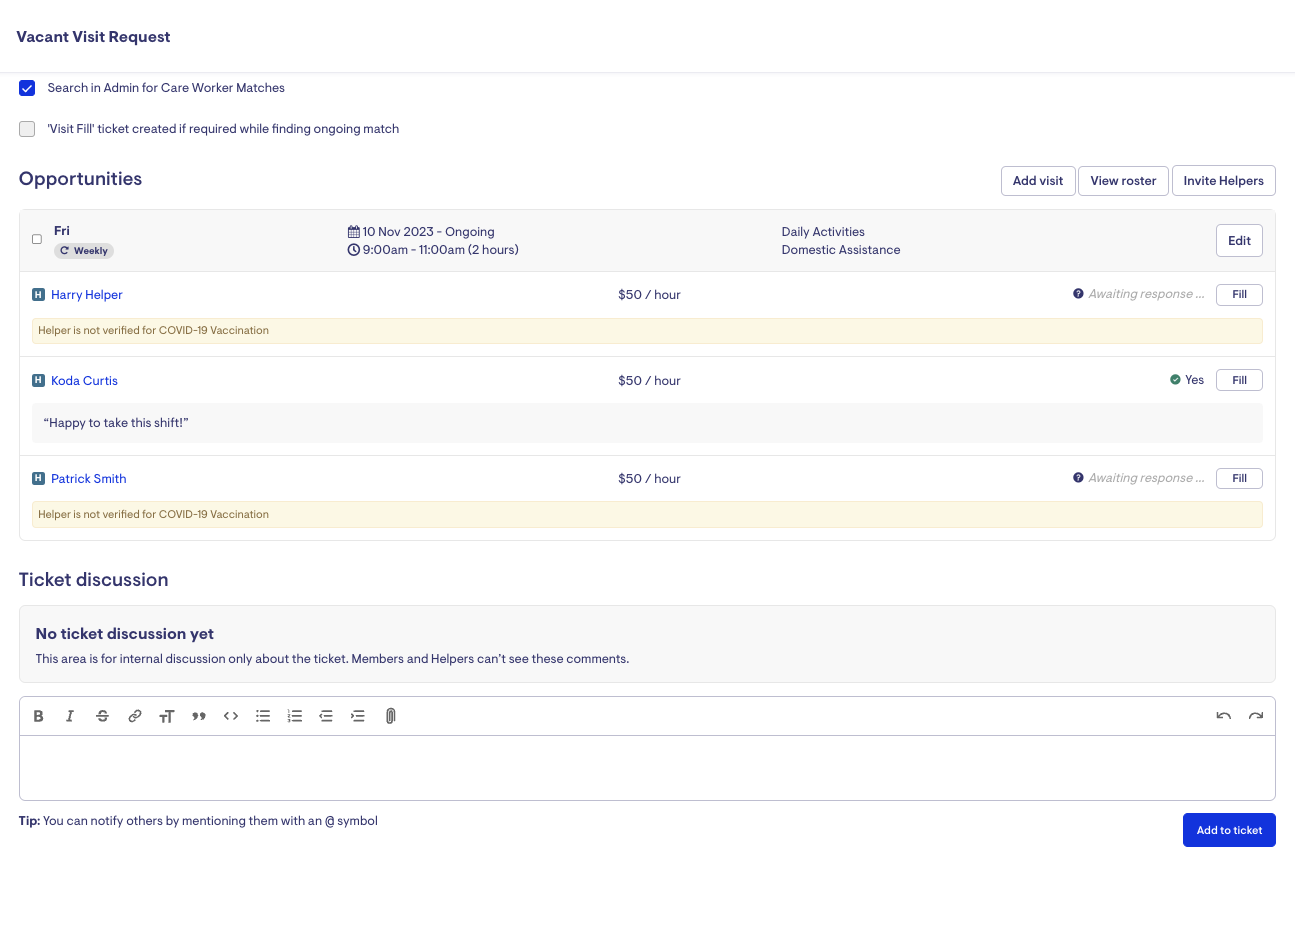
On the far right of each response, you'll see a button that's labelled "Fill." Clicking this will assign the visit to the selected Care Worker, and will also create a contract if the Member and Care Worker don't currently have one between each other.
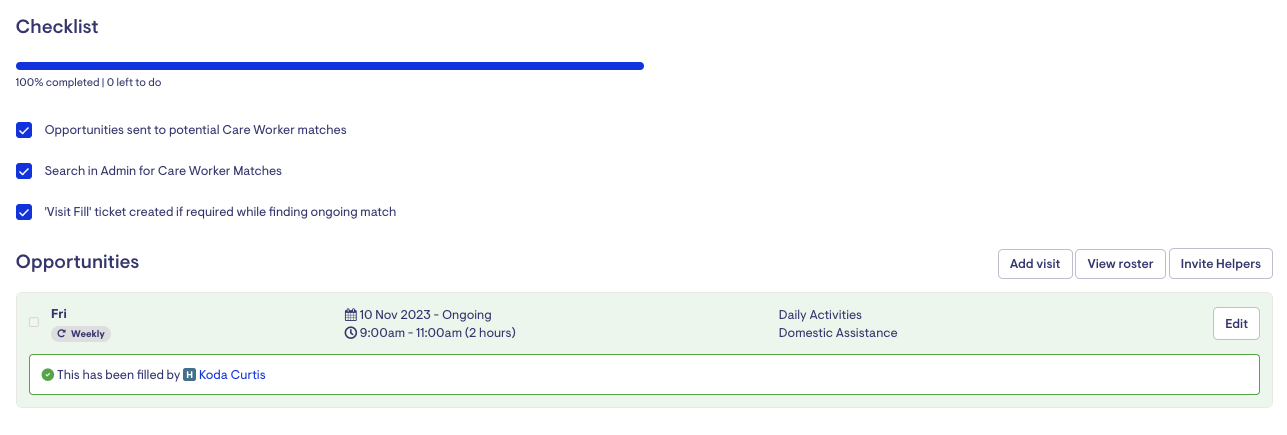
Clicking fill will also ask you to confirm your selection before filling in the visit. Once a visit is filled, the Care Worker (Helper) Request ticket will update again to show you've filled the visit with a Care Worker.
The Care Worker will then receive another notification if they have been selected to fill the vacant visit.
Other Care workers invited for the opportunity will not receive a second notification. Nevertheless, they can verify the opportunity's status by accessing the initial notification they received, which also displays a history of all the opportunities they have been invited to.
Vacant visits are also displayed on the Member's roster within their app so that they can be aware of your efforts to fill these vacant visits.
Additional Information/Questions
A response becomes stale when you have modified a visit after they've responded. This is because the visit may have been drastically modified in terms of times, days or services, and so the Care Worker's original response may no longer be valid. It would be risky to choose them to fill the visit since their reply may no longer align with the visit as it currently exists.
-
If you still want that Care Worker to respond, you can invite them again.
-
If you want to fill the visit with that Care Worker regardless, you can click the "edit" button on the vacancy and assign it to the Care Worker instead. You just won't be able to use the "fill" button on the ticket.
Why can't I fill the visit with some of the Care Workers I've invited?
When a 'Fill' button is disabled, it means there are reasons blocking you from choosing that Helper to fill the visit. Those reasons could be:
-
The Care Worker's response is stale, meaning it may no longer be valid
-
There are red warnings against the Care Worker
What do the warnings under the Helpers mean?
You may notice yellow or red warnings associated with certain Care Workers. These warnings serve as alerts for potential issues that may arise when matching them with a Member. You have the option to address these issues by editing the Care Worker's profile if you choose to do so. However, the primary purpose of these warnings is to inform you before proceeding with a match.
-
Yellow warnings = warnings - Yellow warnings won't block you from assigning the Care Worker to the visit.
-
Red warnings = hard blockers - Red warnings will block you from filling the visit with that Care Worker. These warnings will appear if:
-
The Care Worker doesn't offer the product/rate needed for the visit
-
The Care Worker doesn't provide the services required for the visit
-
TheCare Worker is incompatible with Member (on their incompatibility list)
-
The Care Worker was archived
-
The Membership was archived
-
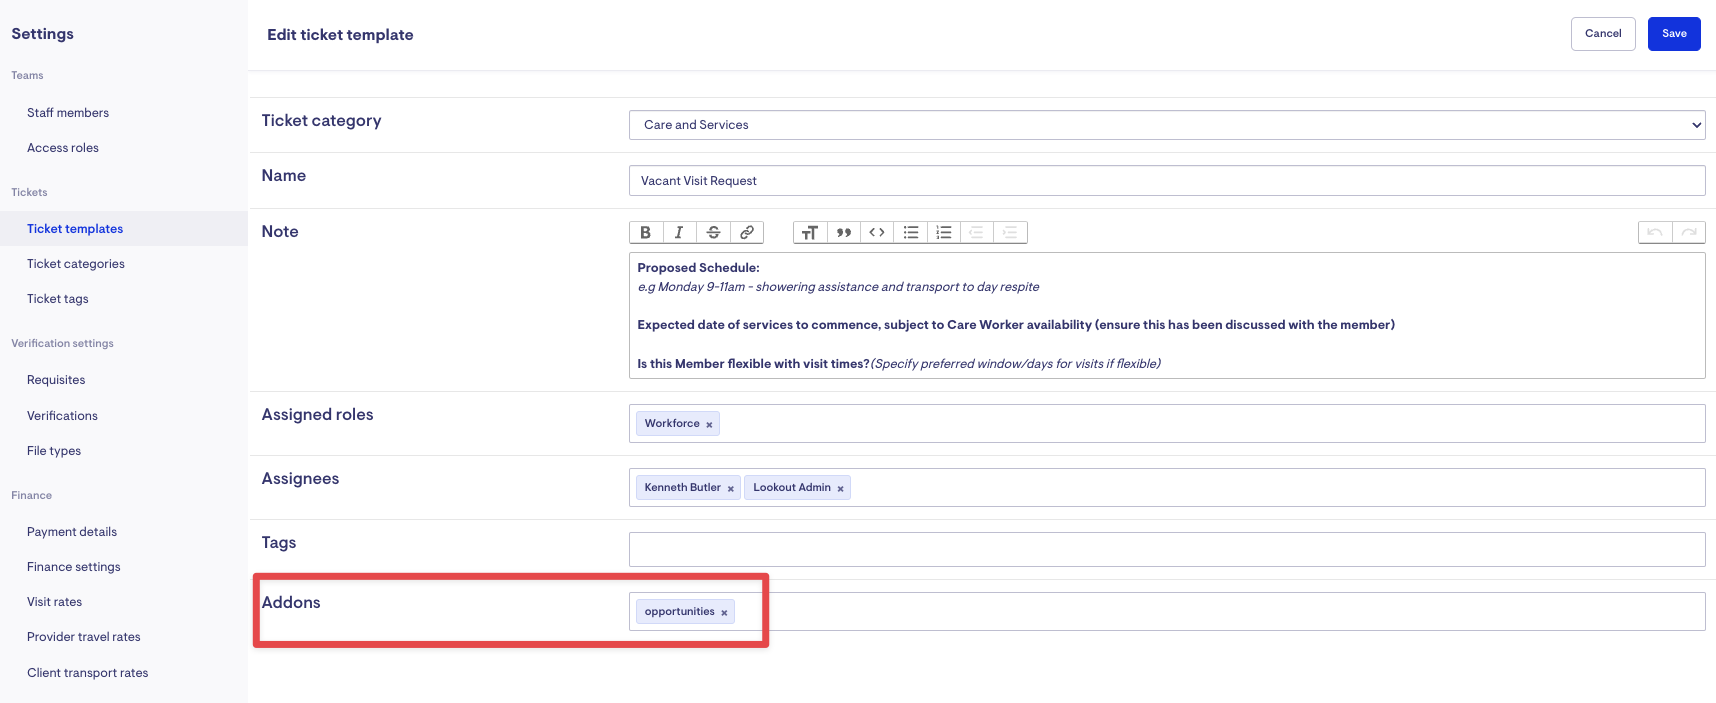
Why is the Opportunities section not showing up on the Vacant Visit request ticket I created?
To ensure the Opportunities section is accessible, the Vacant Visit request ticket must be associated with a membership. If a helper was selected instead of a member during the ticket creation, the Opportunities section won't appear.
If you created the ticket for a member but still can't see the Opportunities section, please make sure the opportunities add-on is included in the ticket template.
Here's how to do it:
1. Go to Settings and access Ticket templates.
2. Edit the Vacant Visit Request template.
3. Add "opportunities" to the Addons section.
4. Save the changes and create a new ticket.
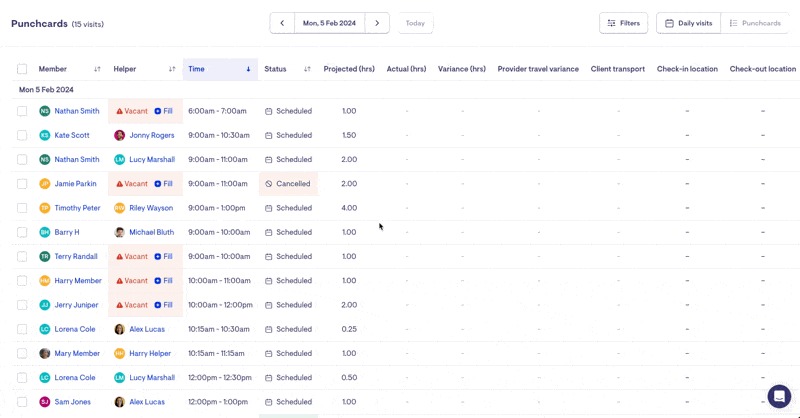
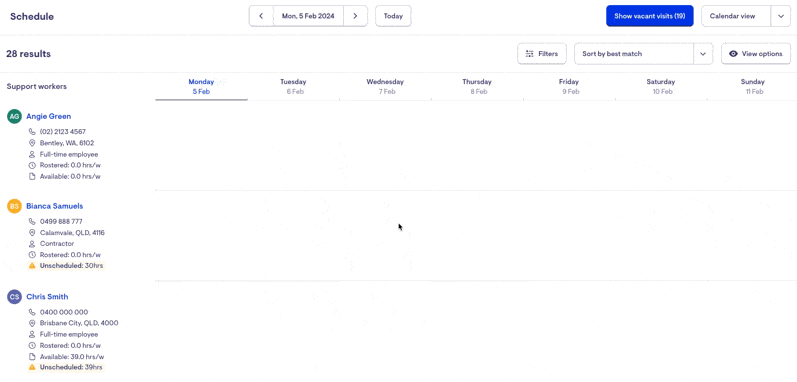
How do I find Vacant Visits?
To find Vacant Visits, go to the Scheduling page and click the 'Show vacant visits' button. On the 'Calendar view', you'll see vacant visits for the calendar week where the selected date belongs. To narrow it down to just the vacant visits for the day, switch to the 'Daily view'.
To locate all vacant visits, head to Punchcards. Use the Visit Status filter and select 'Vacant'. Because Lookout generates recurring visits for the next 90 days from today, adjust the Punchcard period to span from the current date to the next three months.