Introduction
This guide introduces the latest updates to custom attributes, designed to give your team more flexibility, control, and visibility across Lookout.
One of the key additions is the new Tag field type, similar to dropdowns or radios buttons, which allows you to select from a predefined list of options. Tags help surface important client details quickly and consistently.
We've also introduced a new custom attributes permission, giving admins better control over who can manage attribute settings versus who can add or edit attribute values.
Finally, custom attributes are now even more powerful with enhanced filtering options. You can filter memberships based on attribute values, whether they’re selected from a list (like checkboxes or tags) or entered as free text.
In this article, we will discuss the above in further detail, ensuring that by the end of this article, you understand and can confidently implement these new features.
What is a Custom attribute?
A custom attribute is a user defined field that allows you to capture specific information that isn't already included in the standard fields of the system.
Custom attributes are useful when:
-
You need to record data that’s specific to your operations, clients, or workflows.
-
The available fields don’t cover everything you want to track.
-
You want to improve filtering, reporting, or automation based on information that matters to you.
A common example may be capturing a communication preference on a Membership. You could add a custom attribute with ‘Preferred contact method’ and add Phone, Email and Text as drop-down options.
While custom attributes have been a part of Lookout for a long time, they have been uplifted to give your team more flexibility, control, and visibility across Lookout.
New tag attribute type
Tag is a new field type option that has been added to Custom Attributes. Like the dropdown or radio field types, it lets you choose from a predefined list of options. Let’s see how it works in practice.
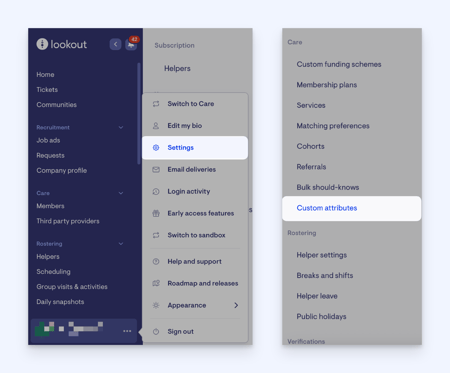
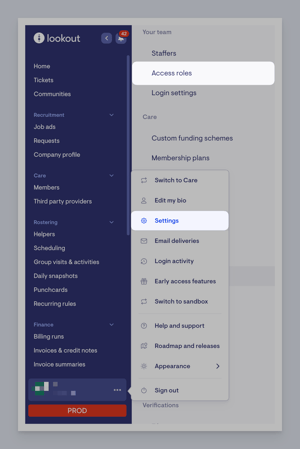
Navigate to Settings by clicking the three dots next to your name in the navigation bar, and then select Custom attributes under the Care heading.
The new tag type is available across all custom attribute groups listed on this page and can be used to create a new custom attribute or edit an existing one.
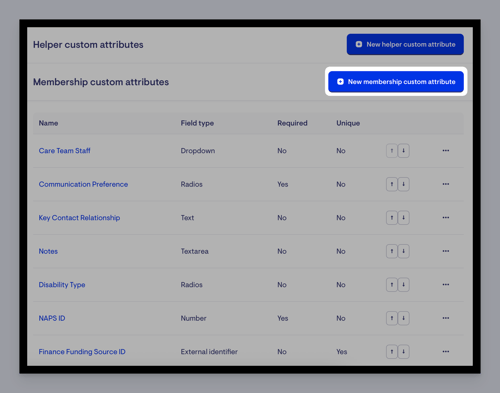
For this example, we are going to create a new membership custom attribute. Click the blue New membership custom attribute button to start.
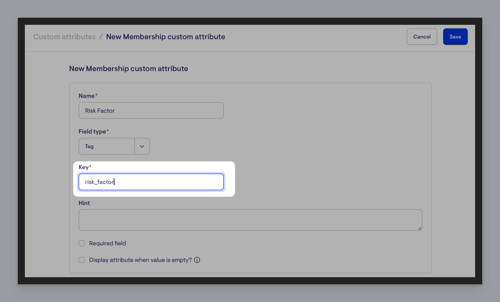
A new screen will load. Give your new custom attribute a name and select Tag from the field type drop-down options.
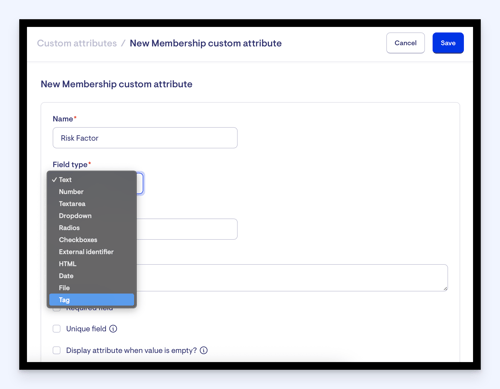
In this example, we’re creating a custom attribute related to risk factors. In the options section, we’ll add “Medium Risk” and “High Risk” as our tags.
You will see that the Key input field has a red asterisk, so it needs to be filled in to save. The Key box is a reference name for your new tag. It is used for reporting purposes. For best practice, type the name of your new custom attribute here, but with an _ between words instead of spaces.
You will see that you can also assign an icon and colour to each tag option.
The icon option also includes a search feature to help you filter and find an appropriate icon. We have rolled out this new feature across Lookout: the search filter will appear if there are six or more options present in a dropdown.
A live preview will appear next to your created tag options, so you can see exactly how they’ll look when in use and a clear breakdown of their components. The label is the text that will appear when a tag is used, meaning this is the text you'll see when a custom tag is applied to a member. You can also see this in the preview of the options on the right-hand side. You determine the value. Here you can add a reference like low, medium or high. The value sits within the tags. The icon will appear next to the label text whend, and the colour is what the label and icon will sit within, a tag is applie as you'll see in the preview.

You can also use the six dots on the left-hand side of your options to reorder them. This new feature is available when using the tag field type and Dropdown, checkboxes, and radios attribute types.
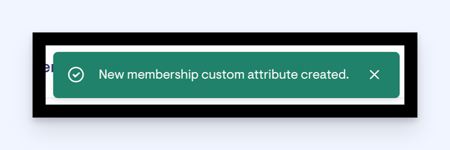
Don’t forget to click the blue Save button to save your new custom attribute. A green pop-up box will appear to confirm your new attribute has been created successfully.
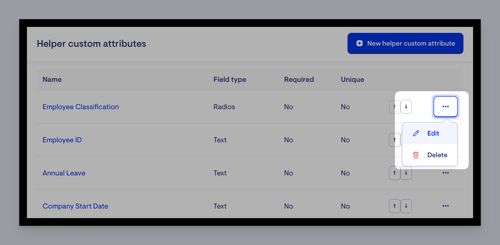
To edit an existing attribute to the tag type, locate your attribute and click the three dots on the right-hand side of it, then select edit. Following the same steps as above, you can update an existing custom attribute to this new Tag field type.

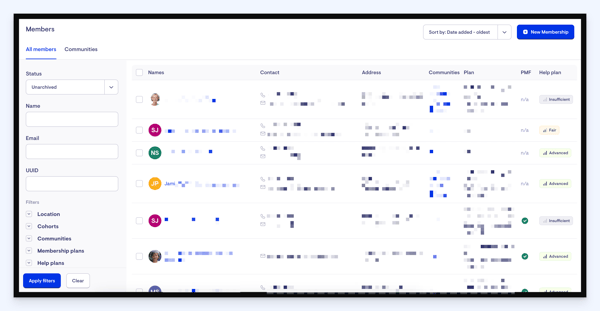
Now let’s see our new custom attribute in use. Navigate to the Care section in the main side menu, and then select Members.

You can use the search filters to help you find a member or scroll through the list. Once you have found who you are looking for, click their name to enter their dashboard.
From their dashboard, scroll down to the left-hand side where their membership details are. Click the Edit custom attributes button. This will open a new screen.
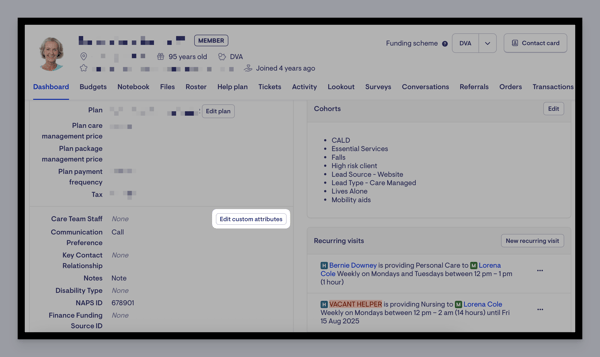
This will open a new screen. Scroll down to the bottom to locate our new Risk Factor custom attribute. Select either the High or Medium risk tag option, and don’t forget to press the blue Save button.

A green pop-up box will appear to confirm you have updated your member’s custom attributes.

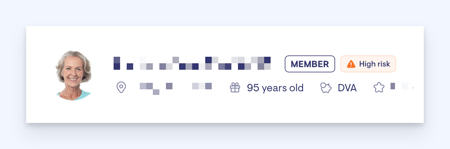
You will now see on your member’s dashboard next to their name the risk factor tag you have given them.
This custom attribute can be edited at any time. For instance, with our example, if our member is set to a high risk, over time this tag may now be suitable anymore, meaning we can edit our custom attribute tag by following the same steps above and changing the option to medium risk to appear by their name instead.
This custom attribute can be updated at any time. For example, if a member is initially marked as "High Risk" but their situation improves, you can follow the same steps to edit the attribute and change the tag to "Medium Risk." The updated tag will appear next to their name, keeping the information accurate and current.
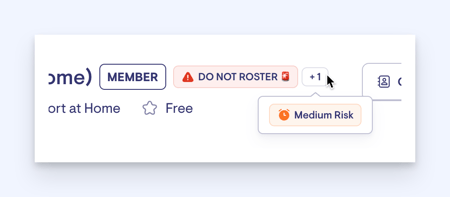
If a member has numerous tags, these will appear in a collapsed tooltip.
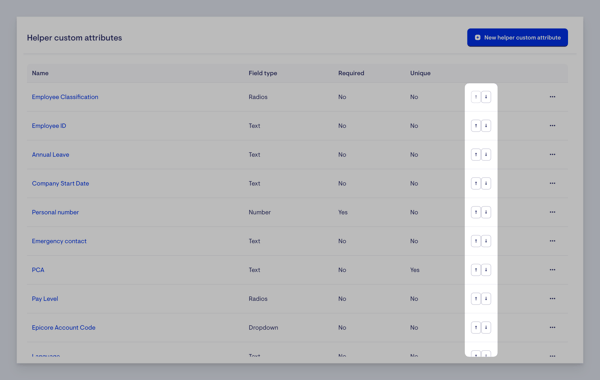
The order of the tags is determined by the order in your custom attribute’s settings. To change the order of your custom attributes, head back into your three dot settings, and the locate Custom attributes under the Care section. You can use the up and down arrow buttons to reorder and move your custom attributes.
Updated user permissions
We've added a new permission called "Custom Attributes" to access roles. This helps separate who can manage custom attribute settings from those who can add or edit attribute values.
There are still some built-in restrictions to keep things secure and role-appropriate. For example:
-
If a staff member doesn’t have access to a membership (based on community permissions), they won’t be able to update that member’s custom attributes.
-
If they can’t manage products (e.g. they're not a Finance Admin), they won’t be able to change product attribute values.
-
And if they aren’t a Marketplace or Workforce Admin, they won’t be able to edit custom attributes for helpers.
These checks help ensure that users only see and edit what they're meant to, keeping your data safe and well-managed.
The ability to add custom attributes can only be completed by someone with the correct permissions. You will either need to edit an existing access role to include this permission or create a new one and assign it to relevant staff.
For staff to have access to custom attributes, we must complete a few steps: Navigate to Settings by clicking the three dots next to your name in the navigation bar, and then select Access roles under the Your team heading.
You can add the custom attribute permissions to your existing access roles by clicking the three dots, then the edit option.
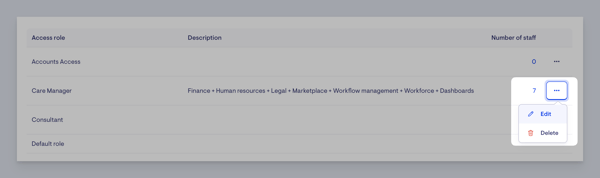
This will load up a new screen, where you will scroll to locate Custom attributes, then tick this option to assign access to this role.

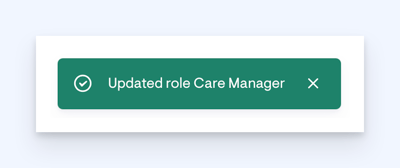
Click the blue Save button to finish. A green pop-up box will appear to confirm that your access role was successfully updated.
Filter memberships by custom attribute values
This new feature allows you to filter memberships based on custom attribute values. If the attribute uses options like checkboxes, radio buttons, dropdowns, or tags, you’ll see a list of checkboxes to choose from. For free-text attributes, a simple text field will appear instead.
This filtering functionality will soon extend to other lists where custom attributes are used. Watch this space!

Workato automations
Your organisation can set up Workato automations to update custom attributes automatically. For example, you can:
-
Automatically tag a client as a high falls risk if a falls incident was reported either in Lookout or via an external system.
-
Update a radio button or checkbox to reflect the outcome of a new assessment uploaded elsewhere.
-
Populate a free-text field with notes or scores pulled in from another system.
-
Turn tags on/off or switch them based on changes in funding level, help plan updates, budgets, incidents, observations, etc. The options are limitless!
If you're interested in setting up these kinds of automations, please reach out to your account manager to help you get started.