Introduction
The new recurring rules page is your go-to destination for managing all recurring visit rules in one place. Designed with clarity and control in mind, this feature allows users to easily view, audit, and update recurring rules based on a selected date or range. Whether you're troubleshooting visit patterns, reviewing scheduling coverage, or aligning rules with operational updates, the recurring rules page offers a streamlined and intuitive experience to keep your schedules running smoothly.
This manual provides step-by-step instructions on:
-
Navigating and utilising the new recurring rules page
-
Mapping recurring visits to Support at Home
By following this guide, service providers can ensure a smooth transition to the new Support at Home framework, maintaining continuity of care for clients and aligning with the latest funding and policy requirements.
Recurring rules
Overview
The new recurring rules page is designed to help you easily identify and manage any recurring rules that are active on a particular date or date range. At the top of the page, you can select a specific day or a custom date range, and the system will display all recurring rules that have visits overlapping with that period.
This makes it much easier to:
-
Audit and troubleshoot recurring visits
-
Understand scheduling coverage
-
Make bulk updates to recurring rules
-
Align recurring rules with operational changes
Navigating recurring rules
The ability to view recurring rules can only be completed by someone with Rostering permissions. You will either need to edit an existing access role to include this permission or create a new one and assign it to relevant staff.
For more information on creating access roles, please look at the following article: Using Access roles in Lookout
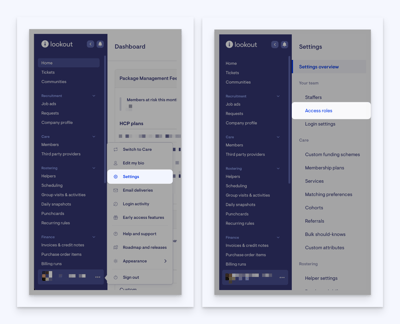
To edit a pre-existing access role, please follow these next steps. Navigate to Settings by clicking the three dots next to your name in the navigation bar, and then select Access roles under the Your team heading.
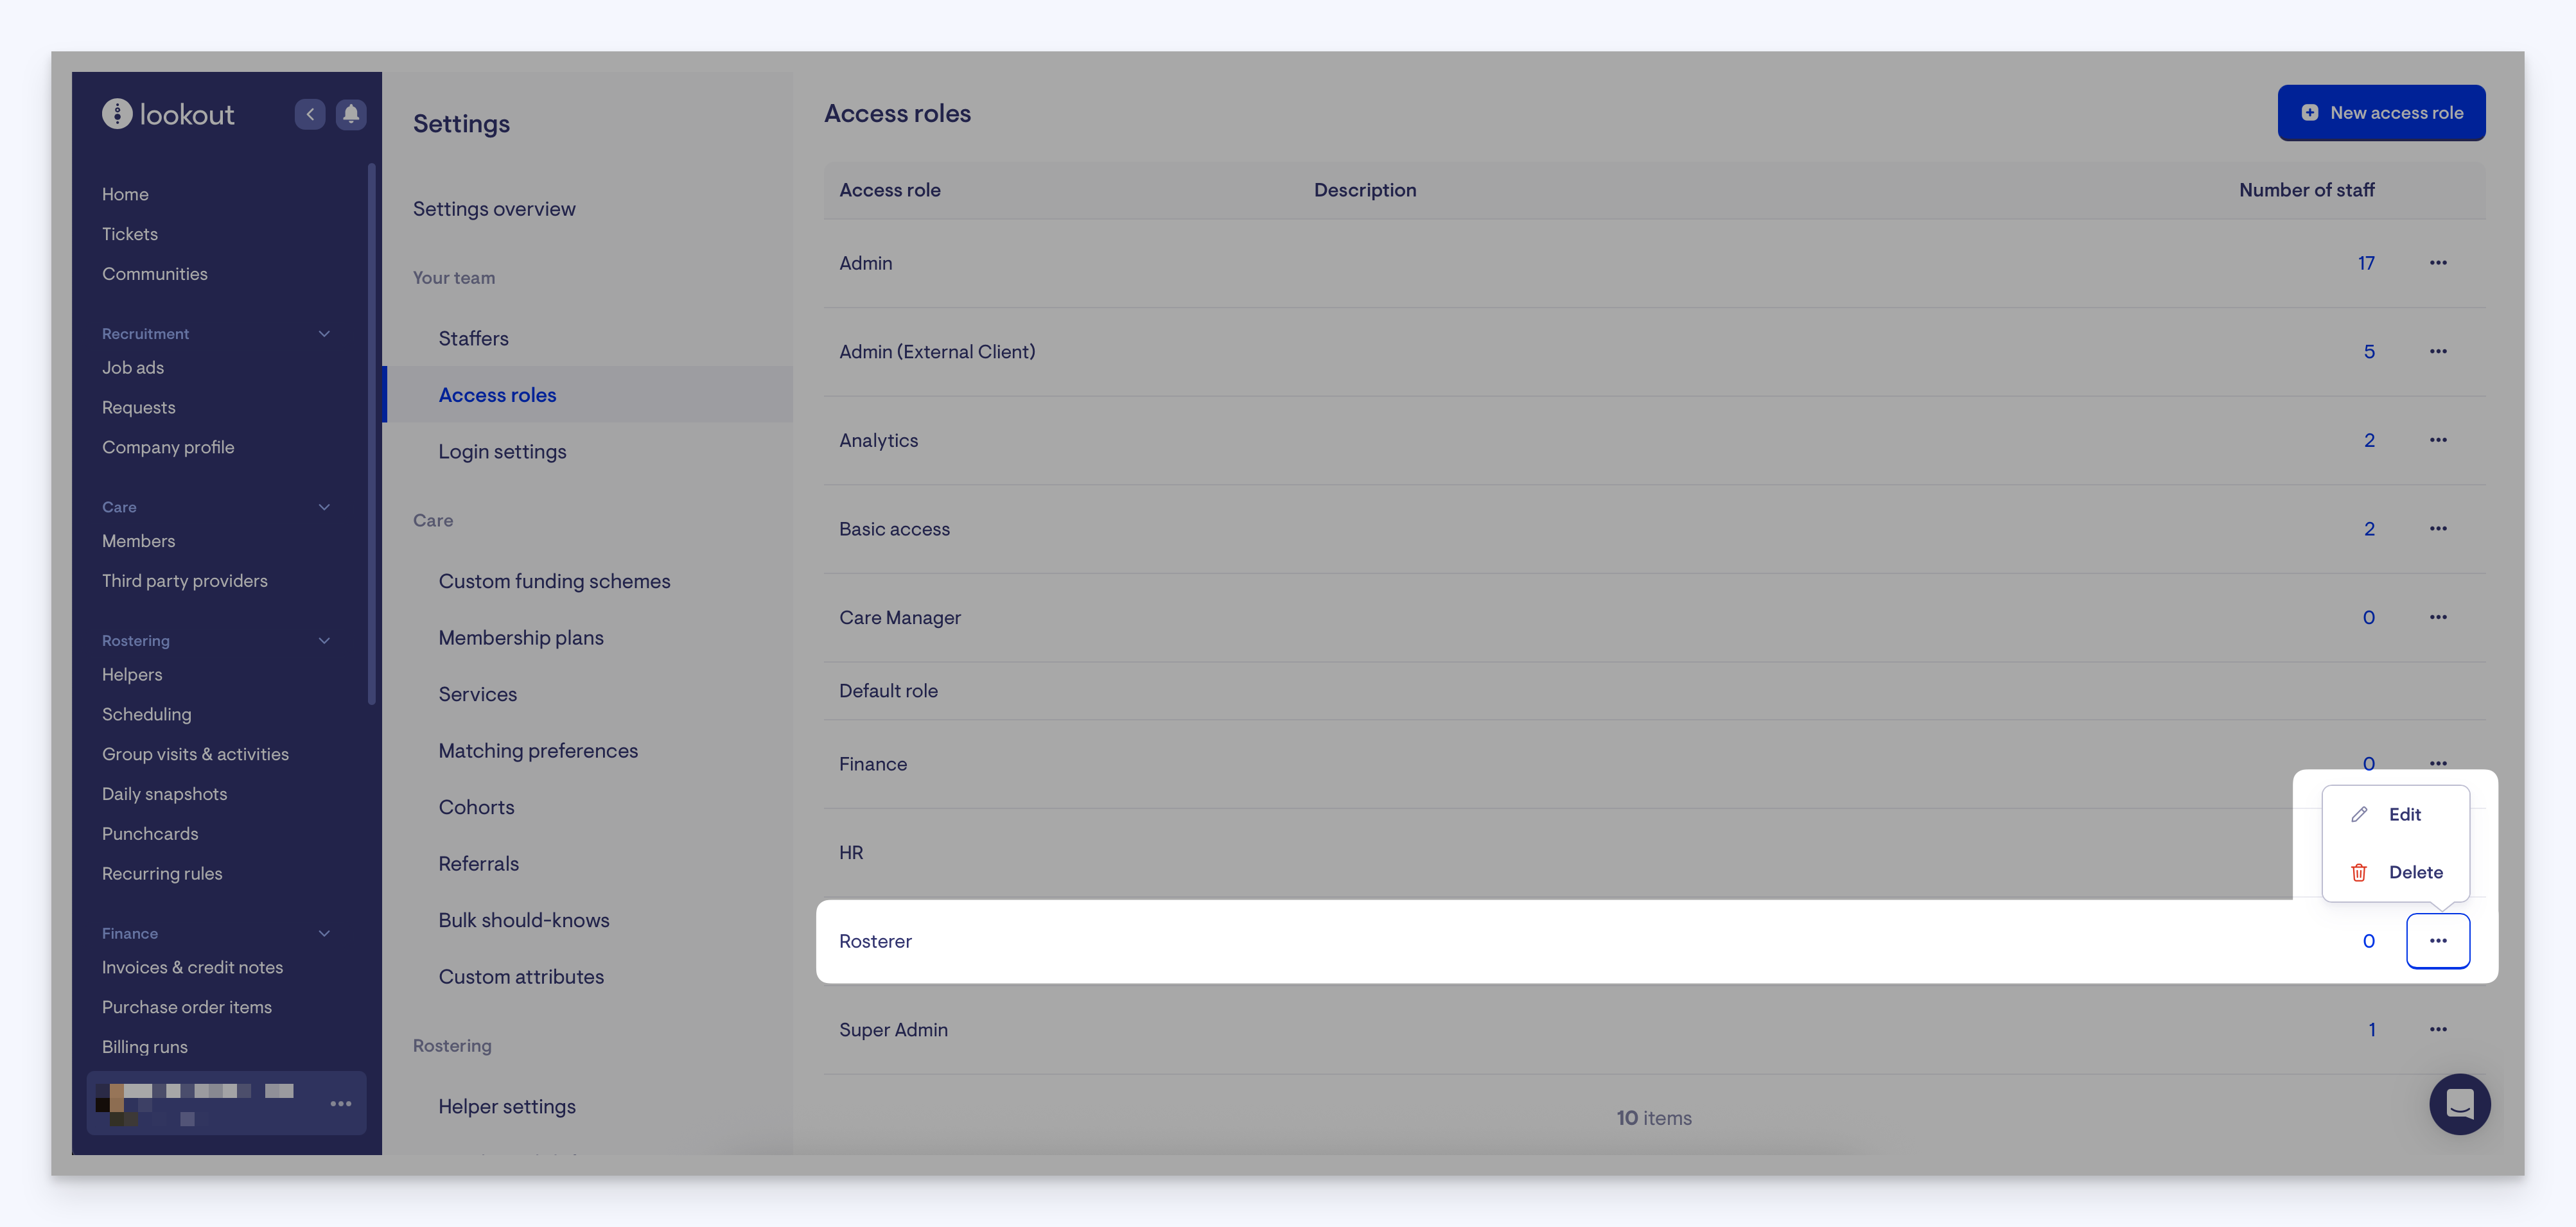
Locate the access role you want to edit. In our example, we are using our Rosterer role. Click the three dots to the right side of your role, and a pop-up window will appear. Click Edit.
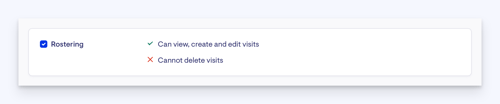
A new page will load with all the options you can now edit for this access role. Ensure the option for Rostering is ticked. You will see in the brief explanation that with this option ticked, you or anyone assigned to this role can view, create and edit visits.
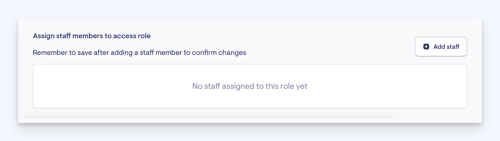
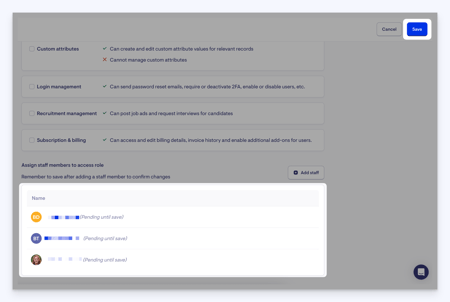
Scroll to the bottom of the page. Here is where you can assign staff members to this access role. Click the Add staff button.
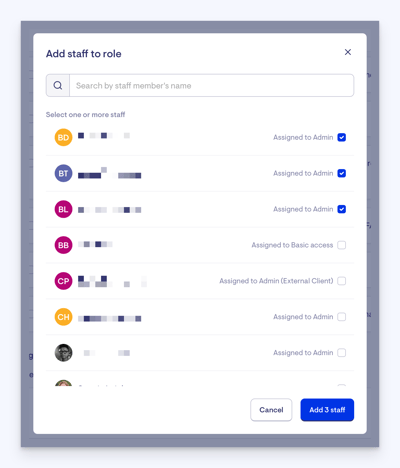
A pop-up window will appear with all your staff members listed. Tick the members you wish to assign to this access role, then press the blue Add staff button.
You will see these members now listed in the assigned staff members section, but with a message after each name—pending until save. You will need to remember to save after assigning staff members to ensure this change is confirmed.
List all visits for a recurring rule
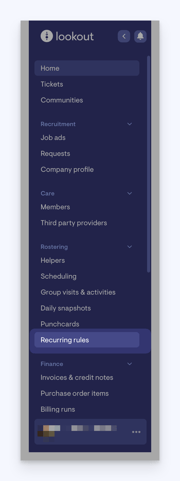
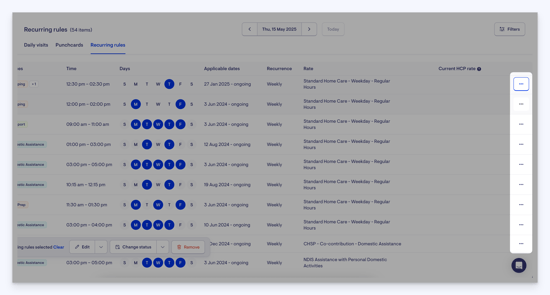
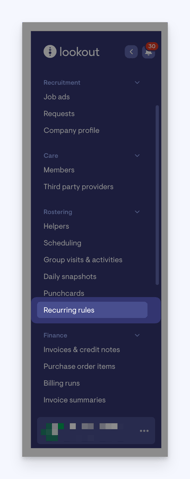
From the main Lookout screen, navigate to the Rostering section in the main side menu, and then select Recurring rules.
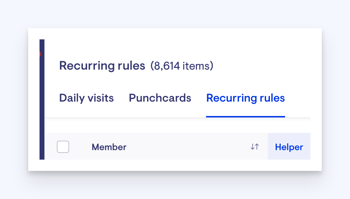
This page lists any recurring rule with visits that overlap within the single date or date range at the top.
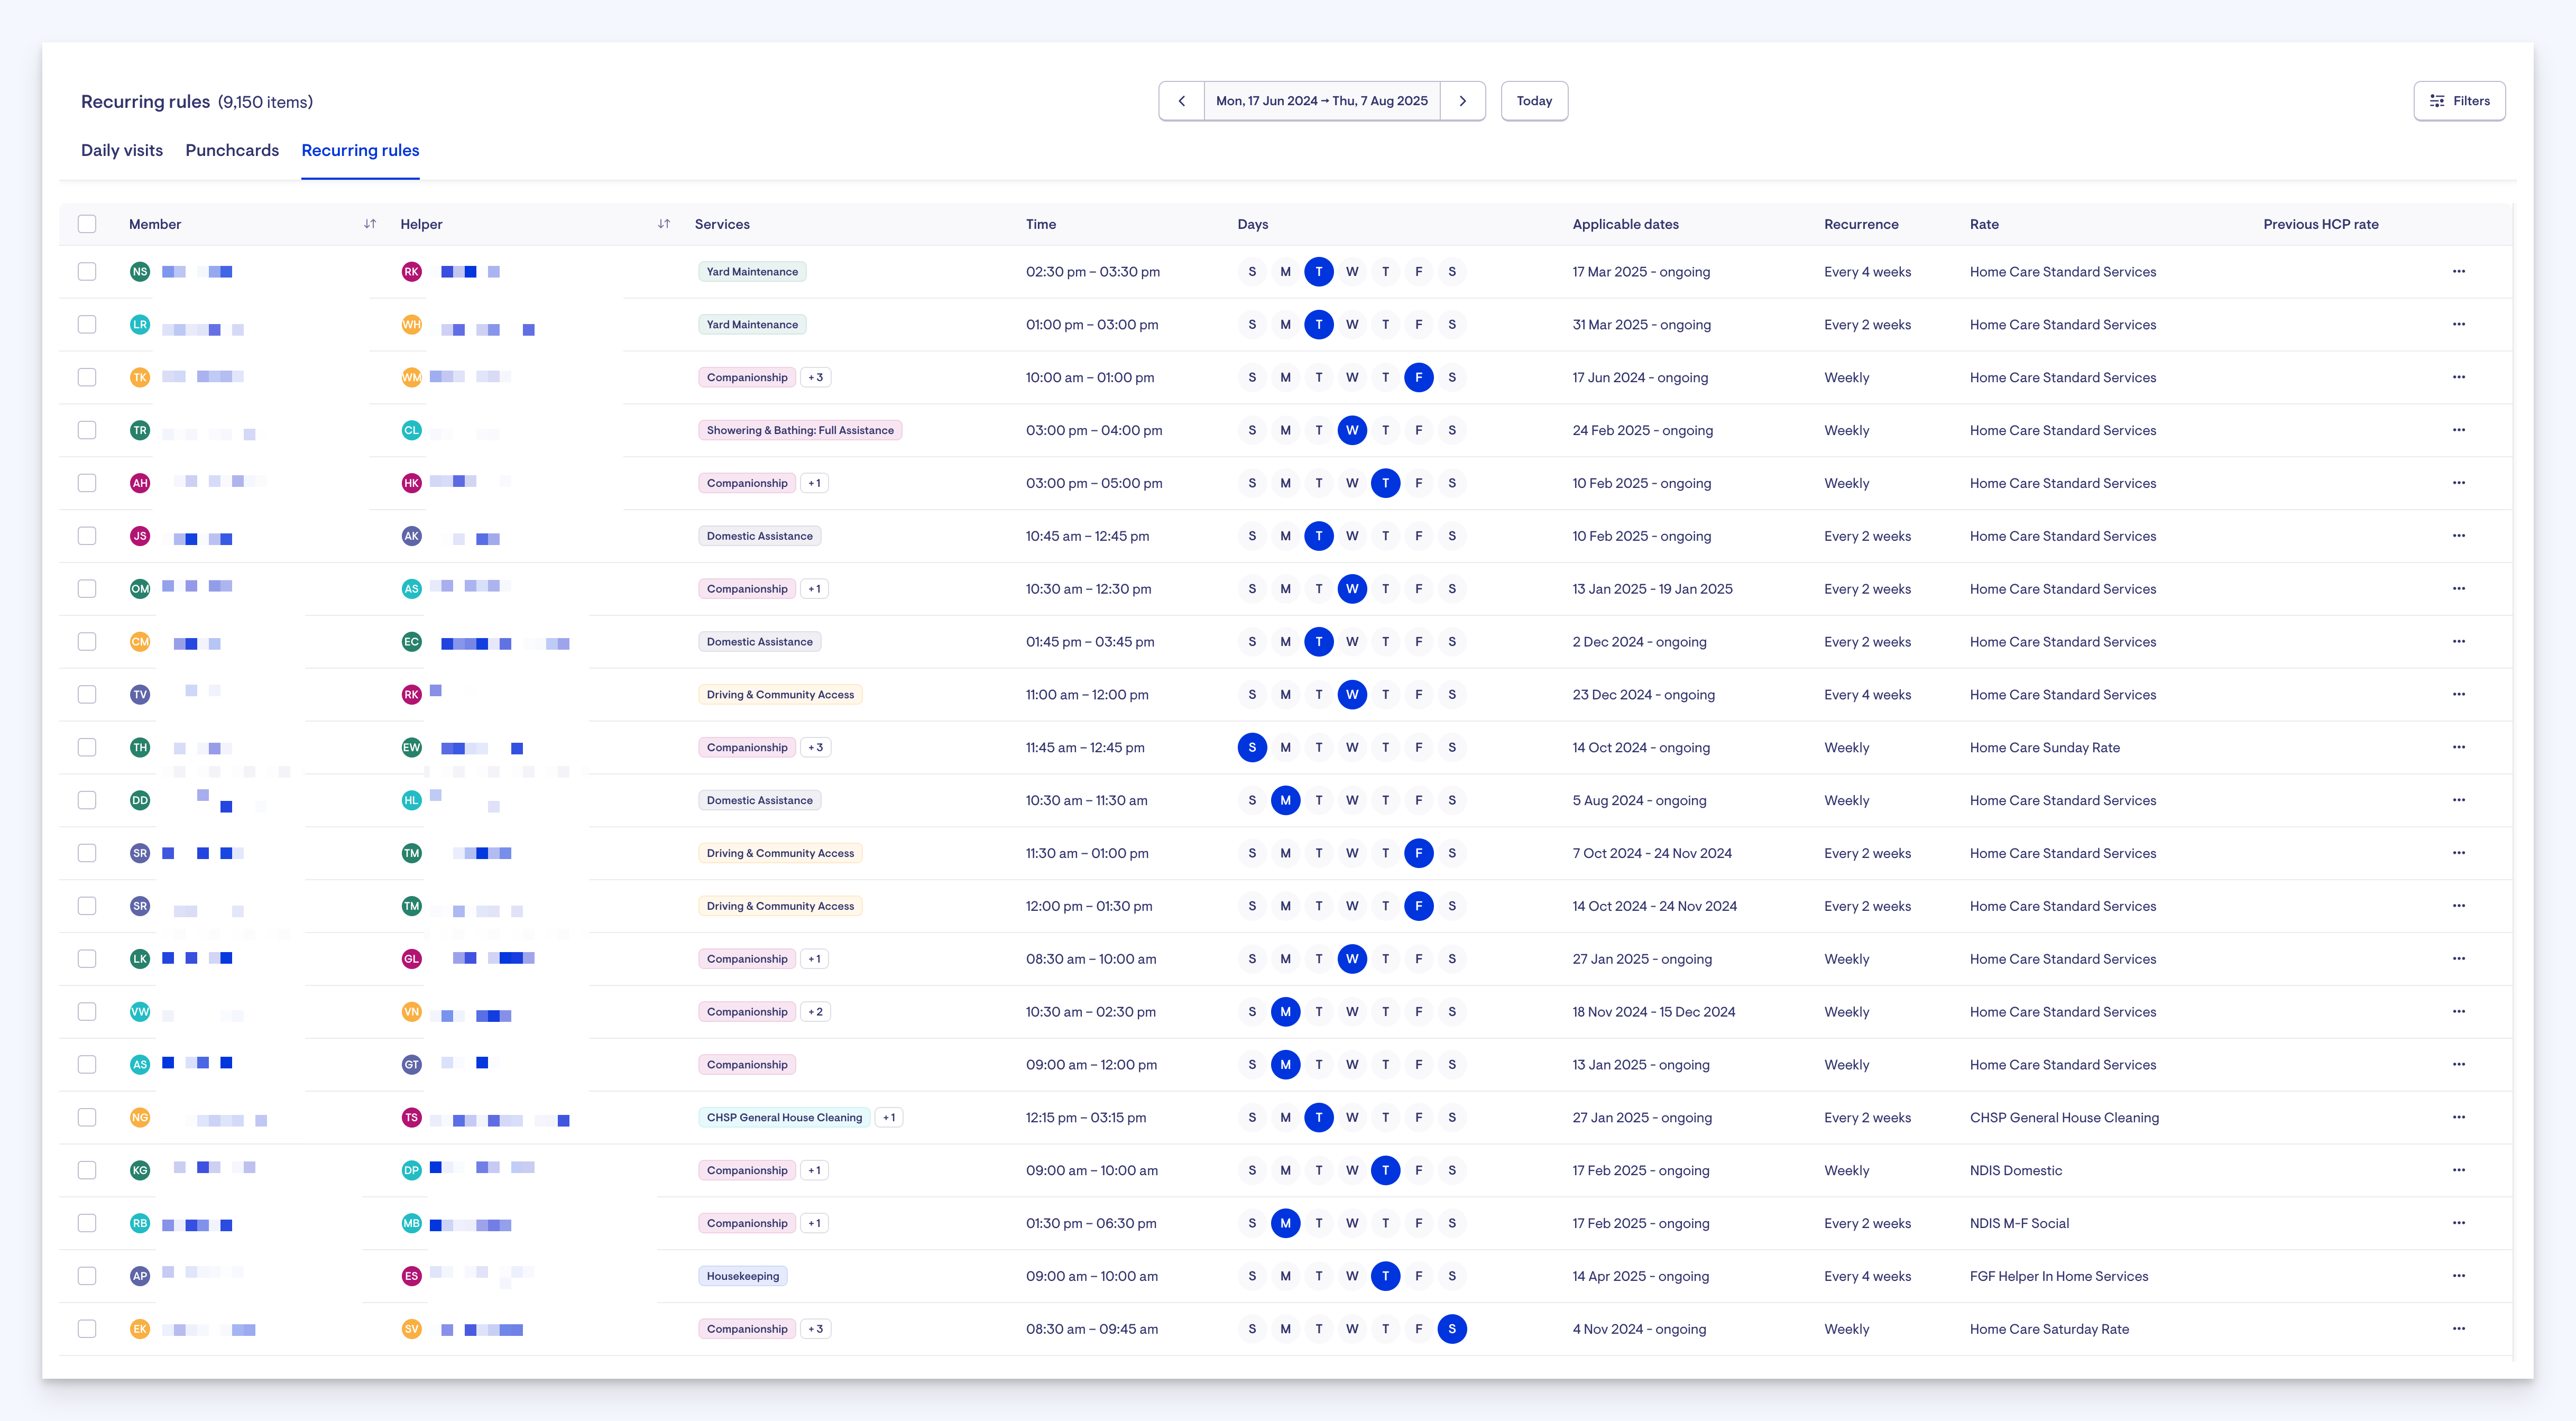
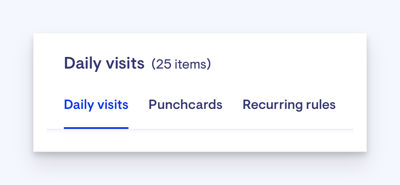
This page displays all recurring rules active in your instance. You will also see on this screen tabs for Daily visits and Punchcards.
Filtering options
To help you quickly locate the rules you care about, you can filter the list using a range of options. Available filters include:
-
Date range: This is available at the top of the screen rather than in the filters window. Choose a single day or a broader period to narrow your view.
-
Helper: See only those rules assigned to specific staff or contractors.
-
Member: See only those rules assigned to specific members.
-
Services: Filter by specific services linked to recurring rules.
-
Communities: Focus on rules associated with specific communities.
-
Funding scheme: See only those recurring rules associated with a particular funding scheme. For example, Support at Home.
-
Membership plans: Filter by your specific membership plans.
-
Mapped to SaH: Select between Yes, No, or Both to filter your mapped or unmapped results.
-
Helper engagement type: See only those recurring rules associated with a particular helper engagement type. For example, Employee, Contractor or Volunteer.
When you apply a filter here, it’s also applied to the Daily visits and Punchcards tabs, and vice versa. This provides a seamless experience as you move between different tabs.
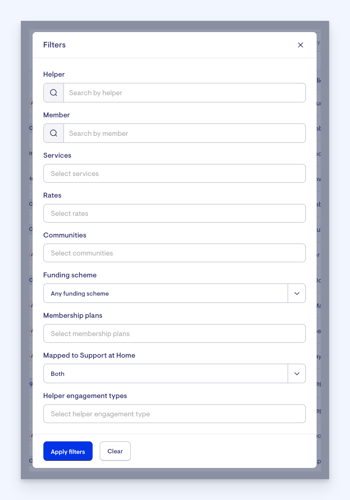
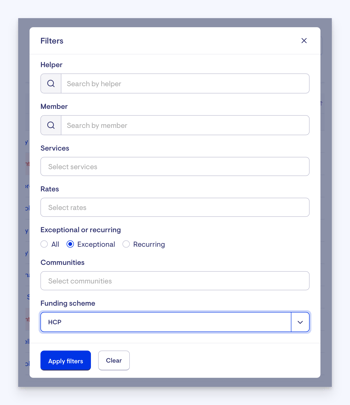
To filter your results, click the Filters button in the top right corner. A pop-up window will appear with your filtering options. This will then streamline your recurring rules results to whatever filter options you have applied.
Tip: When you view your results, only the first 100 load initially. To surface more results before making your selection, please scroll to the end of the page. Further results display in groups of 100. To ensure the Bulk Select tool selects all results, scroll all the way to the end first to ensure all results have loaded. You can confirm the number of lines selected in the call out box.
Bulk actions
To save time and improve efficiency, the Recurring rules page includes a set of bulk actions that can be applied to multiple rules at once.
Available bulk actions:
-
Change rates: Update pricing or compensation rates across selected rules.
-
Change services: Swap out or update services tied to recurring rules.
-
Assign a Helper: Quickly reassign rules to a different staff member or contractor.
-
Vacate rule: Remove the Helper assignment from the selected rules while keeping the rest of the rule intact.
-
Delete: Permanently delete selected rules if they’re no longer needed.
-
Map to Support at Home: Map rules to Support at Home rates. This feature is coming on 20 May.
These bulk actions streamline administrative tasks and help ensure consistency across your recurring visits.
As shown in the example below, we are utilising the new bulk selection feature to select a couple of recurring rules.

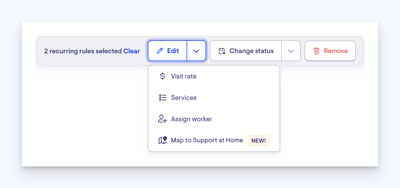
A pop-up panel will appear letting you know how many recurring rules you have selected, along with Edit drop-down options and Change status drop-down options. This is where the bulk actions we discussed earlier are accessible and actionable.
In the Edit drop-down options, you will see options for Visit rate, Services, Assign worker and our new Map to Support at Home feature.
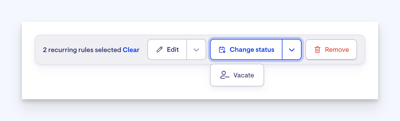
Under Change status is where you will find the option to Vacate.
This new bulk action tool allows you to select multiple recurring visits at the same time and apply these changes, saving you time and effort.
Recurring rule visits
Once you have applied filters to the recurring rules page, you can see a list of all the visits this rule generates with the applied filters.
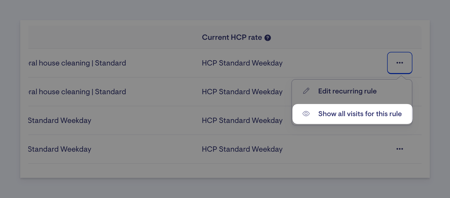
From your list of recurring rules, locate a rule and click its three-dot button on the right-hand side. You may have to side scroll to reveal.
Here you will see two options: Edit recurring rule or Show all visits for this rule.
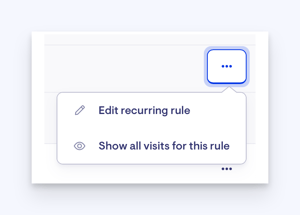
Clicking the Show all visits for the role option will take you to the Daily visits associated with this one recurring rule.
Mapping recurring visit rates
Your recurring rules likely generate a lot of visits, and this is a good place to start when mapping HCP rates to Support at Home. We’ve released a new page for viewing all your recurring rules in one spot, and added bulk action functionality, including the ability to bulk-map to Support at Home rates.
Navigate to the Rostering section in the main side menu, and then select Recurring rules.
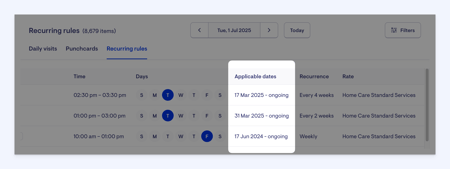
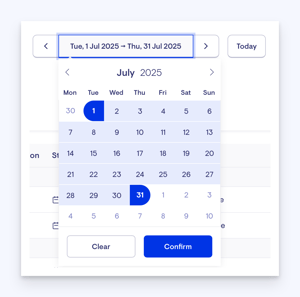
This page displays all recurring rules active in your instance. To get started with mapping, you’ll need to find the recurring visit rules that generate visits after 30 June 2025. To do this, navigate to the date picker at the top and click. Change the date to 1 July 2025. Any recurring rules that have an applicable date range including 1 July will show. To check, find the table column Applicable dates - this will show the period the recurring rule is active.
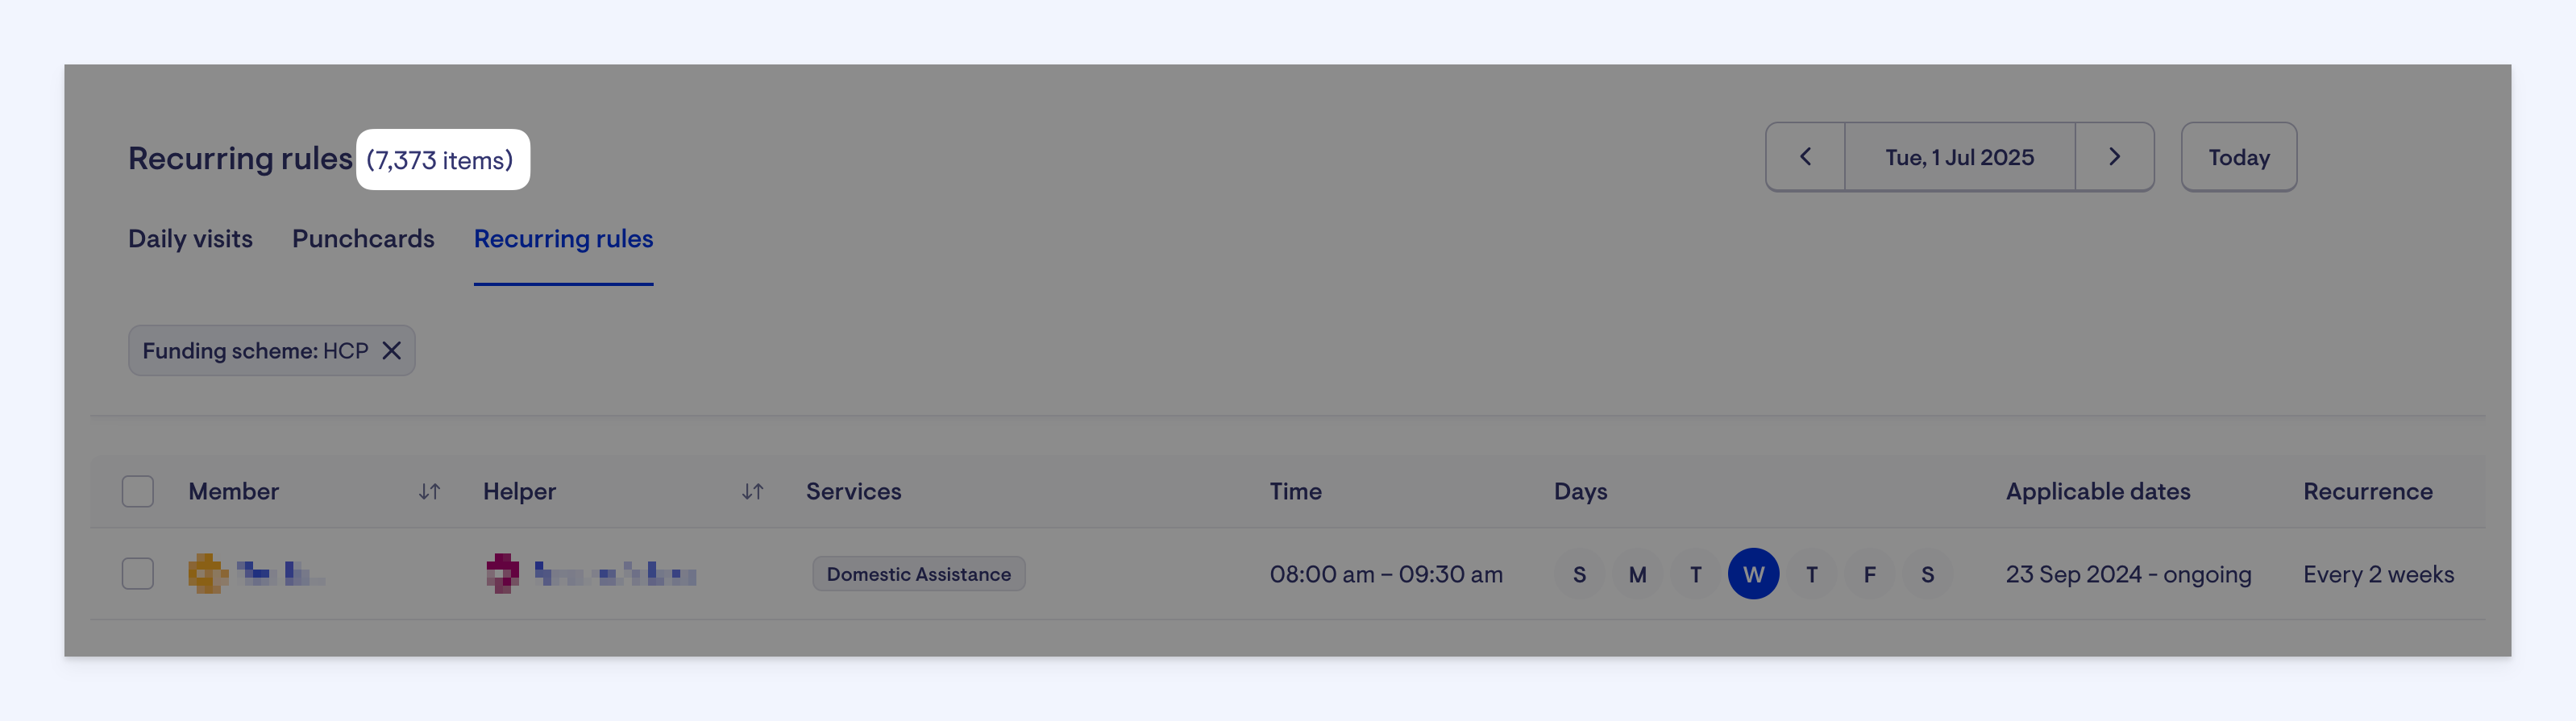
The next step is to filter this result to find all recurring rules that have HCP rates. Click the ’Filters’ button at the top and select ‘HCP’ from the ‘Funding scheme’ dropdown. Click ‘Apply filters’. If using the analytics Support at Home transition dashboard, the number at the top should match the number on the dashboard.
Support at Home transition dashboard
In the above example, there are a lot of recurring rules after selecting the date and filtering by HCP. Adding additional filters will assist in both reducing this number and narrowing down to pick the most appropriate Support at Home rate to map to. The best way to do this is to filter by Member and by services.
Under HCP, you can assign multiple Lookout services to a single visit, however, with the introduction of Support at Home, you must select only one primary service per visit. As such, each visit after 30 June 2025 must be mapped to a single Support at Home service.
In this example, we’ve filtered by Mary Member, and selected Domestic assistance as the Lookout service. This brings the recurring rule number down to 7 items. Utilising the filters to drill down will assist in making the mapping process easier.
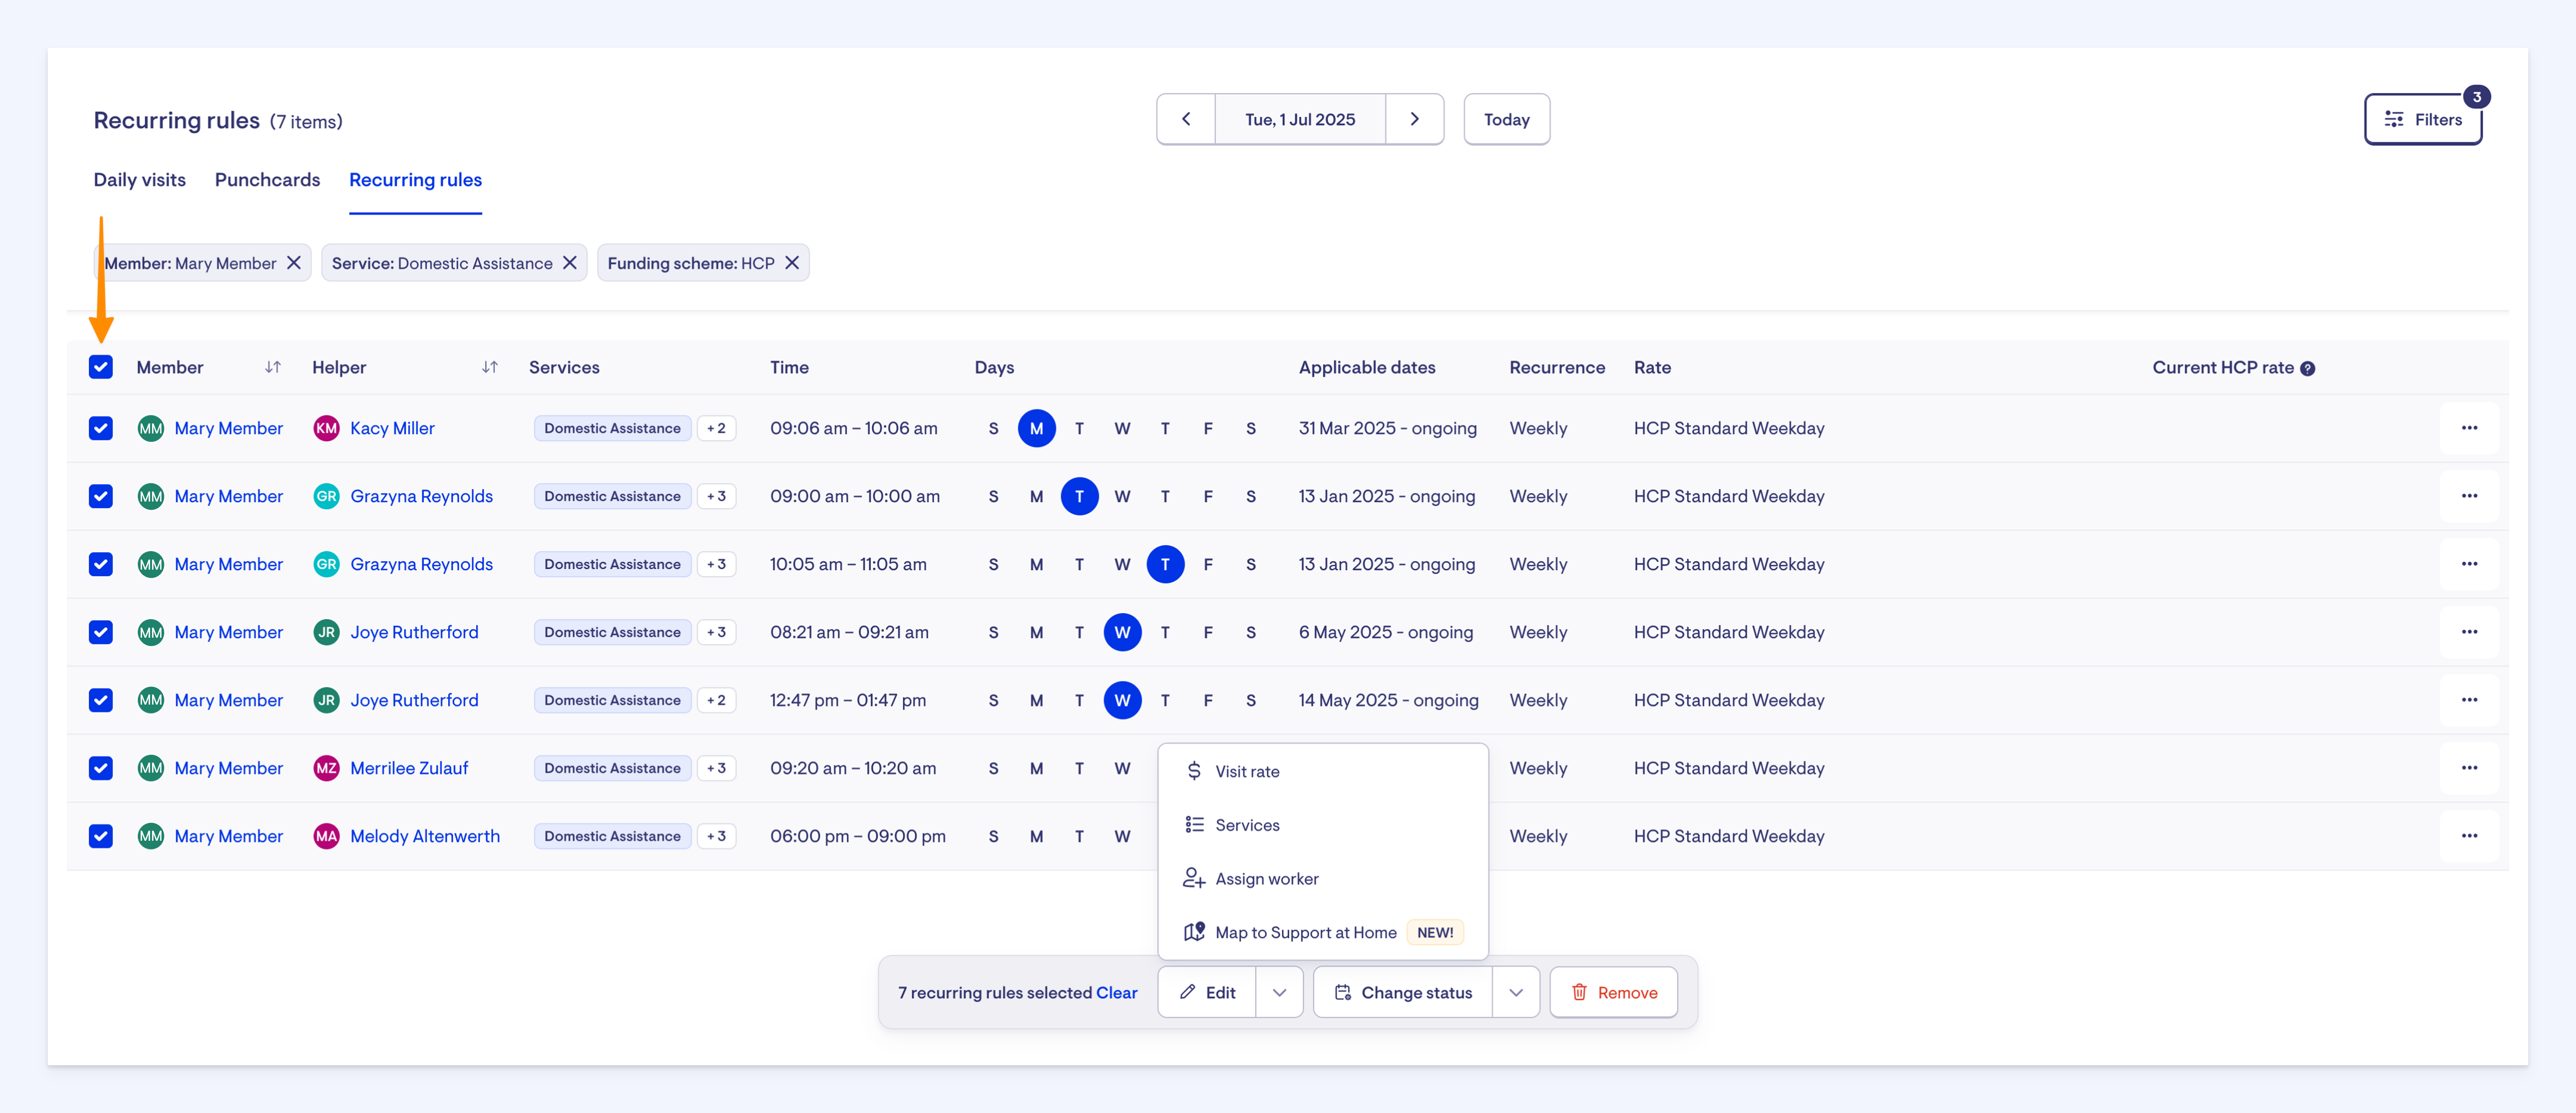
Bulk map your filtered recurring visits by clicking the checkbox at the top right. This will select all the recurring visits on this page and will display the floating action panel. Click Edit and select Map to Support at Home.
A side panel will appear. Select a Support at Home rate by clicking the Please select an option dropdown. Search or scroll to find a suitable rate. In our example, we’re going to map our 7 recurring visits to ‘General house cleaning’ which is a service under the ‘Domestic assistance’ service type for Support at Home.
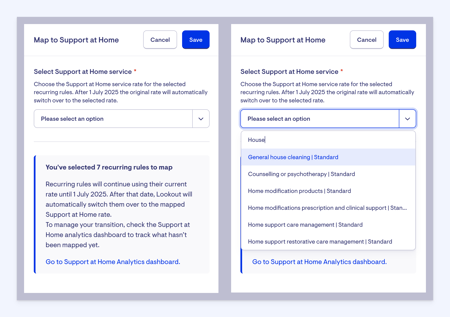
When you’re ready, click the ‘Save’ button at the top to map the Support at Home rate.
Now we can see a column at the end of the table called Current HCP rate. This is the original HCP rate that will apply to any visits generated by the recurring rule until 30 June. After 30 June, the new Support at Home rate will be used.
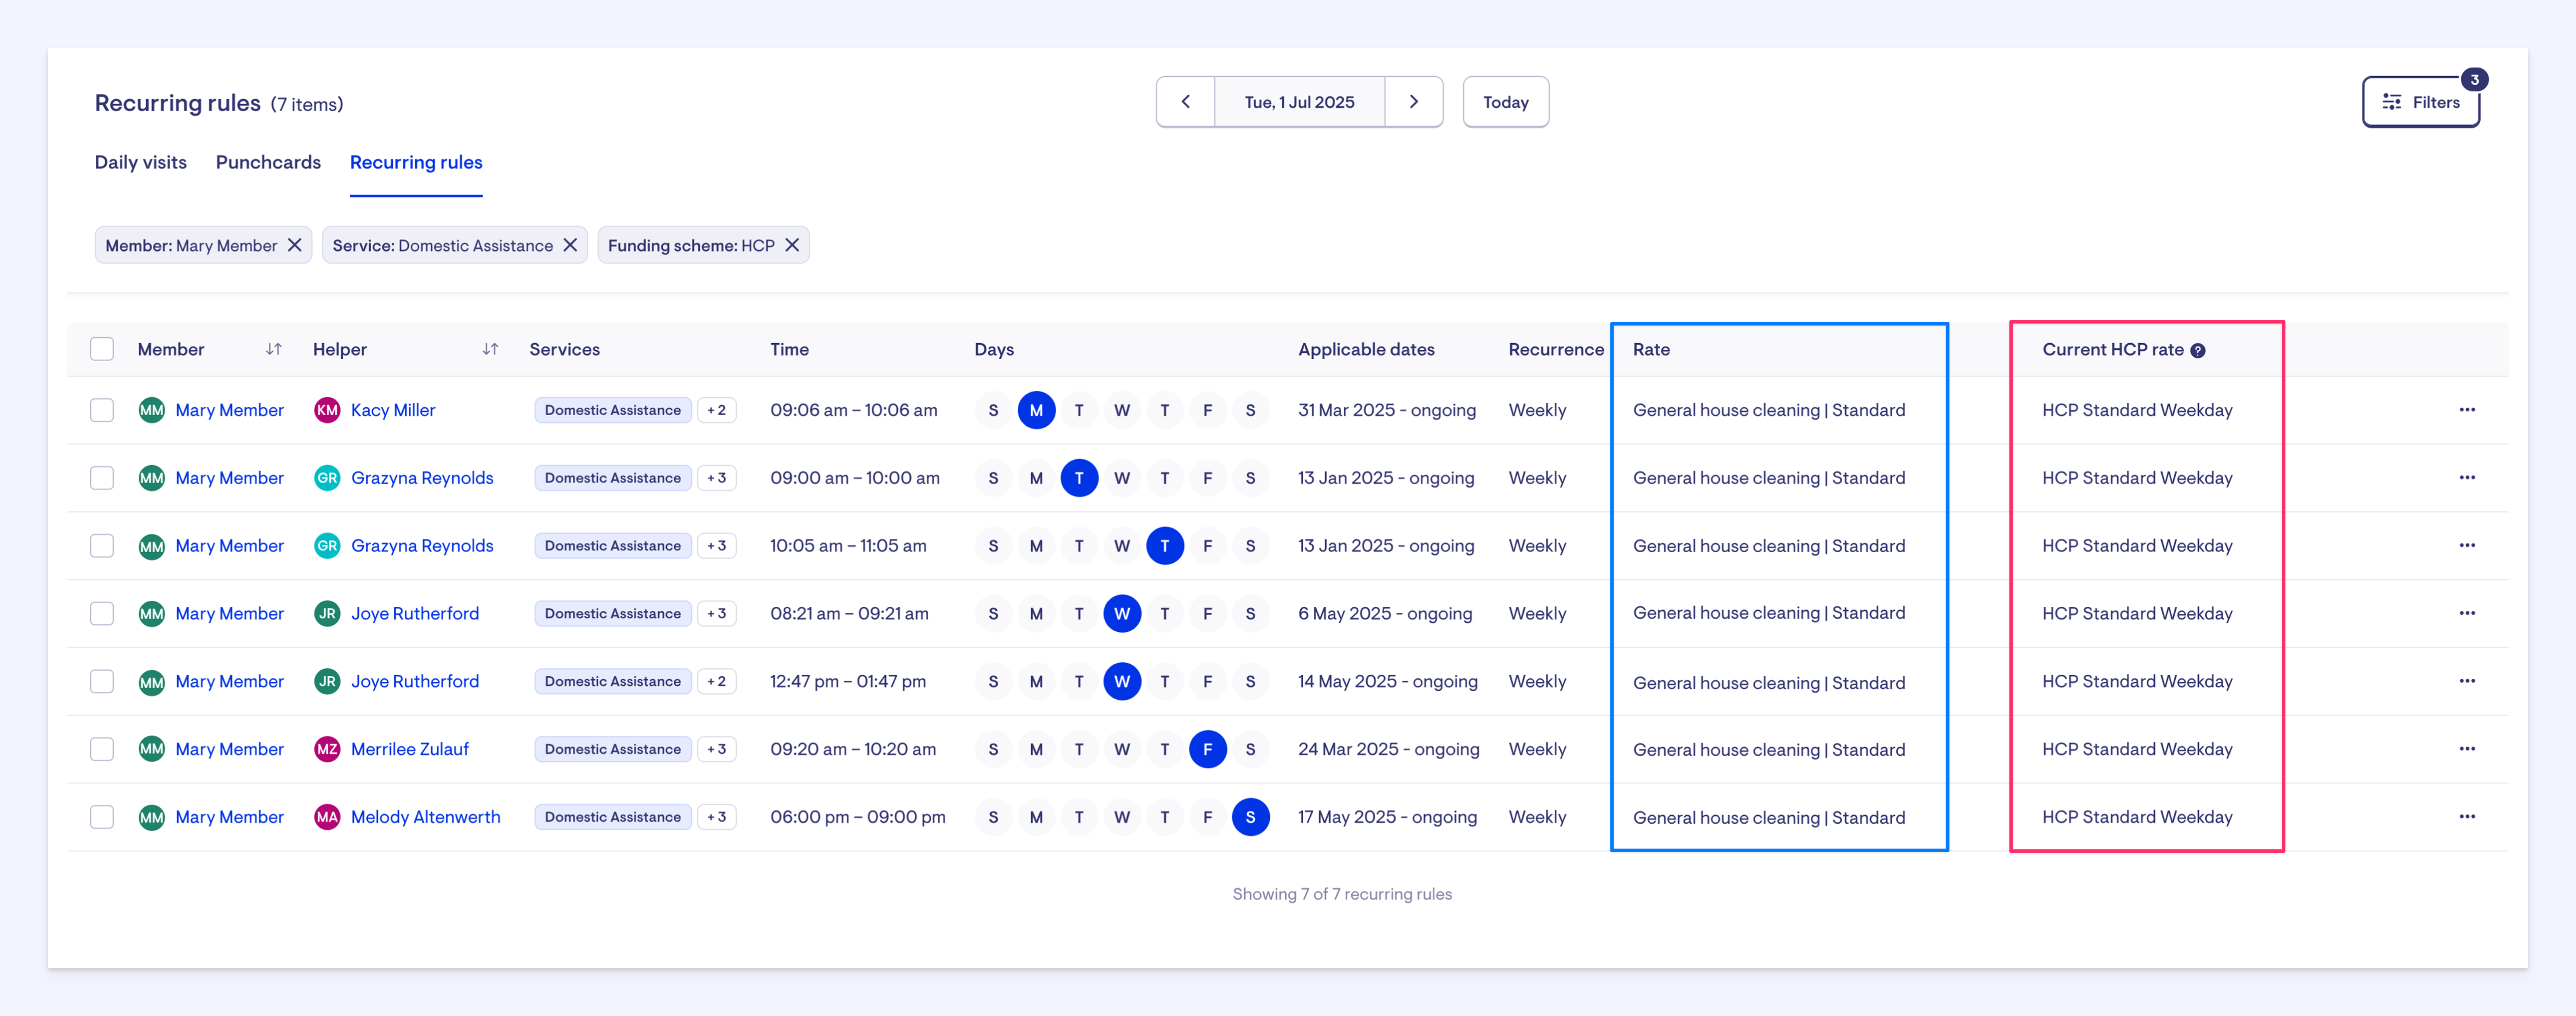
In the image above, the 7 recurring rules have two columns: the Rate column outlined in blue is the Support at Home rate we have mapped to. The Current HCP rate column outlined in pink is the old HCP rate – this rate will apply to all visits the recurring rule generates until June 30, after which the new rate will apply.
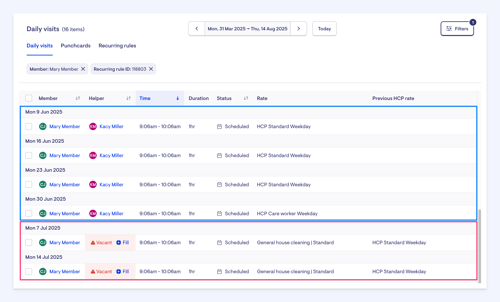
You can see the mapping change in action by clicking the three buttons next to a row and selecting Show all visits for this rule.
This will take you to a filtered Daily visits page. You’ll see that all the recurring rule visits before July 1 have the HCP rate, outlined in blue below, while the visits after have the Support at Home rate, outlined in pink:
Repeating this process allows you to map all your recurring rule-generated visits in preparation for Support at Home, without any interruption.
You can change the mapping at any time.
Important: Choosing the correct Support at Home service category is essential for accurate claiming. You should familiarise yourself with the new service categories and adjust your service delivery models accordingly to ensure compliance and optimal care for clients.
How to map exceptional visits
Exceptional visits are non-recurring, one-time services provided outside of regularly scheduled visits. These need to be mapped to Support at Home rates, just like recurring visits.
It's essential to ensure exceptional visits are also properly mapped. These could otherwise be missed, leading to incorrect rate application.
Only exceptional visits that occur after June 30 will need to be mapped to a Support at Home rate.
Navigate to the Rostering section in the main side menu, and then select Recurring rules.

Click the Daily Visits tab at the top of this page.
The Daily visits page as mentioned before, has the option to filter. These filters are applied between all of the tabs on this page – Punchcards and Recurring rules. However, a few more filter options are available when in the Daily visits tab, which we are going to utilise now.
To help us see only exceptional visits, we are going to apply a few filters. Click the Filters button in the top right corner. Within the filters, navigate to Exceptional or recurring. By default, the All option might be selected. Change the selection to Exceptional. In the Funding scheme filter drop-down, select the HCP option. Press the blue Apply filters button.
Applying further filters will help narrow down your list of visits to more specific results. For example, you might want to select all the HCP visits under the Funding scheme drop-down option, then apply the Domestic assistance service under the Services filter option. This further filtering may help you to map to your new Support at Home rates for General house cleaning, Laundry services and Shopping assistance.
Now, navigate to the date picker at the top of the page. We want to filter for results after Support at Home goes live, so in the date picker we’ll choose 1 July – 31 July. Press the blue Confirm button to show the exceptional visit results.
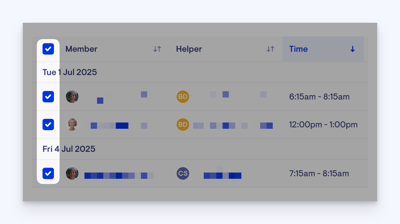
Now, you will see results for the exceptional visits that fall after Support at Home goes live. These visits need to be mapped. Utilising our bulk action feature, you can select all of these visits by ticking the bulk-action box next to the Members column header.
A pop-up panel will appear letting you know how many visits you have selected, along with Edit, Change status, and Actions drop-down options. This is where the bulk actions are accessible and actionable.
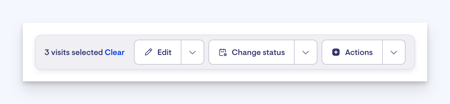
In the Edit drop-down options, you will see options for Visit date and time, Visit rate, Services, Travel, Assign worker and our new Map to Support at Home feature.

Click the Map to Support at Home edit option. Clicking this option will open a side panel. Here, you will choose your Support at Home service from the Please select an option dropdown.
You will also see an information box underneath confirming these visits will map to Support at Home on 1 July. Until then, they will follow their current setup.
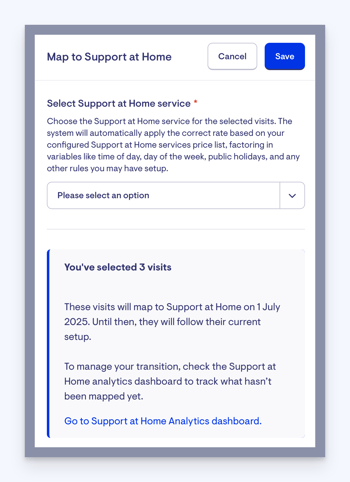
The system will automatically apply the correct rate based on your configured Support at Home services price list, factoring in variables like time of day, day of the week, public holidays, and any other rules you may have set up. Choose from the Please select an option drop-down the best service that suits these visits. Then press the blue Save button in the top-right corner.
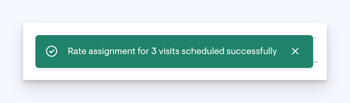
A green confirmation message will appear indicating the remapping was successful.
Supporting articles
Support at Home analytics dashboard
Support at Home service prices
Support at Home transition dashboard