Before continuing with this article, you may wish to review the full Support at Home service code and reference data list, which is available here.
Introduction
This guide will explain how to set up Support at Home rates in Lookout. Only users with Finance admin permissions can view and manage rates. Staff permissions can be updated through access roles.
Note: While this guide is primarily for finance and executive users, others involved in service planning may also find it helpful.
Current HCP visit rates
Overview
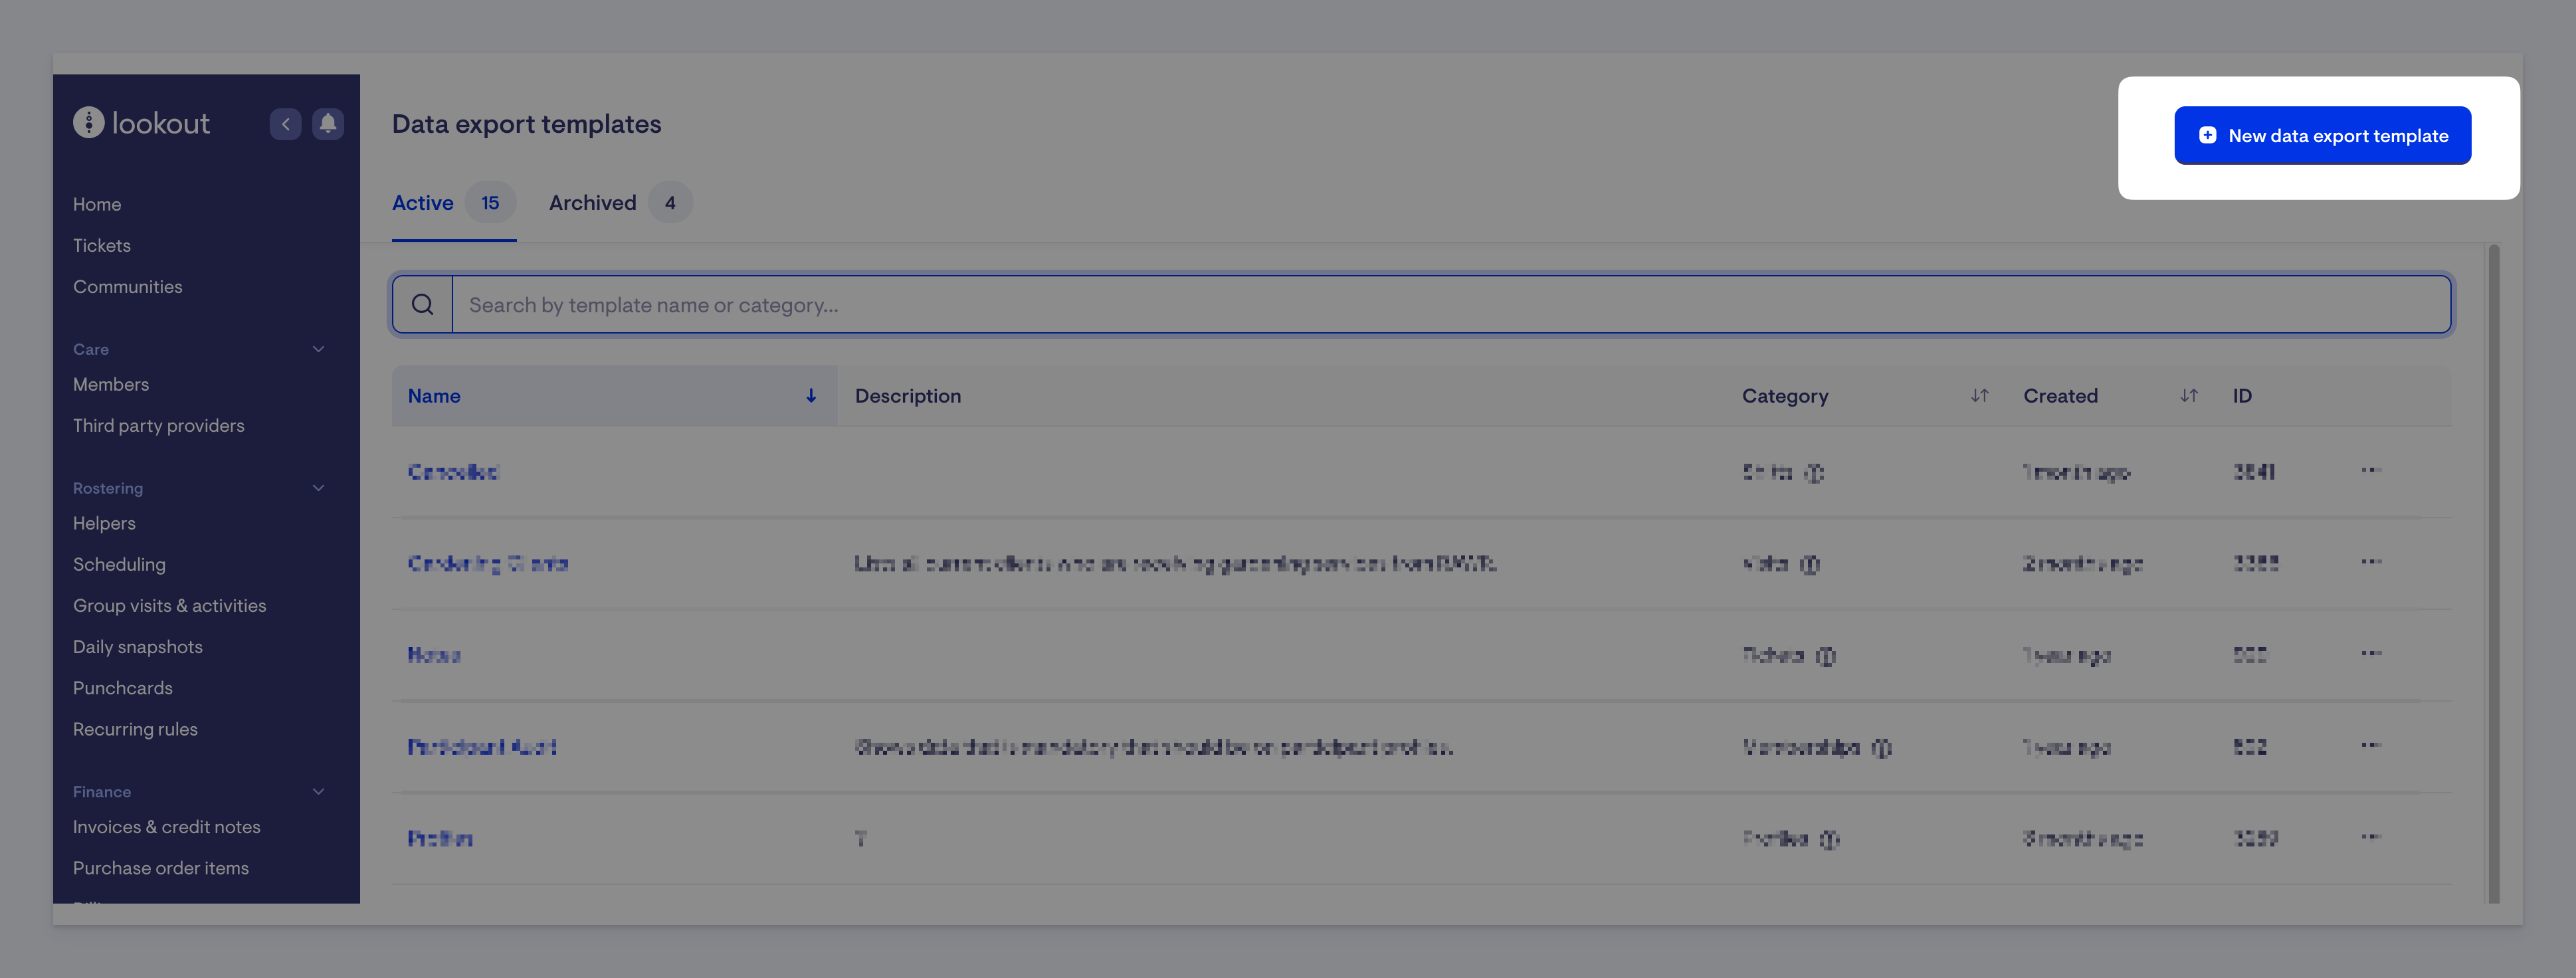
Before creating Support at Home rates, you may want to review your existing HCP rates. You can export your current HCP visit rates from the data exporter by following these steps:
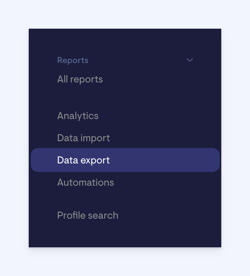
Navigate to Data export in the left-hand menu.
Click the New data export template button in the top right-hand corner.
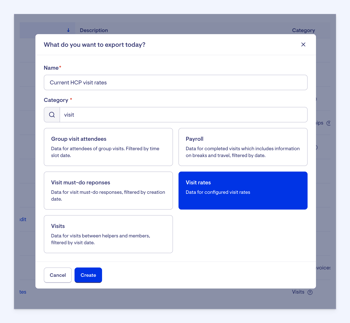
A pop-up window will appear. Here, you can name your export and select from various categories what you want to export. Type in the Category search bar “visit”. This will bring up the Visit rates category. Select this category and then click the Create button.
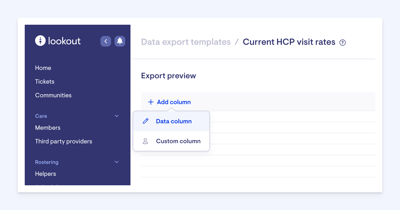
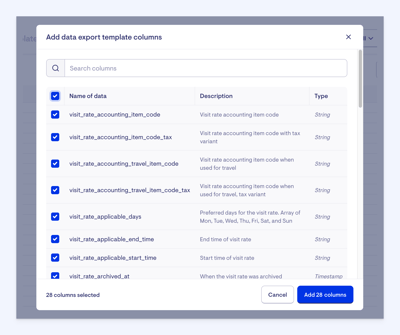
Click + Add column and select Data column from the pop-up options. This will bring up a new window.
For this example, we will select all the columns by clicking the top tick box to select all. Then, we will hit the Add 29 columns button.
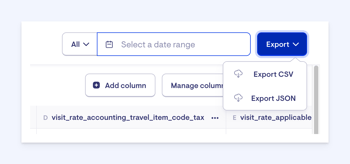
In the Export preview window, in the top right corner, you'll find a date range filter. Ensure it is set to All.
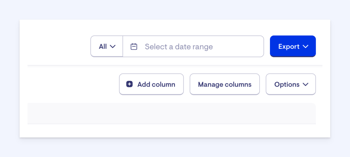
Now, click the top right Export button. A pop-up will appear with two export options. Select Export CSV.
A green banner will appear, showing Lookout is building your data export.
Once the data export has finished, you will see a notification by the bell symbol in the top left corner of the navigation bar. Click the bell symbol to open a pop-up window showing all notifications. Here, you will see that your data export is complete. Click the link in the notification to download your CSV file.
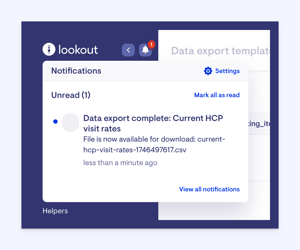
Unless otherwise specified, the file will automatically save to your computer’s downloads folder.
Getting started
Setting up Support at Home rates
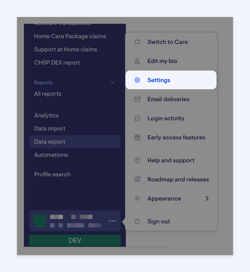
To begin setting up your Support at Home rates, navigate to Settings by clicking the three dots next to your name in the navigation bar, and then select Visit rates under the Rates heading.

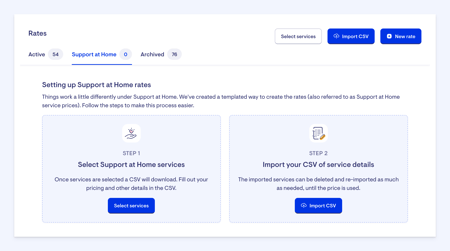
The Support at Home rates are separated into their own tab for easier management. Click the Support at Home tab.
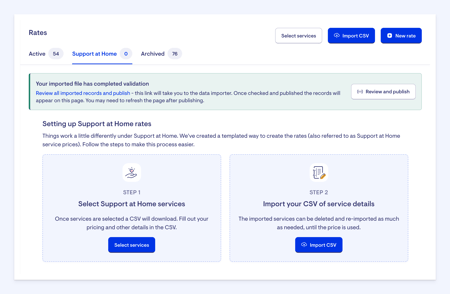
Building your Support at Home service list
Lookout has made setting up your Support at Home rates easier by creating a CSV template builder. By selecting the Support at Home services your business provides, Lookout will create a corresponding CSV file with all your rate names and codes, ready for you to fill in with details.
The process is split into two steps. Starting with Step 1, click on the Select services button.
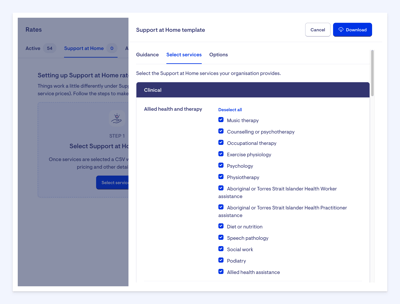
Pressing this button opens a side window.
Click the Select services tab at the top. This will display all Support at Home services. Choose the services your organisation will provide under Support at Home. You can choose individually or click Select all to select all services under a service type.
After selecting your services, scroll back to the top of the list. You will see an Options tab next to the Select services. The Options tab allows you to tailor your CSV further. Here, you can create segments and variants as needed.
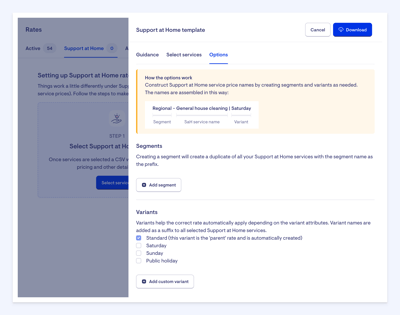
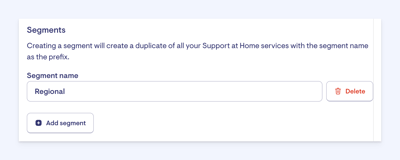
Segments
Some prices may need to differ for the same service, and segments allow you to duplicate all rates and set a different price. For example, different prices for regional vs. metro Members. When you add a segment, all selected services are duplicated for that segment. The segment name becomes a prefix in the rate name (check the diagram in the options tab to see how the prefixes and suffixes work).
To add a segment, click Add segment and enter a name, for example, Regional.
Variants
Variants make rostering easier by allowing rates to adapt based on timing, for example, weekday vs. weekend. Each service gets a rate called ‘Standard’ as the parent rate. Variants act as children of the parent rate, so they inherit all the data from the parent rate unless changed.
You can add more variants, Saturday, Sunday, and public holidays have already been set up as options. Lookout will automatically select the correct variant during rostering based on the visit’s scheduled time. The automatic switching of rates feature is under development and will be available soon.
Tick the boxes next to any or all the pre-made variants to add them.
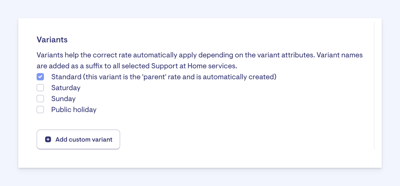
There is also an option to add a custom variant. You can click the Add custom variant button to add and define your own. Add as many variants as needed. Variant names appear as a suffix in the rate name.
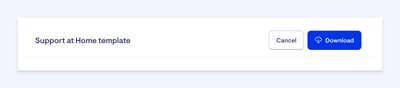
Once you are happy with the set-up, click the Download button at the top right corner to export the CSV file. You can tweak your selected services and options as many times as you need and re-download the template.
Importing
You can now open the CSV file within Excel, Numbers or Google Sheets to manipulate further. Refer to the Guidance tab next to Select services for information on required columns, or a full guide on columns can be found at the end of this article. Once you are happy with your prices and configuration, save the CSV file again.
Now that we have completed Step 1, we will move on to Step 2 for building your Support at Home service list: Importing your CSV of service details.
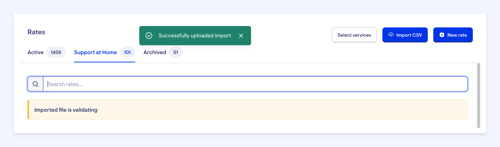
Click on the Import CSV button and upload your file. After clicking the Import button, a screen will appear that will do an initial check of your file for problems.
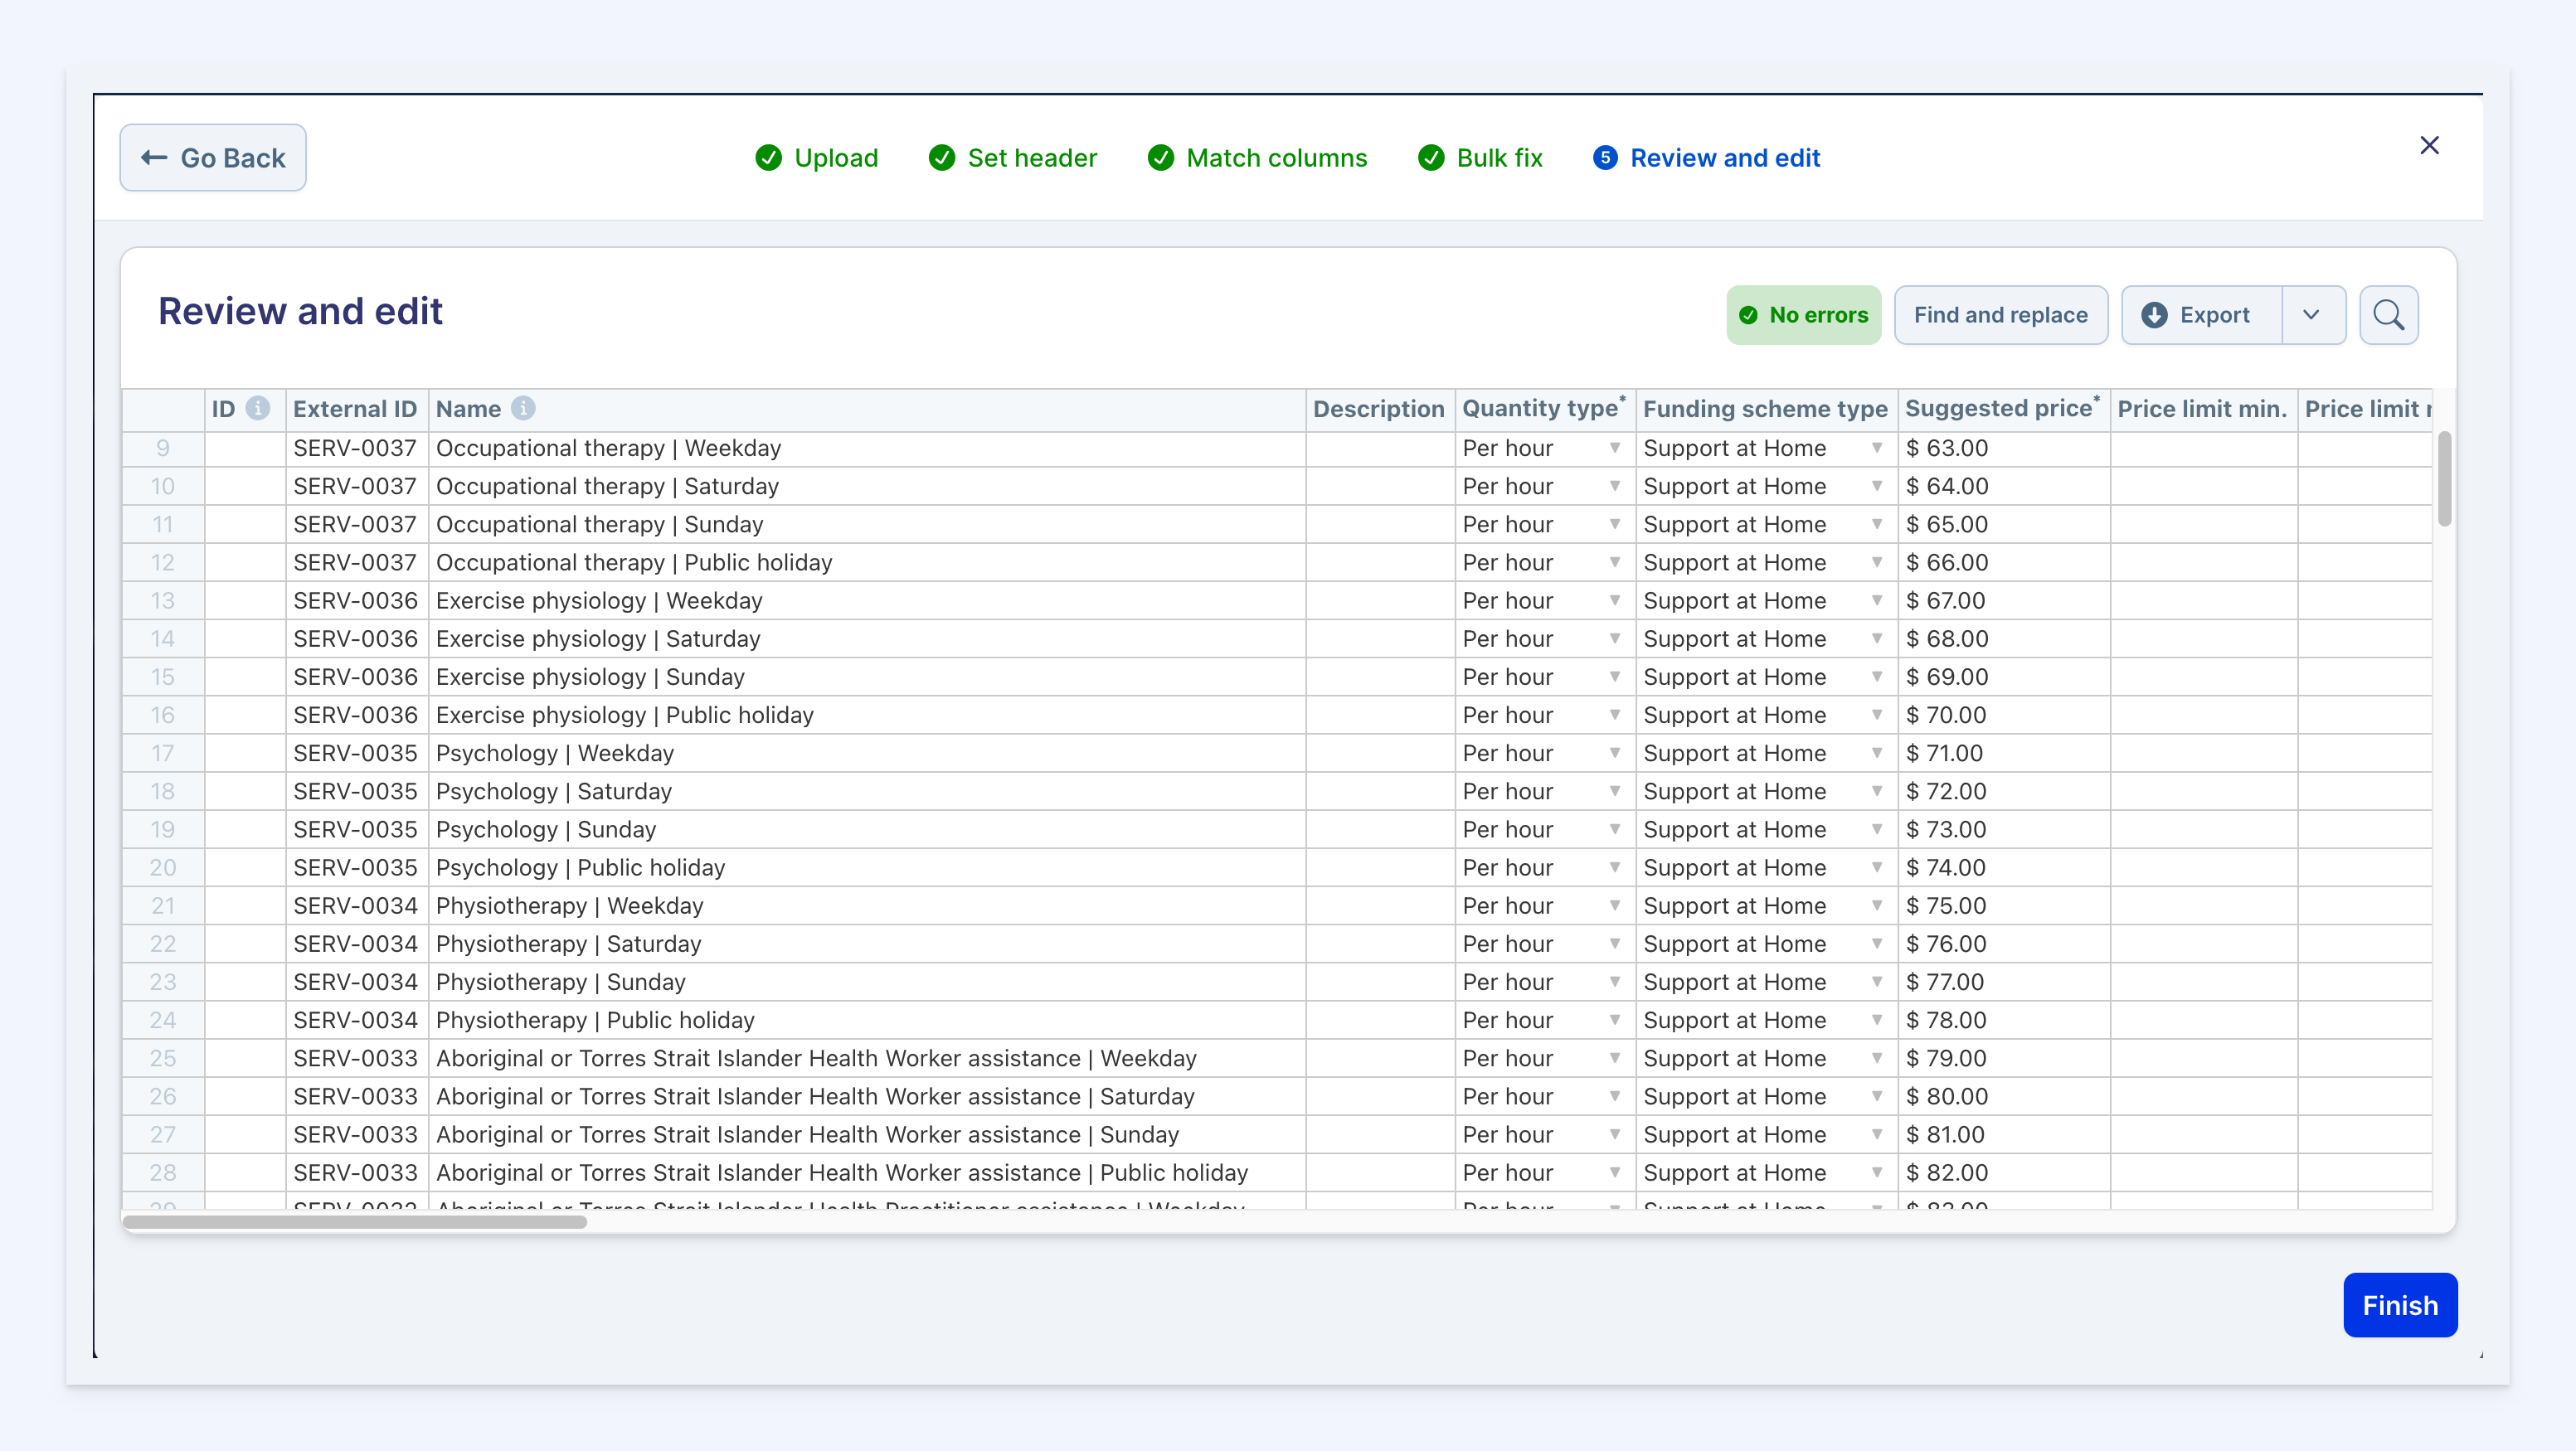
Any issues found will be highlighted in red:
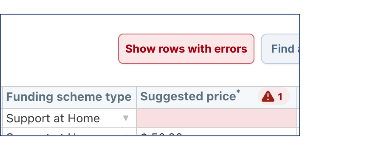
Click the Show rows with errors button to show all the errors. You can fix the errors here or cancel the upload and fix it in your CSV before re-uploading.
Select Finish once you’re happy with the initial check over the file.
The file will now go through a second validation process to check against the Lookout database - an orange banner will show at the top of the page to show that the uploaded file is being validated. The second validation may take a while, depending on the CSV's number of rows. Navigating away from the page while you wait is safe - refresh the page to check progress.
When the green banner appears, the file is ready for review and a final check before publishing the records. Click the Review and publish button to see your imported records in a new tab.
The import page shows a list of all your imported records and their state.
If everything looks correct, click the Publish button in the top right corner.

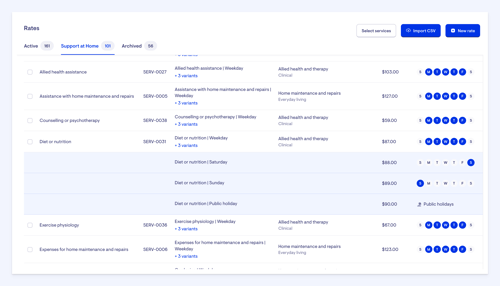
After publishing, close this tab and refresh the rates page – your uploaded rates should now appear under the Support at Home tab. Publishing may take a little time – refresh the page to see the publishing progress. Once done, all your records will be displayed on this page.
Under the Price name column for each rate, any rates with variants will show with a count of variants, which you can click to expand.
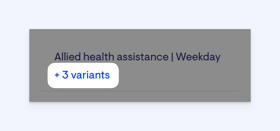
As you’ll see in the example below, the Diet or nutrition service has +3 variants. Note that some cells appear empty - variants only show data that differs from the parent.
Important: The importer is a powerful way to add new records and change existing records, but it will not allow for deletion. If you need to completely delete a record, you can do this through the UI and in bulk by selecting all records you wish to delete and clicking Delete in the floating bar button.

Note: Only rates that have not been used or mapped can be deleted.
You can also delete any imported file that has not yet been published in the data importer page:

CSV template columns
|
Column name |
Details |
|
|
The Lookout ID for the rate. Not required. |
|
(required) |
The Support at Home service code for claiming. Required. |
|
(required) |
The rate name. The rate name includes any segmentation name as a prefix and any variants as a suffix to the service name. Required |
|
|
A description of the rate for staff. Not required. |
|
(required) |
The unit type - this can be set to |
|
|
The shortened funding scheme name, in this case |
|
|
The service price. This should include any overheads and loading. Required. |
|
|
The minimum price that can be set for this rate. Not required. |
|
|
The maximum price that can be set for this rate. Not required. |
|
|
Rates can be set up to only apply between visit duration times. Set the duration in the format HH:mm. For example, you may wish to only apply this rate for a visit duration between 2 hours and 4.5 hours. The |
|
|
As above, rates can be set up to only apply between visit duration times. Set the duration in the format HH:mm. Not required. |
|
|
Set this column to |
|
|
Set this column to |
|
|
This rate is applicable on Mondays. Use |
|
|
This rate is applicable on Tuesdays. Use |
|
|
This rate is applicable on Wednesdays. Use |
|
|
This rate is applicable on Thursdays. Use |
|
(required) |
This rate is applicable on Fridays. Use |
|
(required) |
This rate is applicable on Saturdays. Use |
|
|
This rate is applicable on Sundays. Use |
|
|
The minimum start time of a visit, which this rate covers using 24-hour time. For example, setting this column to |
|
|
The maximum end time of a visit, which this rate covers using 24-hour time. Details as above. Not required. |
|
|
For Helpers unregistered for tax, what is the applicable tax name? The defaults are |
|
|
For Helpers unregistered for tax, what is the applicable tax code? The defaults are |
|
|
For Helpers registered for tax, what is the applicable tax name? The defaults are |
|
|
For Helpers registered for tax, what is the applicable tax code? The defaults are |
|
|
This is any code your organisation uses outside of Lookout. Not required. |
|
|
This is any code your organisation uses outside of Lookout. Not required. |
|
|
Is this rate for use on a public holiday? Use |
|
|
The parent rate name. This is used to identify which variant belongs to which parent. It's recommended that the automatically generated parent names in the CSV remain in place as they classify which variants belong to which parent. |
|
(either |
The Lookout service ID to link to this rate. This is for Membership plan-building purposes, and only one service can be used. Either the
NOTE: Lookout services are the services you already have set up in your Lookout instance, they are not the Support at Home services. |
|
|
A Lookout service name to link to this rate. This is for Membership plan-building purposes, and only one service can be used. Either the |
|
|
Determines if, when the rates is used, transport is collected on checkout for payroll purposes. Does not charge the Member. Options are either Required. |
Note: The rate template requires Lookout services – what are they?
Lookout services are the services set up already in Lookout. They can be located at Settings > Care > Services.
You need to use either the service name (1) or the service ID (2). Note that service names are case-sensitive!

Collecting client transport for Support at Home
Under Support at Home, travel within a visit cannot be charged separately for services that may include transport by the Helper. For example, the Shopping assistance service may involve the Helper driving with the Member, but transport cannot be billed as an additional line item.
Organisations may still want to record the Helpers’ kilometres travelled during the visit to reimburse the Helper.
How to enable client transport recording
To allow Helpers to record transport during eligible visits:
- Edit the relevant rate with the Support at Home funding scheme selected
- Enable the option: “Allow Helpers to record transport during visits using this rate.”
Once enabled:
- Helpers will see a client transport entry field at checkout when using this rate
- Admin users can review and edit transport information in punchcards after the visit is complete
This is a new feature: If you’ve already set up Support at Home rates, you’ll need to edit and reconfigure any rates where you want to allow transport recording.
Support at Home Membership plans
Under Support at Home, a Lookout service must be linked to a rate before being added to a Membership plan.
For detailed guidance on setting up Membership plans, take a look at the following article: Support at Home Memberships